Set Up Single Cluster Deployment
This guide provides step-by-step instructions for setting up a single-cluster deployment of EGS. In a single-cluster deployment, both the controller and worker components of EGS are installed in the same Kubernetes cluster. This setup is ideal for users who want to quickly get started with EGS without the need for multiple clusters.
Overview
The installation process involves the following key steps:
- Cloning the EGS installation repository
- (Optional) Creating namespaces if your cluster enforces namespace creation policies
- Running the EGS preflight check script to verify prerequisites
- Running the EGS prerequisites installer script to set up additional applications
- Running the EGS installation script to deploy EGS components in the single cluster
Step 1: Clone the Repository
Clone the EGS installation repository using the following command:
git clone https://github.com/kubeslice-ent/egs-installation.git
- Ensure the YAML configuration file is properly formatted and includes all required fields.
- The installation script terminates with an error if any critical step fails, unless explicitly configured to skip on failure.
- All file paths specified in the YAML must be relative to the
base_path, unless absolute paths are provided.
Step 2: Create Namespaces
If your cluster enforces namespace creation policies, pre-create the namespaces required for installation before running the script. This step is an Optional step and only necessary if your cluster has such policies in place.
Navigate to the cloned egs-installation repository and locate the create-namespaces.sh script and the namespace-input.yaml file.
Use the namespace-input.yaml file to specify the namespaces to be created. You must ensure that all required annotations
and labels for policy enforcement are correctly configured in the namespace-input.yaml file.
Use the following command to create namespaces:
create-namespaces.sh --input-yaml <NAMESPACE_INPUT_YAML> --kubeconfig <ADMIN KUBECONFIG> --kubecontext-list <KUBECTX>
Example Command:
./create-namespaces.sh --input-yaml namespace-input.yaml --kubeconfig ~/.kube/config --kubecontext-list context1,context2
For more information, see the Namespace Creation
readme file in the egs-installation repository.
Step 3: Run the EGS Preflight Check Script
Use the egs-preflight-check.sh script to verify the prerequisites for installing EGS.
To run the preflight check script, use the following command:
./egs-preflight-check.sh --kubeconfig <ADMIN KUBECONFIG> --kubecontext-list <KUBECTX>
Example command:
./egs-preflight-check.sh --kubeconfig ~/.kube/config --kubecontext-list context1,context2
The script performs the following checks:
- Validates the presence of required binaries (for example,
kubectl,helm,jq,yq,curl) - Verifies access to the Kubernetes clusters specified in the
kubecontext-list - Validates namespaces, permissions, PVCs, and services, helping to identify and resolve potential issues before installation
Step 4: Run the EGS Prerequisites Installer Script
Use the egs-install-prerequisites.sh script to configure additional applications required for EGS, such as GPU Operator,
Prometheus, and PostgreSQL.
To run the prerequisites installer script:
-
Navigate to the cloned
egs-installationrepository and locate the input configuration file namedegs-installer-config.yaml. -
Edit the
egs-installer-config.yamlfile with the globalkubeconfigandkubecontextparameters:global_kubeconfig: "" # Relative path to global kubeconfig file from base_path default is script directory (MANDATORY)
global_kubecontext: "" # Global kubecontext (MANDATORY)
use_global_context: true # If true, use the global kubecontext for all operations by default -
Enable additional applications installation by setting the following parameters in the
egs-installer-config.yamlfile:# Enable or disable specific stages of the installation
enable_install_controller: true # Enable the installation of the Kubeslice controller
enable_install_ui: true # Enable the installation of the Kubeslice UI
enable_install_worker: true # Enable the installation of Kubeslice workers
# Enable or disable the installation of additional applications (prometheus, gpu-operator, postgresql)
enable_install_additional_apps: true # Set to true to enable additional apps installation
# Enable custom applications
# Set this to true if you want to allow custom applications to be deployed.
# This is specifically useful for enabling NVIDIA driver installation on your nodes.
enable_custom_apps: false
# Command execution settings
# Set this to true to allow the execution of commands for configuring NVIDIA MIG.
# This includes modifications to the NVIDIA ClusterPolicy and applying node labels
# based on the MIG strategy defined in the YAML (e.g., single or mixed strategy).
run_commands: false
# Node labeling automation for KubeSlice networking
# Set this to true to automatically label nodes with 'kubeslice.io/node-type=gateway'
# Priority: 1) Nodes with external IPs, 2) Any available nodes (up to 2 nodes)
# This is required when kubesliceNetworking is enabled in worker clusters
add_node_label: truenoteYou must set the following important configuration in the
egs-installer-config.yamlfile:- Set
enable_custom_appstotrueif you need NVIDIA driver installation on your nodes. - Set
run_commandstotrueif you need NVIDIA MIG configuration and node labeling. - Set
add_node_labeltotrueto enable automatic node labeling for KubeSlice networking.
- Set
-
After configuring the YAML file, run the
egs-install-prerequisites.shscript to set up GPU Operator, Prometheus, and PostgreSQL:./egs-install-prerequisites.sh --input-yaml egs-installer-config.yamlThis step installs the required infrastructure components before the main EGS installation.
Step 5: Single Cluster Installation
For single-cluster deployments, you can skip the worker cluster registration step. The controller and worker components are installed in the same cluster.
To install EGS in a single-cluster setup, follow these steps:
-
Navigate to the cloned
egs-installationrepository and locate the input configuration file namedegs-installer-config.yaml. -
Edit the
egs-installer-config.yamlwith basic configuration parameters:# Kubernetes Configuration (Mandatory)
global_kubeconfig: ""  # Relative path to global kubeconfig file from base_path default is script directory (MANDATORY)
global_kubecontext: ""  # Global kubecontext (MANDATORY)
use_global_context: true  # If true, use the global kubecontext for all operations by default
# Installation Flags (Mandatory)
enable_install_controller: true # Enable the installation of the Kubeslice controller
enable_install_ui: true # Enable the installation of the Kubeslice UI
enable_install_worker: true # Enable the installation of Kubeslice workers
enable_install_additional_apps: true # Set to true to enable additional apps installation
enable_custom_apps: true # Set to true if you want to allow custom applications to be deployed
run_commands: false # Set to true to allow the execution of commands for configuring NVIDIA MIG -
Run the EGS installation script to deploy EGS components in the single cluster:
./egs-installer.sh --input-yaml egs-installer-config.yamlThe script installs the Kubeslice Controller, Admin Portal, and worker components in the same cluster, along with any additional applications enabled in the configuration.
Access the Admin Portal
After the successful installation, the script displays the LoadBalancer external IP address and the admin access token to log in to the Admin Portal. You can access the EGS Admin Portal to manage your EGS deployment.
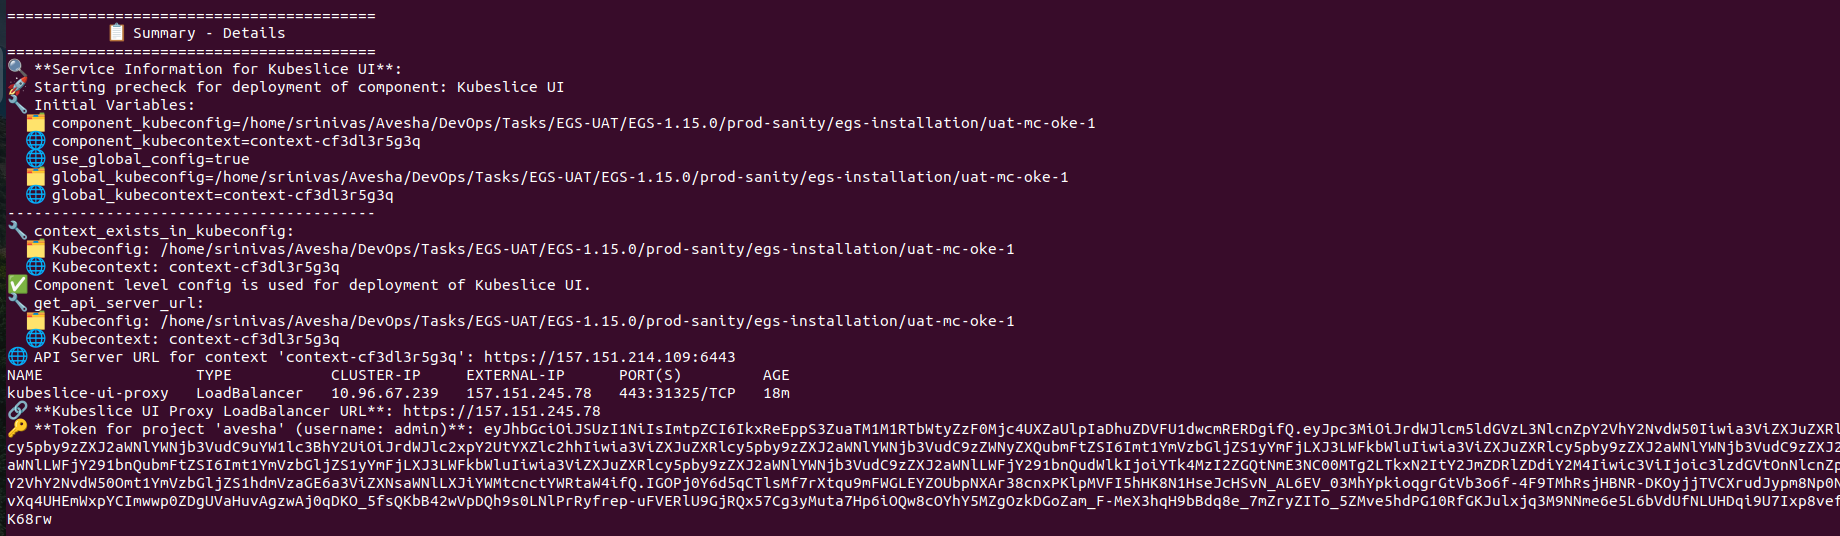
Make a note of the LoadBalancer external IP address and the admin access token required to log in to the Admin Portal. The KubeSlice UI Proxy LoadBalancer URL value is your Admin Portal URL and The token for project avesha (username: admin) is your login token.
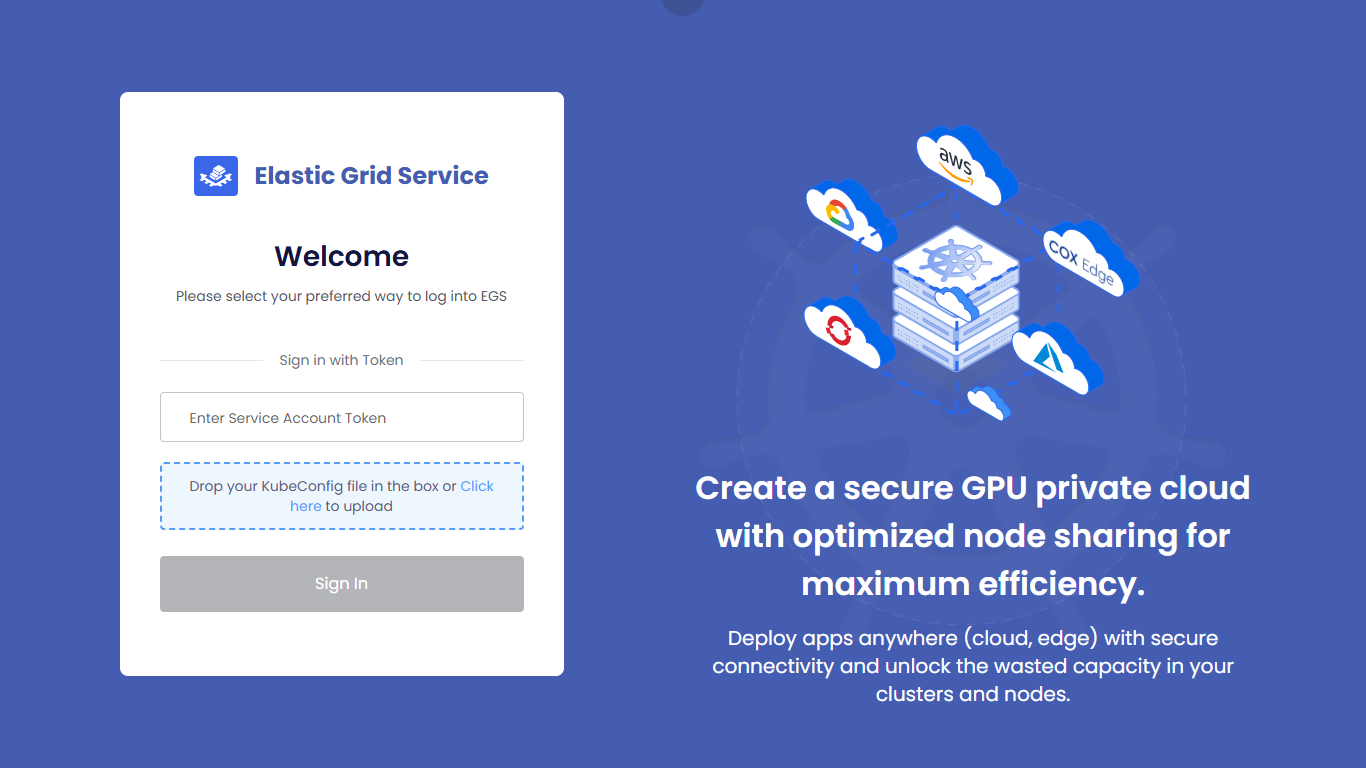
Use the URL and the admin access token, from the previous step to log in to the Admin Portal.
Retrieve Admin Credentials Using kubectl
If you missed the LoadBalancer external IP address or the admin access token displayed after installation, you can retrieve them
using kubectl commands.
Perform the following steps to retrieve the admin access token and the Admin Portal URL:
-
Use the following command to retrieve the admin access token:
kubectl get secret kubeslice-rbac-rw-admin -o jsonpath="{.data.token}" -n kubeslice-avesha | base64 --decodeExample Output:
eyJhbGciOiJSUzI1NiIsImtpZCI6IjE2YjY0YzYxY2E3Y2Y0Y2E4YjY0YzYxY2E3Y2Y0Y2E4YjYiLCJ0eXAiOiJKV1QifQ.eyJpc3MiOiJrdWJlcm5ldGVzL3NlcnZpY2UtYWNjb3VudCIsImt1YmVybmV0ZXM6c2VydmljZS1hY2NvdW50Om5hbWUiOiJrdWJlc2xpY2UtcmJhYy1ydy1hZG1pbiIsImt1YmVybmV0ZXM6c2VydmljZS1hY2NvdW50OnVpZCI6Ijg3ZjhiZjBiLTU3ZTAtMTFlYS1iNmJlLTRmNzlhZTIyMWI4NyIsImt1YmVybmV0ZXM6c2VydmljZS1hY2NvdW50OnNlcnZpY2UtYWNjb3VudC51aWQiOiI4N2Y4YmYwYi01N2UwLTExZWEtYjZiZS00Zjc5YWUyMjFiODciLCJzdWIiOiJzeXN0ZW06c2VydmljZWFjY291bnQ6a3ViZXNsaWNlLXJiYWMtcnctYWRtaW4ifQ.MEYCIQDfXoX8v7b8k7c3
4mJpXHh3Zk5lYzVtY2Z0eXlLQAIhAJi0r5c1v6vUu8mJxYv1j6Kz3p7G9y4nU5r8yX9fX6c -
Use the following command to access the Load Balancer IP:
Example
kubectl get svc -n kubeslice-controller | grep kubeslice-ui-proxyExample Output
NAME                                                      TYPE           CLUSTER-IP    EXTERNAL-IP    PORT(S)         AGE
kubeslice-ui-proxy                                        LoadBalancer   10.96.2.238   172.18.255.201 443:31751/TCP   24h
Note down the LoadBalancer external IP of the kubeslice-ui-proxy pod. In the above example, 172.18.255.201 is
the external IP. The EGS Portal URL will be https://<LB-External-IP>.
Uninstall EGS
You can uninstall EGS using the egs-uninstall.sh script, which removes all EGS components and associated resources from your cluster.
The uninstallation script removes all resources associated with EGS, including:
- Workspaces
- GPU Provision Requests (GPRs)
- All custom resources provisioned by EGS
Before running the uninstallation script, ensure that you have backed up any important data or configurations. The script will remove all EGS-related resources, and this action cannot be undone.
Use the following command to uninstall EGS:
./egs-uninstall.sh --input-yaml egs-installer-config.yaml