Manage Slices
You can create a slice for an individual user or team in your organization based on the requirements. A slice is a logical boundary for a user.
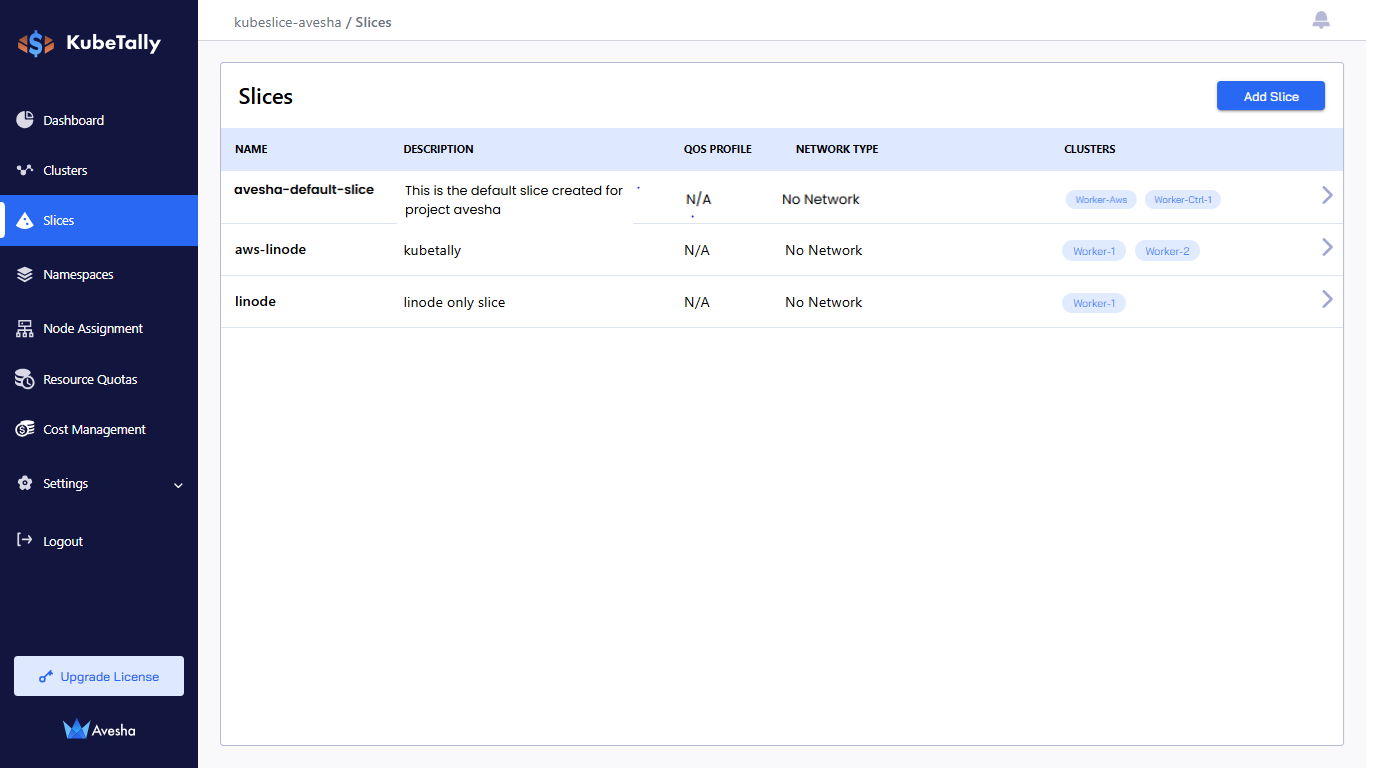
The avesha-default-slice is automatically generated for each project, allowing all namespaces from registered clusters to be
onboarded into a single slice. This default slice eliminates the need to manually create one in order to use the Chargeback feature.
While the behavior of the default slice remains consistent, its lifecycle is managed by Avesha. Users can still create
and add additional slices as needed.
Create a Slice
-
Go to Slices on the left sidebar.
-
Click Add Slice.
-
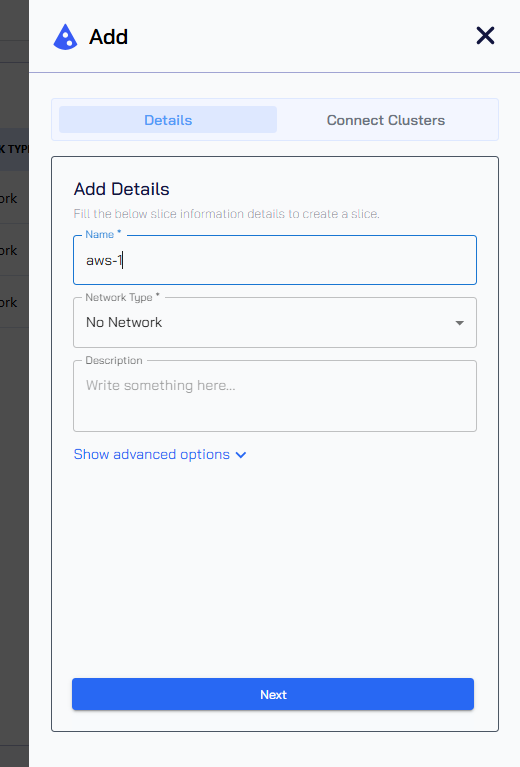
On the Add dialog, under Details, you must:
- Add name for the slice in your network.
- No-Network is the only option set by default for Network Type.
- Click Next.
-
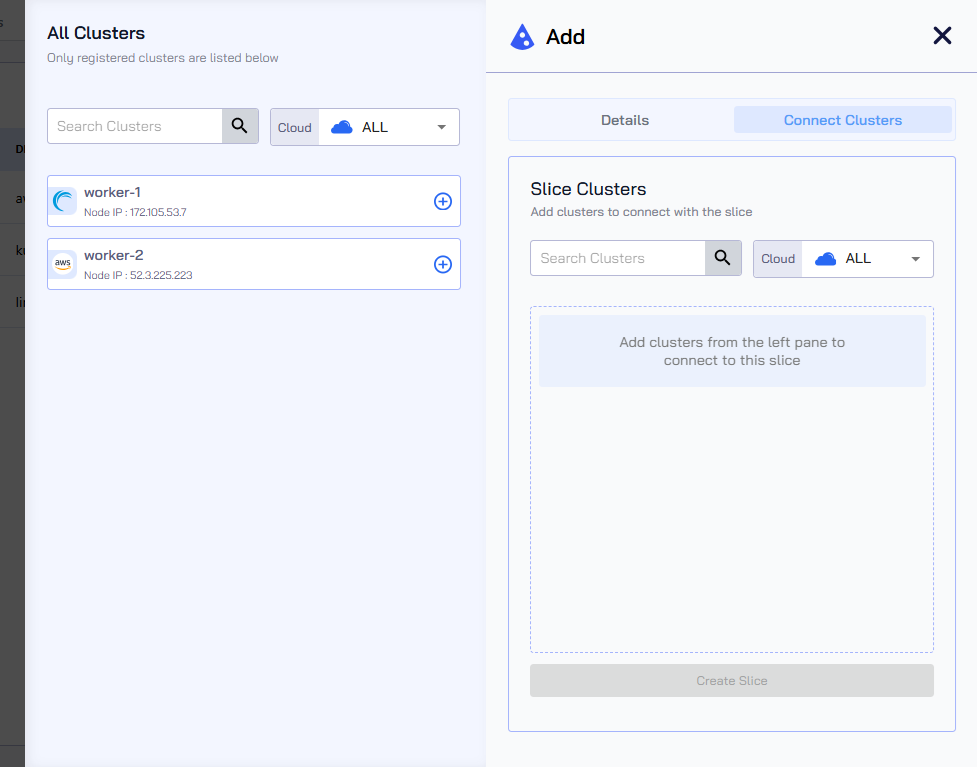
To connect your cluster to your slice that is being created, click the**+** sign against the cluster.
-
Click Create Slice.
Edit a Slice
To edit a slice:
-
On the Slices page, click the arrow icon at the right for the slice to edit.
-
Click the edit icon on the top right.
-
Click the Edit Slice button.
-
In the Connect Clusters tab, you can perform the following:
-
Under All Clusters, to connect more clusters to the slice, click the plus icon next to each worker cluster in the list.
- Under Slice Clusters, unselect the cluster to detach it from the slice. Click the minus icon against a worker cluster to detach it from the slice, enter the text DETACH to confirm, and click the Detach Cluster button.
-
-
Click the Edit Slice button to save the changes.
Delete a Slice
Be sure to detach clusters from a slice before deleting it.
To delete a slice:
-
On the Slices page, click the arrow icon at the right for the slice to delete.
-
Click the delete icon on the top right.
-
Enter DELETE to confirm and click the Delete Slice button.