Manage GPR Templates
This topic describes managing GPU request (GPR) templates. As an admin you can create, update, clone, view, and delete a GPR template in a given workspace.
Create a GPR Template
-
Go to Workspace on the left sidebar.
-
Under All Workspaces, select the workspace you want to manage.
-
In the menu of the selected workspace, click the GPR Templates submenu.
-
On the GPU Request Templates page, click the + Create GPR Template button on the right side of the page.
-
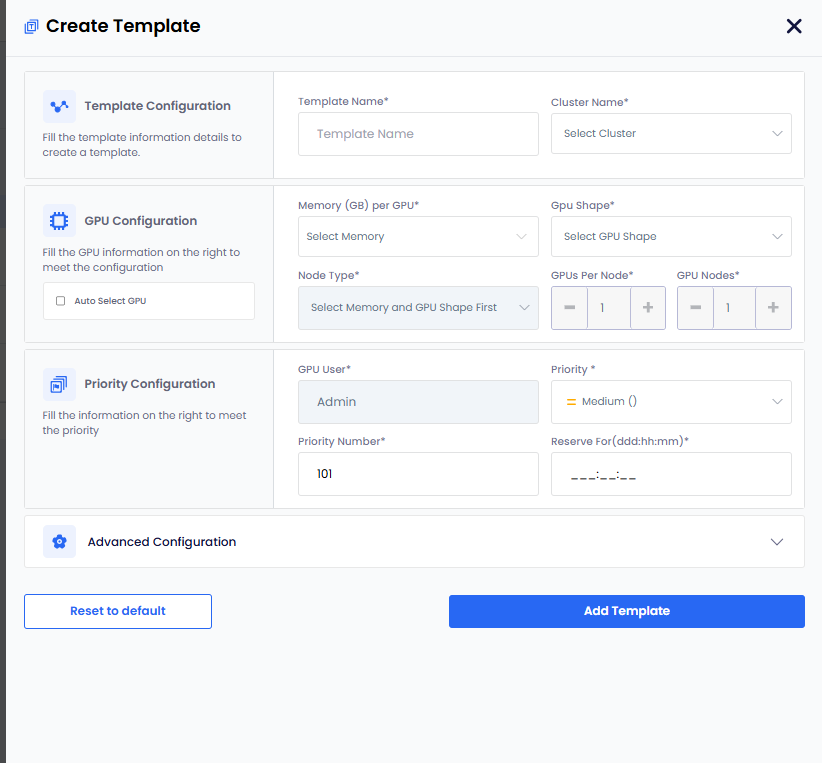
On the Create Template pane, enter the following information to configure a GPR Template:
-
For Template Configuration:
- Enter a name for the template in the Template Name text box
- Select a worker cluster from the Cluster Name drop-down list.
-
For GPU Configuration:
-
Choose how GPU Shape and Node Type are selected:
- Manual Selection:
- Leave the Auto Select GPU checkbox unselected.
- Select a memory value from the Memory (GB) per GPU drop-down list. The list displays the available memory (GB) per cluster.
- Select a GPU shape from the GPU Shape drop-down list.
- Select a node type from the Node Type drop-down list.
- Auto Selection:
- Select the Auto Select GPU checkbox. The GPU shape and node type values are automatically selected based on the memory specified.
- If you manually enter GPU memory in the Memory (GB) per GPU text box, the Auto Select GPU checkbox is selected automatically. The minimum memory value is 1 GB, and the maximum value is the highest allocated memory available for any worker cluster in the workspace.
- Manual Selection:
-
Set the GPUs Per Node if you want to change its default value, 1.
-
Set the GPU Nodes if you want to change its default value, 1.
-
-
For Priority Configuration:
-
GPU User is auto populated.
-
Set Priority. The default value is Medium (1-200).
You can change the priority of a GPR in the queue. You can change the priority number (low: 1-100, medium: 101-200, high: 201-300) to move a GPR in the queue. When a GPR is moved to the top of the queue, it is provisioned when the resources are available to provision the GPR.
-
Set Priority Number. The default value is 101
-
Specify Reserve for(ddd:hh:mm) duration in Days, Hours, and Minutes.
-
-
-
(Optional) Expand Advanced Configuration and:
-
Select Enforce Idle Timeout to allow the GPU nodes to be used after the configured length of the time that it can be idle. This allows other GPRs to use the unused provisioned GPU nodes. By default, this checkbox is unselected.
-
The Requeue on Failure check box is selected by default to queue the GPR in case it fails. When a GPR fails, EGS re-queues that GPR to attempt provisioning it again.
-
The Evict low priority GPRs checkbox is selected by default that configures auto eviction of a low-priority GPR. When there is a high-priority GPR in the queue and insufficient resources to provision it, EGS evicts the low-priority GPR to free up resources for the high-priority GPR. You can unselect Evict low priority GPRs if you do not want auto-eviction.
-
Select Enable Time Slicing to allow multiple GPRs to share the same GPU resources at different times of the day. By default, this checkbox is unselected. Time slicing is useful when different users need GPU resources at different times.
-
-
Click Add Template. The newly added templates gets added to the list under Manage Templates on the GPU Request Templates page.
View a GPR Templates
-
Go to Workspace on the left sidebar.
-
Under All Workspaces, select the workspace you want to manage.
-
In the menu of the selected workspace, click the GPR Templates submenu.
-
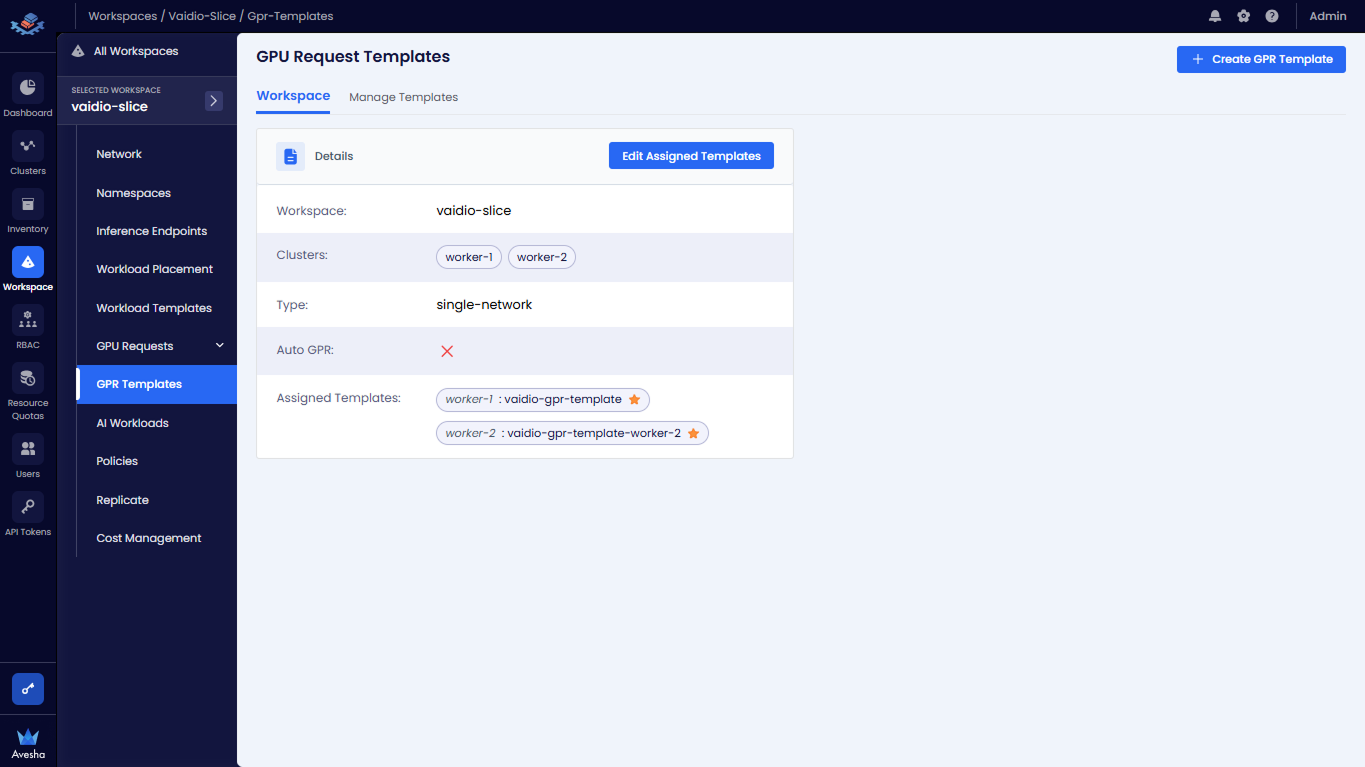
On the GPU Requests Templates page, Under Workspace, you see the workspace details.
- The Assigned Templates parameter lists the GPR templates assigned to the workspace. It display No Templates Assigned* if none are configured.
- The Auto GPR parameter shows whether automatic GPU provisioning is enabled for this workspace.
-
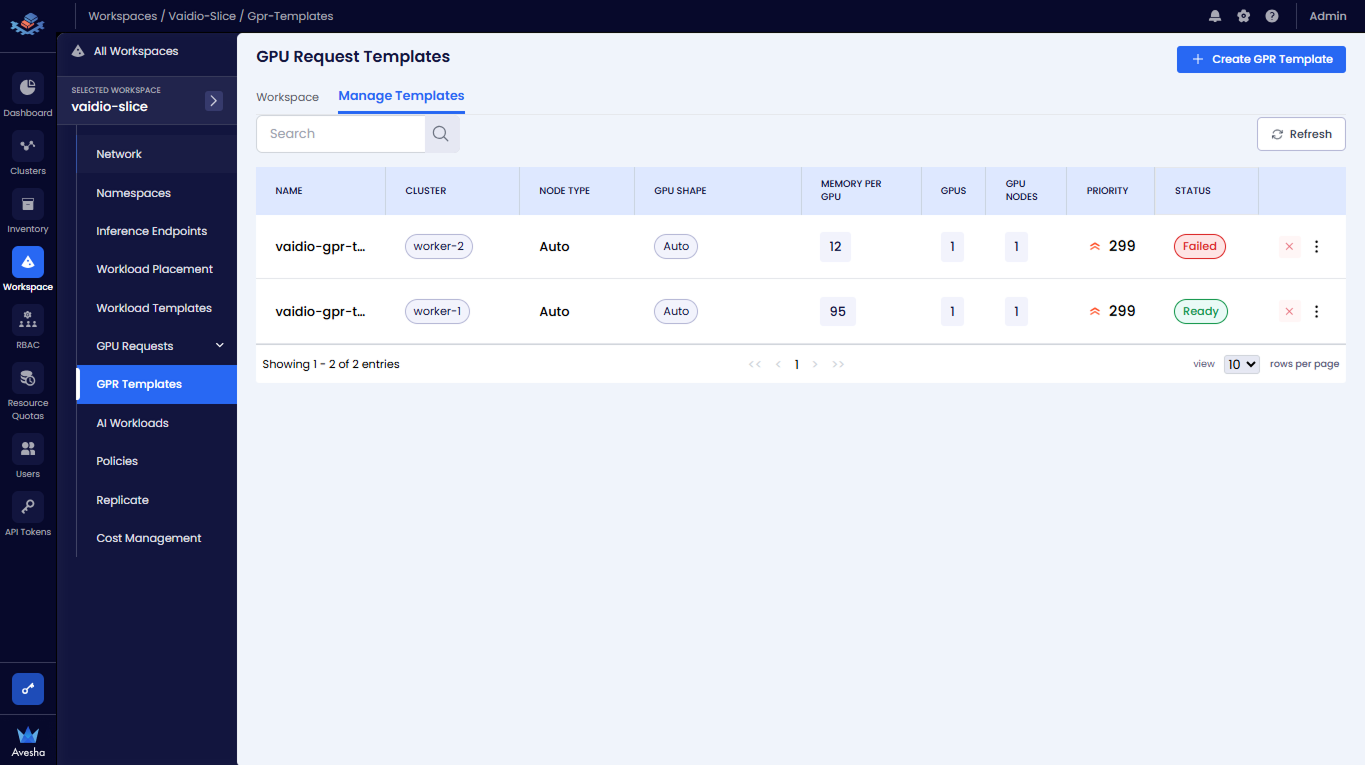
Under Manage Templates, you see the list of managed templates
-
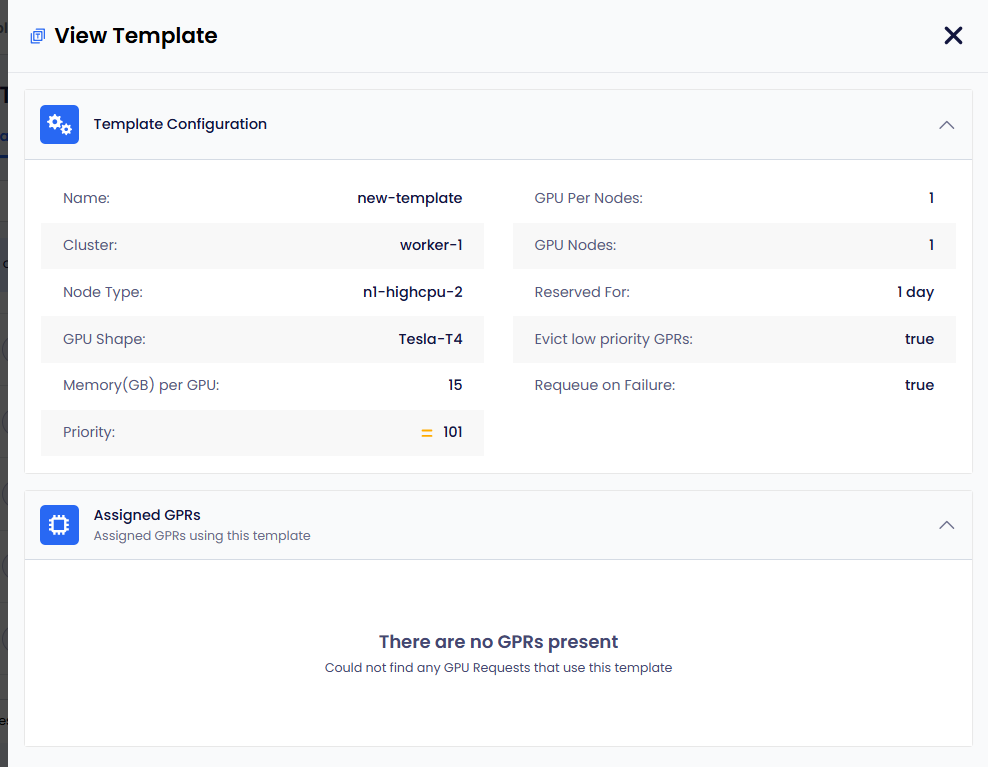
You can select the template to view its details.
Edit a GPR Template
-
Go to Workspace on the left sidebar.
-
Under All Workspaces, select the workspace you want to manage.
-
In the menu of the selected workspace, click the GPR Templates submenu.
-
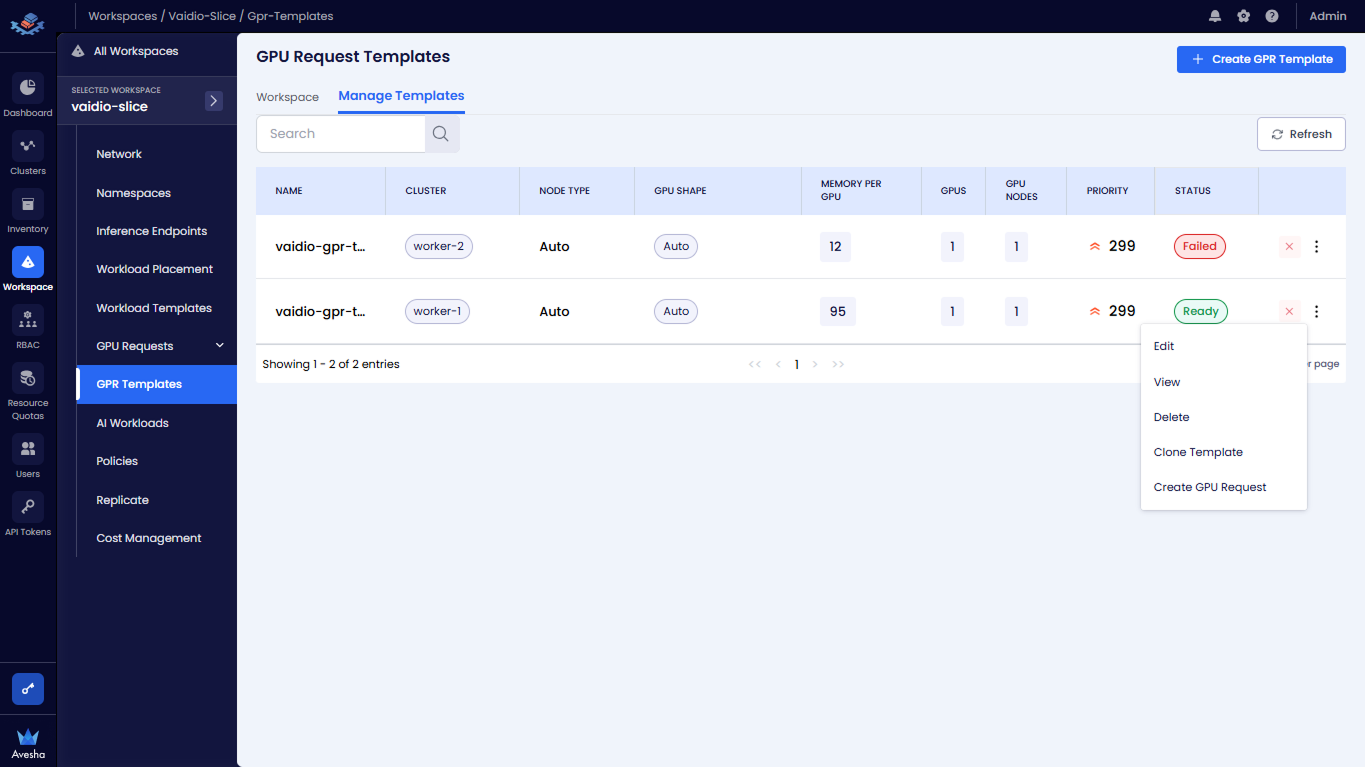
On the GPU Request Templates page, go to Manage Templates.
-
Under Manage Templates, click the vertical ellipsis for the template that you want to edit. and click Edit from the menu.
-
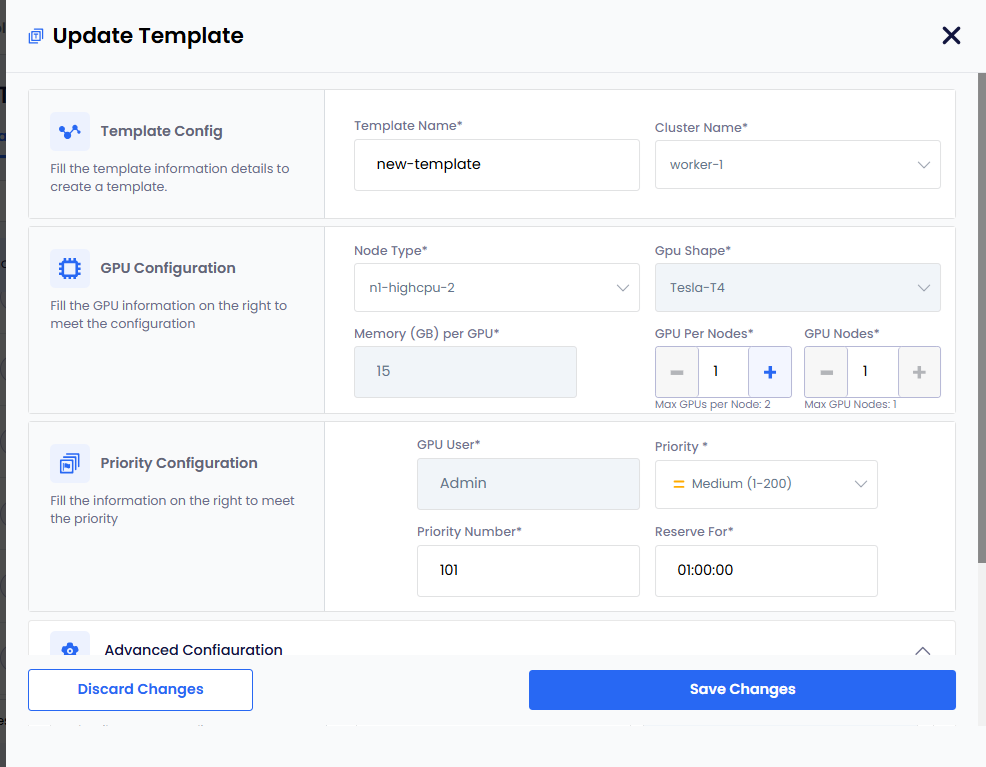
On the Update Template pane, except template name, you can change the configuration of other fields.
infoThe updated configuration is effective to the new GPRs that are created from this updated template.
-
After updating the template, click Save Changes for the latest configuration to be effective.
Clone a GPR Template
-
Go to Workspace on the left sidebar.
-
Under All Workspaces, select the workspace you want to manage.
-
In the menu of the selected workspace, click the GPR Templates submenu.
-
On the GPU Request Templates page, go to Manage Templates.
-
Under Manage Templates, click the vertical ellipsis for the template that you want to clone. and click Clone Template from the menu.
-
On the Clone Template page, the name of the template contains a suffix
-cloneadded to the cloned parent template's name. You can change the following configuration:- Name of the template
- Priority Number
- Reserve for duration
- Enforce Idle Timeout
- Requeuing GPRs on Failure
- Eviction low priority GPRs
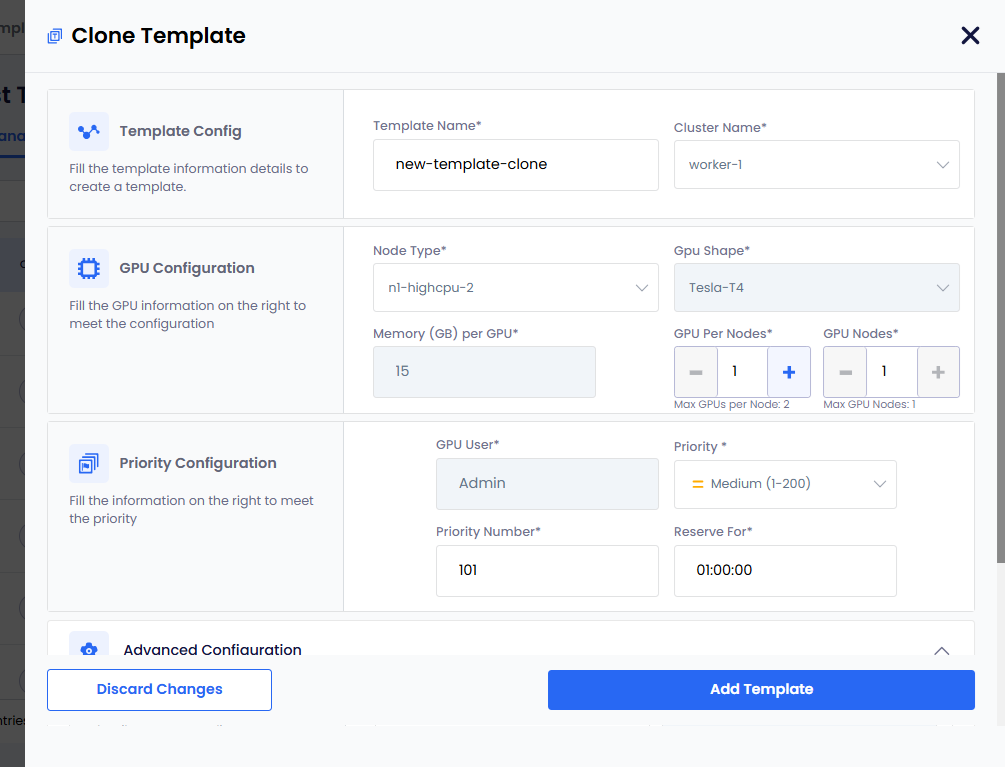
- Click Add Template to complete cloning the template.
Enable Auto GPR on a Template
Auto GPR feature allows you to create the GPR without any human intervention. After auto GPR is enabled, you can deploy AI workloads in the application namespace. The GPR is created based on the workload's GPU requirement. You can bind a GPR template to the workspace. After a template is attached to the workspace, an admin or users can create AI workloads. Based on those AI workloads, the GPR is created automatically.
An auto GPR requires a default template to automatically create a GPR. So, ensure that you set a default template for auto GPR to work.
To enable auto GPR on the default template ( template assigned to a workspace ):
-
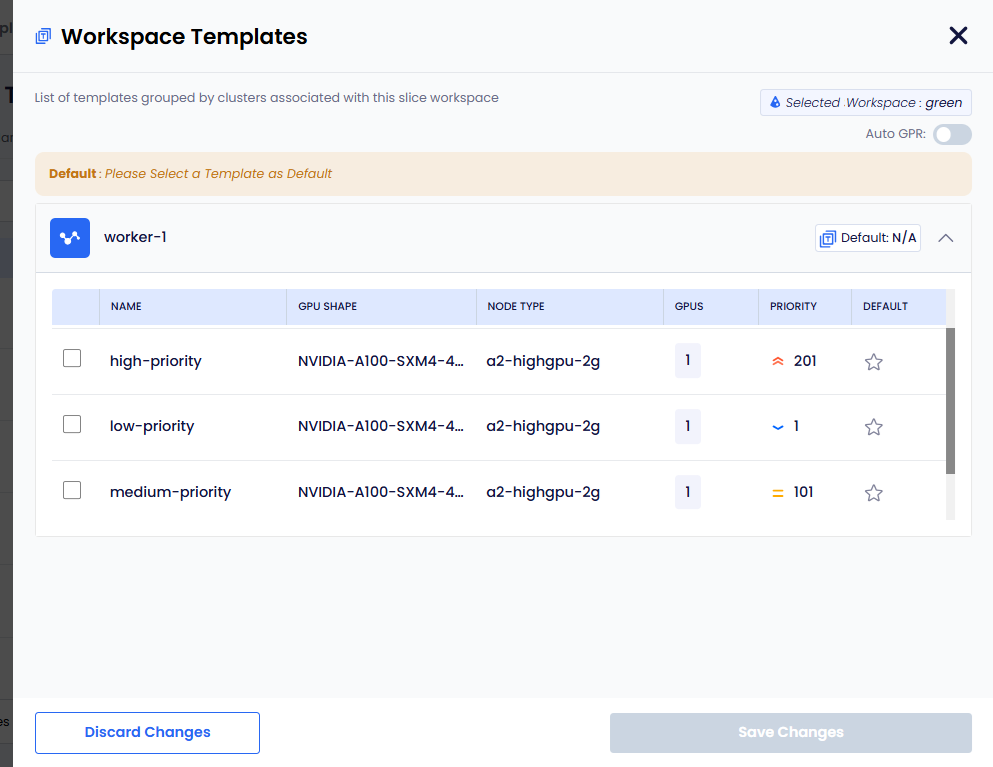
On the GPU Request Templates page, Under Workspace, click the Edit Assigned Templates button.
-
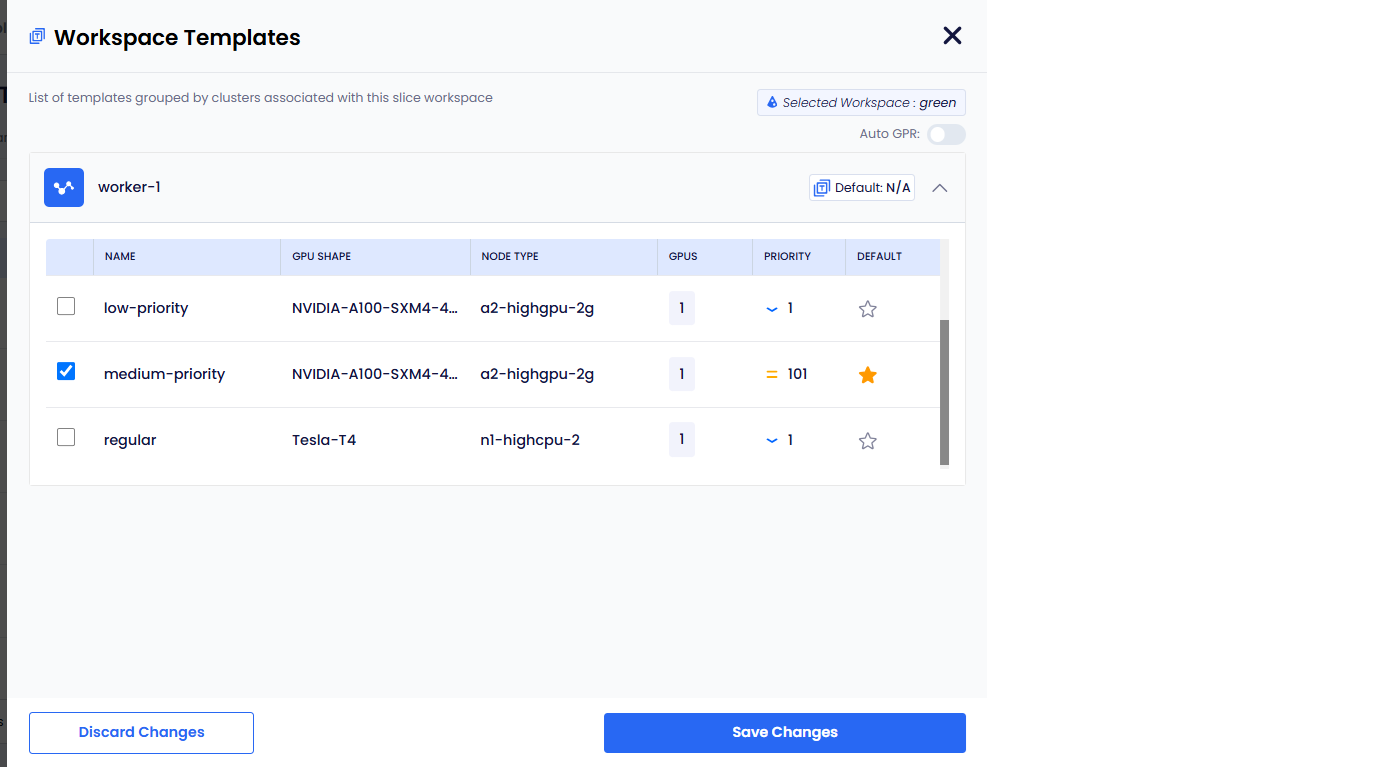
On the Workspace Templates pane, select the template to turn on the Auto GPR toggle button.
-
Click the Save Changes button.
Set a Default Template
An auto GPR uses a default template to create a GPR. So, it's required to set a default template when you enable auto GPR on a workspace.
To set a default template:
-
On the GPU Request Templates page, under Workspace, click the Edit Assigned Template button.
-
On the Workspace Templates pane, you can see the message to select a default template.
-
Select a template that you want to set as default for that workspace, and also click the Star symbol under Default.
-
Click Save Changes to set the default template.
-
On the GPU Request Templates page, under Workspace, the newly set default is visible in the Assigned Templates field.
Change the Default Template
- On the GPU Request Templates page, under Workspace, click the Edit Assigned Template button.
- On the Workspace Templates pane, unselect the default template.
- Select a new template and click the Star symbol under Default.
- Click Save Changes to set the new default template.
Unset a Default Template
- On the GPU Request Templates page, under Workspace, click the Edit Assigned Template button.
- On the Workspace Templates pane, unselect the default template.
- Click Save Changes to unset the default template.
Disable Auto GPR on a Template
- On the GPU Request Templates page, under Workspace, click the Edit Assigned Template button.
- On the Workspace Templates pane, turn off the Auto GPR toggle button.
- Click Save Changes to disable Auto GPR on that workspace.
Delete a GPR Template
-
On the GPU Request Templates page, under Manage Templates, click the vertical ellipsis for the template that you want to edit, and click Delete from the menu.
-
On the delete confirmation dialog, type the name of the template and click Delete.
