Onboard Applications
In Kubernetes, a namespace is a way to logically separate resources within a cluster. Resources like pods and services are associated with a namespace and are uniquely identifiable within it. This topic explains how to onboard namespaces to an application slice and manage them using the KubeSlice Manager.
Onboard Application Namespaces
To exclude pods from a deployment, add the kubeslice.io/exclude label to
the template section of your deployment.
To onboard application namespaces using the KubeSlice Manager:
-
Go to Namespaces on the left sidebar.
-
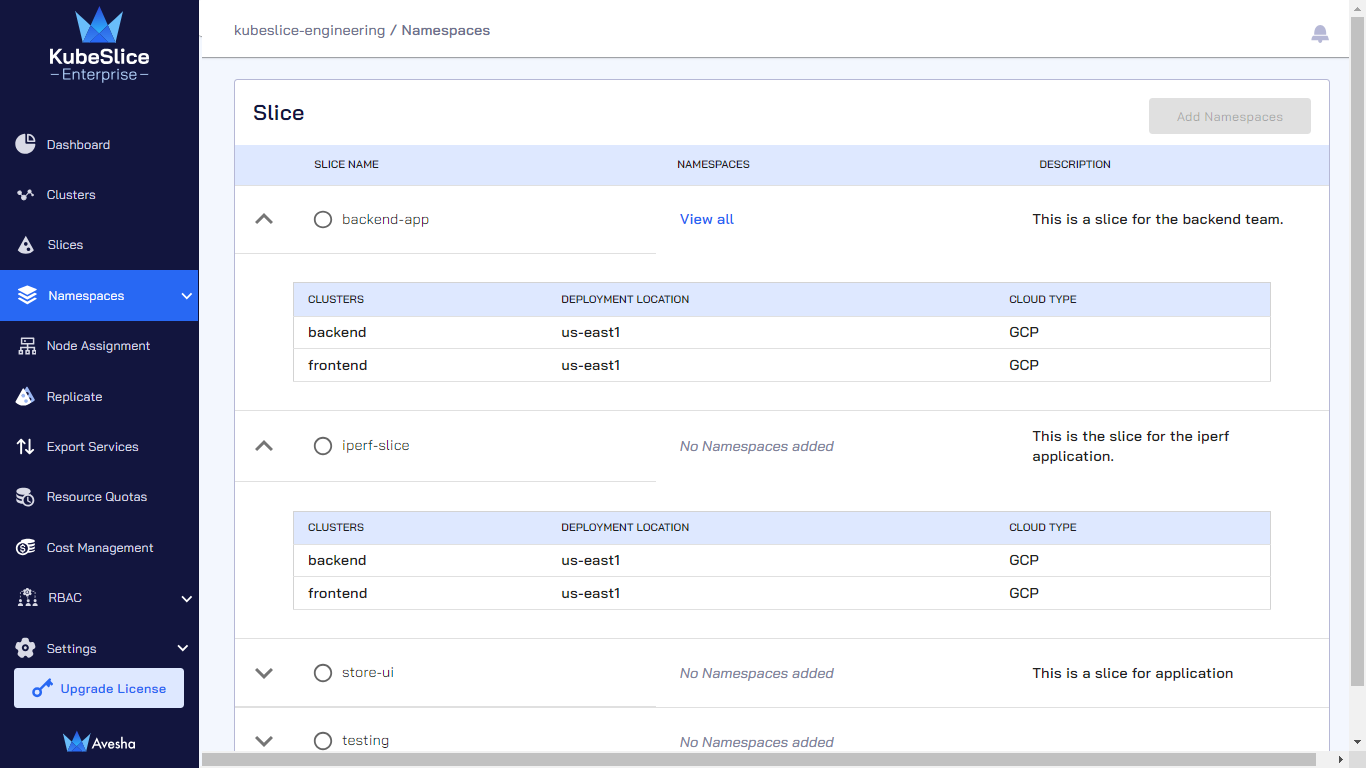
(Optional) Expand the dropdown menu of each slice to see the clusters, deployment location, and cloud type.
-
On the Manage Namespaces page, select the slice that you want to add namespaces to.
-
Click Add Namespaces.

-
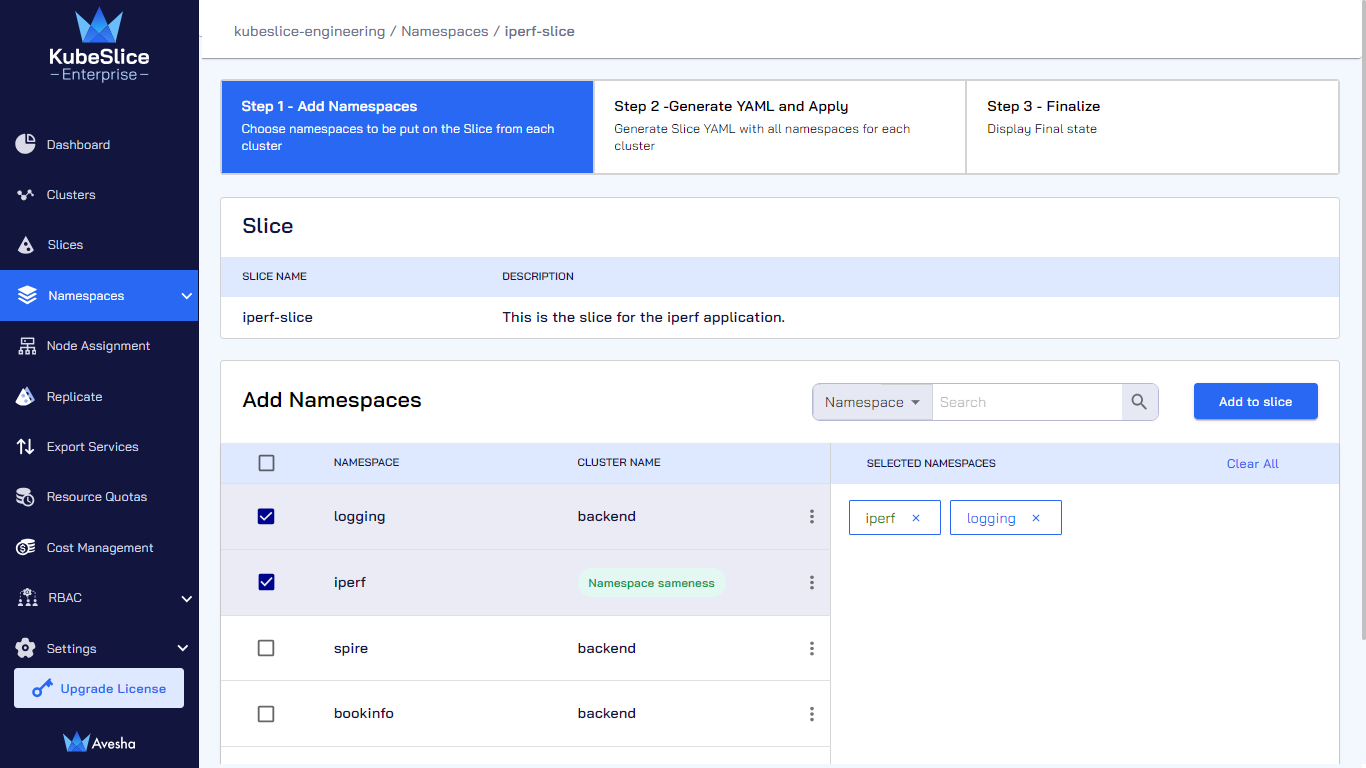
On the Step 1 - Add Namespaces tab, select namespace(s) that you want to add, which appear under Selected Namespaces. You can also search by namespace or cluster in the search bar. On the search bar, click the search by namespace to see the search by cluster option.

-
Click Add to slice.
-
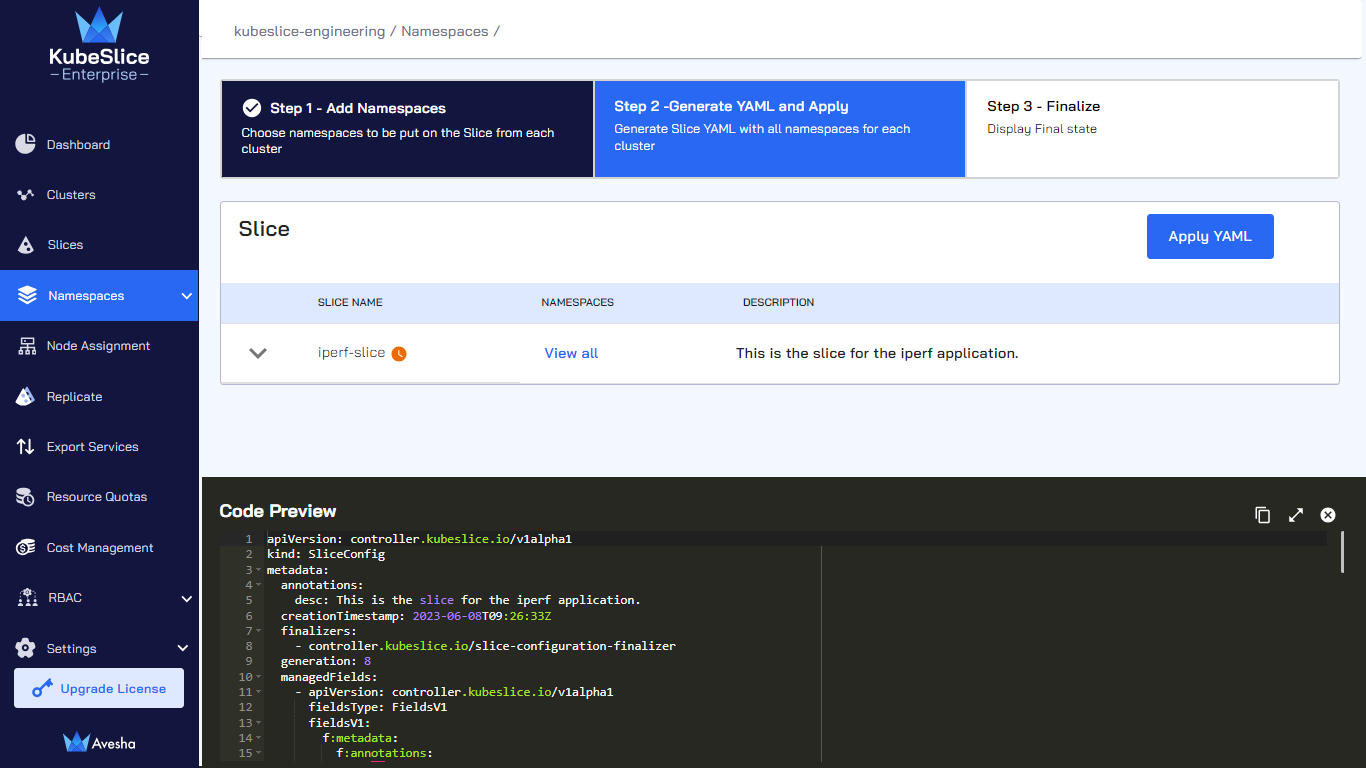
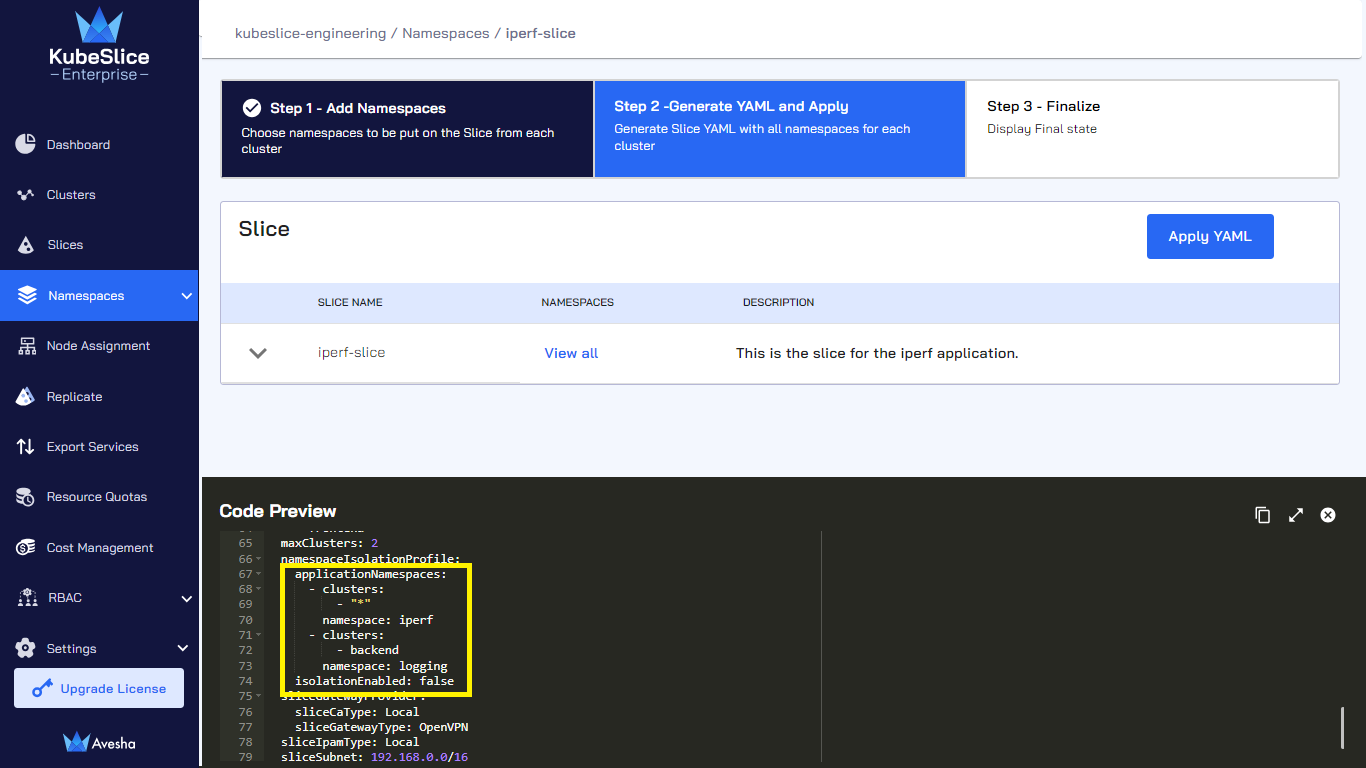
On the Step 2- Generate YAML and Apply tab, towards the bottom of the page, under Code Preview, review the slice YAML file that contains the namespaces that you have just added under
namespaceIsolationProfile.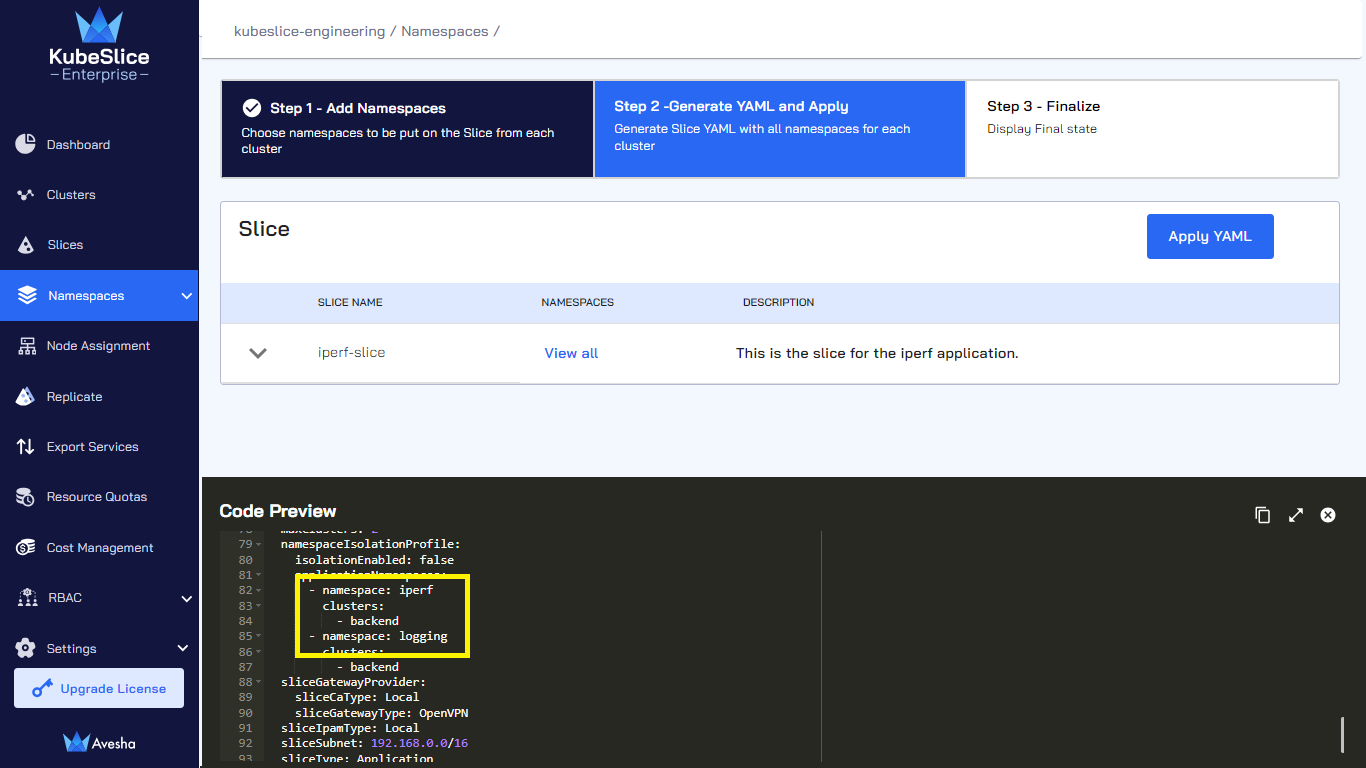
-
Click Apply YAML.
-
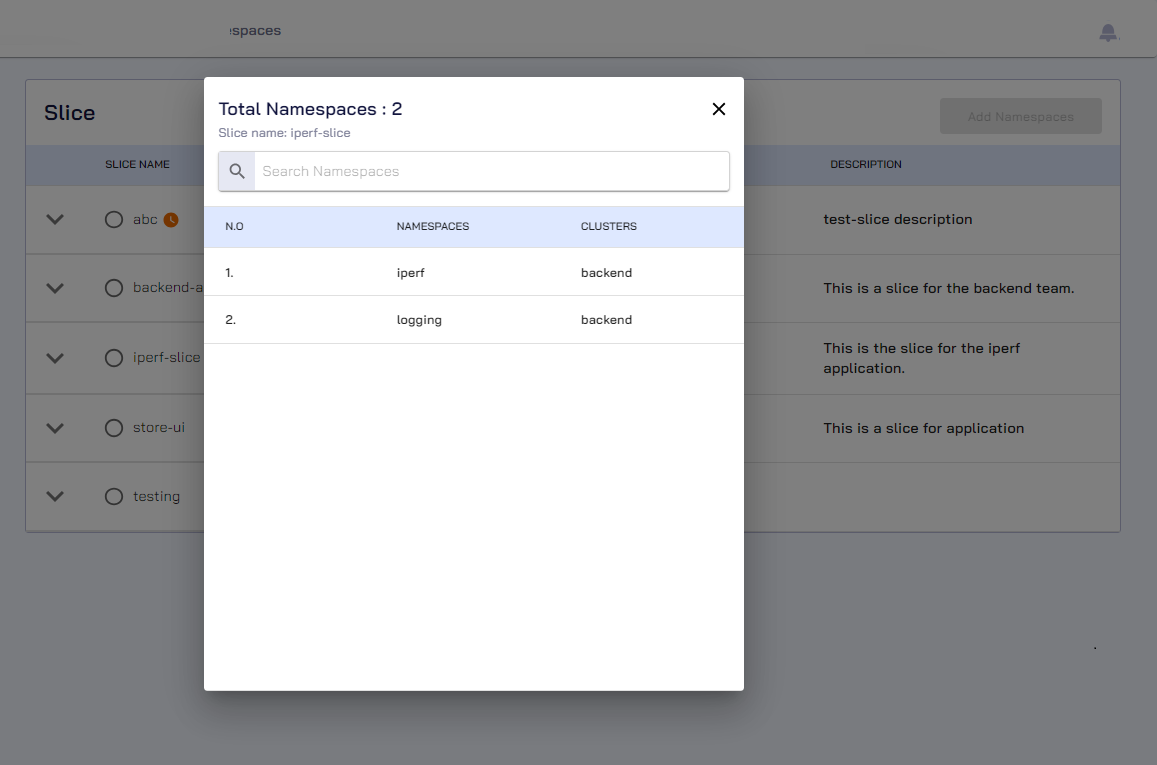
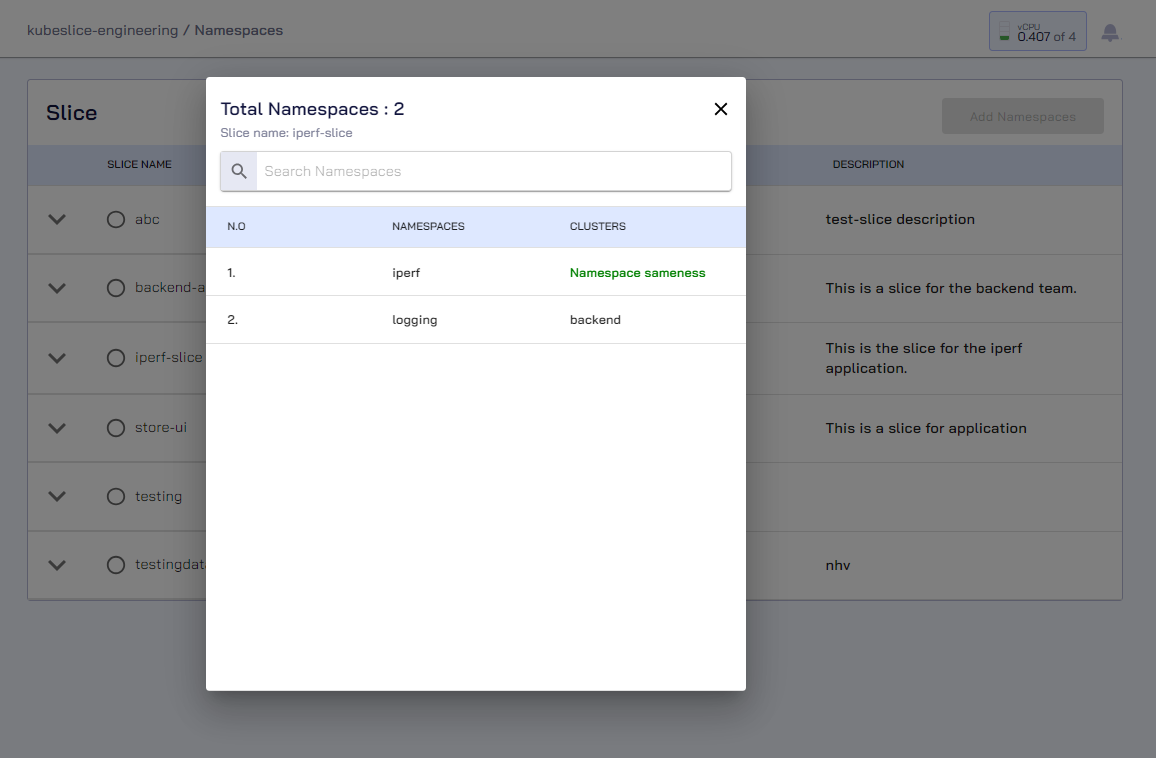
On the Step 3 - Finalize tab, in case if you want to see the namespaces, click View all for the slice.
-
Click Done.
-
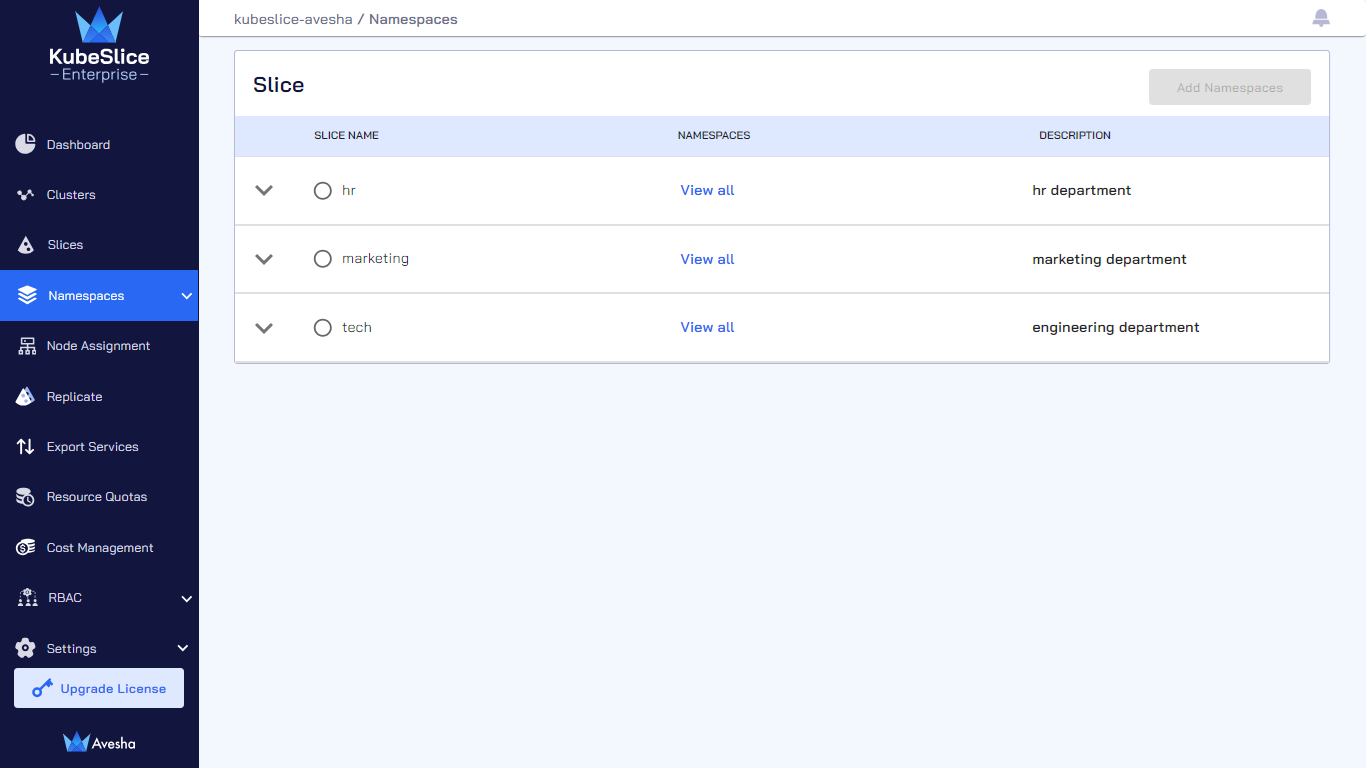
On the Namespaces, click View all for the slice to verify the namespaces that you have added.
After adding namespaces to the slice, you must create a service export for the application to be discoverable by other worker clusters of the same slice.
Namespace Sameness
Namespace sameness allows the freedom to deploy applications across clusters, which is coupled with the ability to have automatic privileges. For example, if a namespace called green exists in all worker clusters on a slice, then the namespace sameness perceives that the green namespace is same on all worker clusters. This implies that the user privileges to resources are same in the green namespace in every worker cluster.
If a new cluster gets added to the slice in the future, that namespace will be onboarded to the future cluster as well without any user intervention.
Enabling namespace sameness implies that the namespace in question is onboarded from all the worker clusters of that slice. Enabling namespace sameness creates that namespace on a worker cluster that does not contain it. Thus, all the worker clusters part of that slice contains that namespace.
Enable namespace sameness
To enable namespace sameness:
-
On the Namespaces page, select the slice that you want namespaces added to.
-
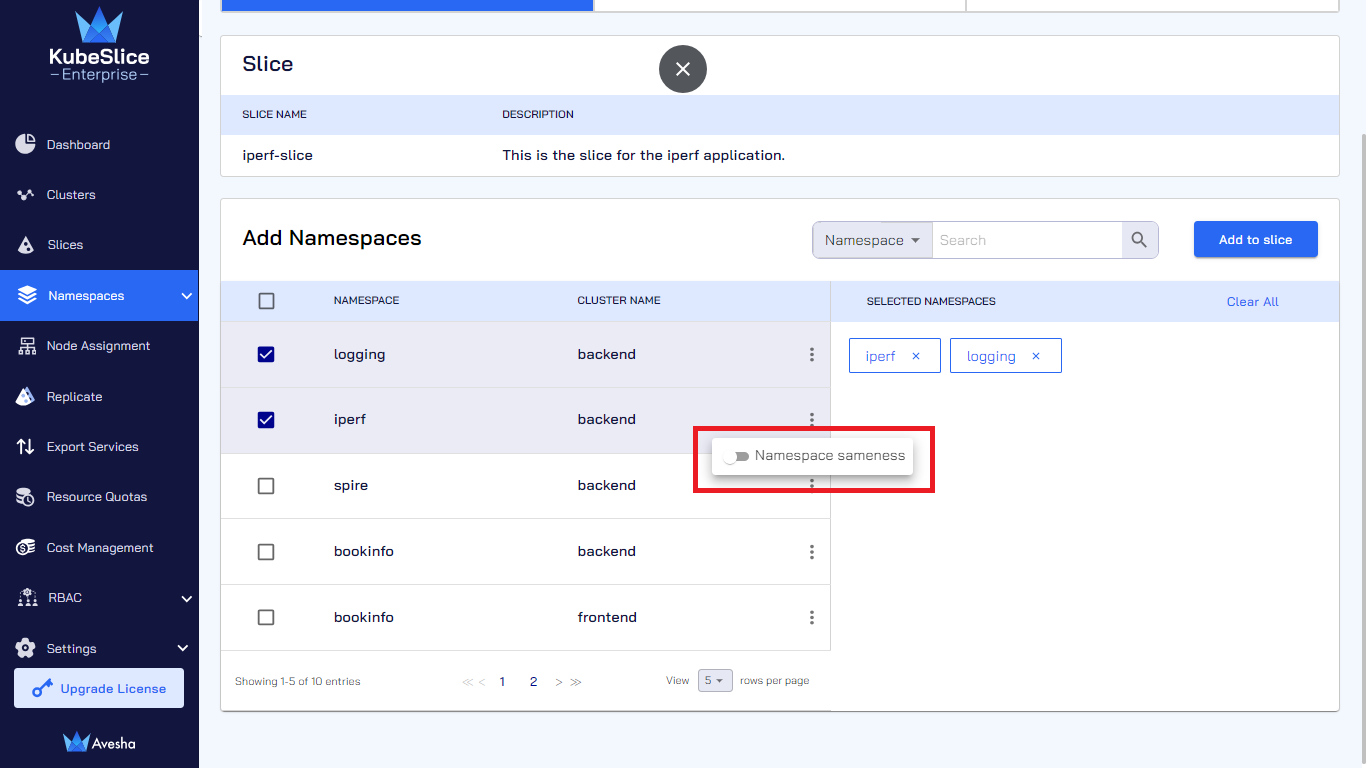
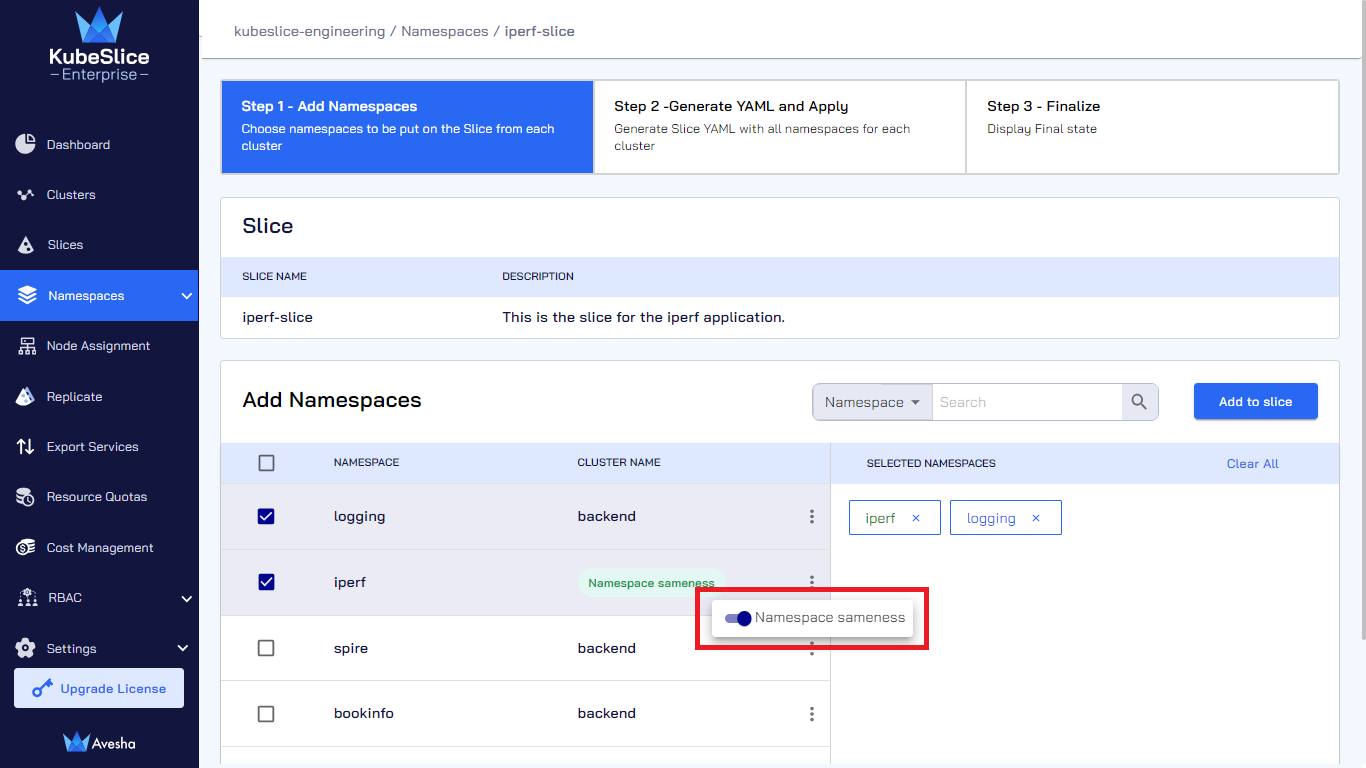
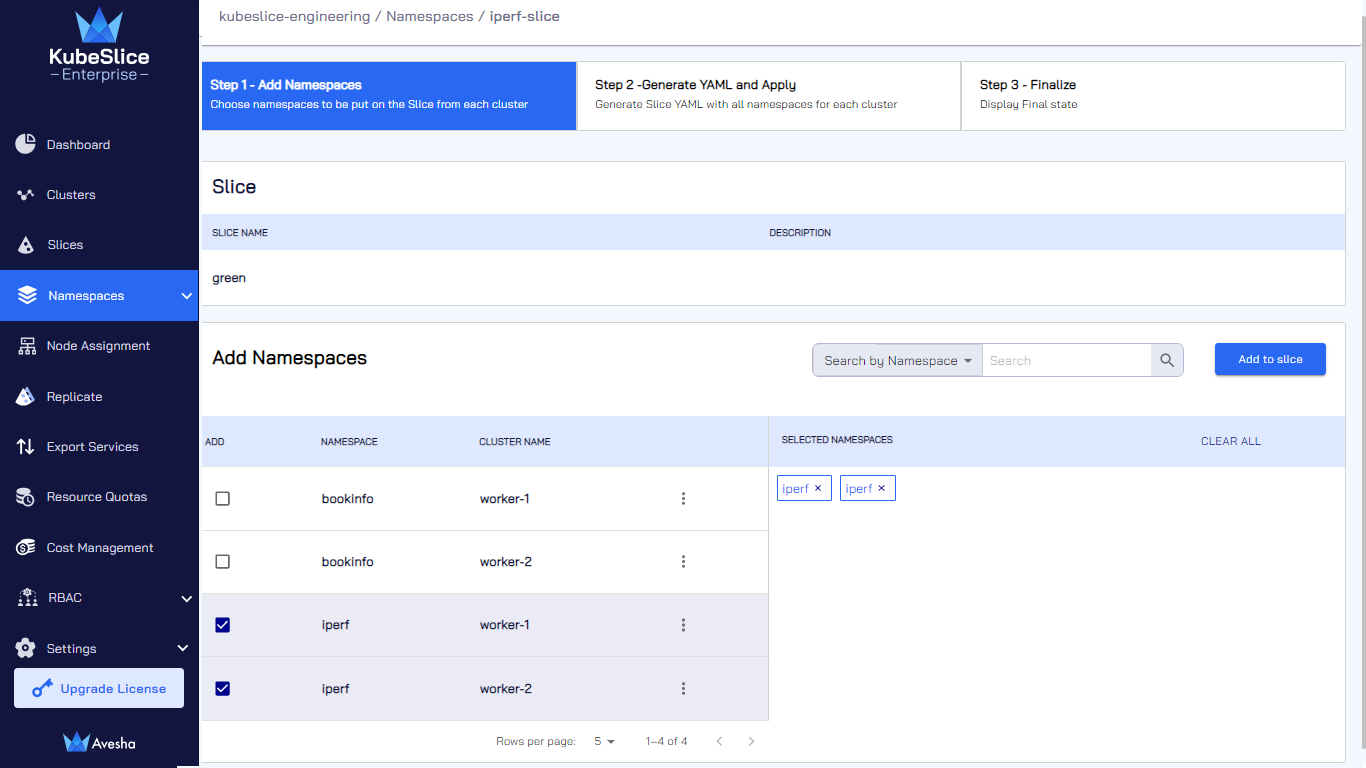
On the Step 1 - Add Namespaces tab, under Add Namespaces, select a namespace. If that namespace is in other worker clusters, all the namespaces will also get added to the slice.
-
Click the vertical ellipsis against the namespace and enable the Namespace sameness button.
-
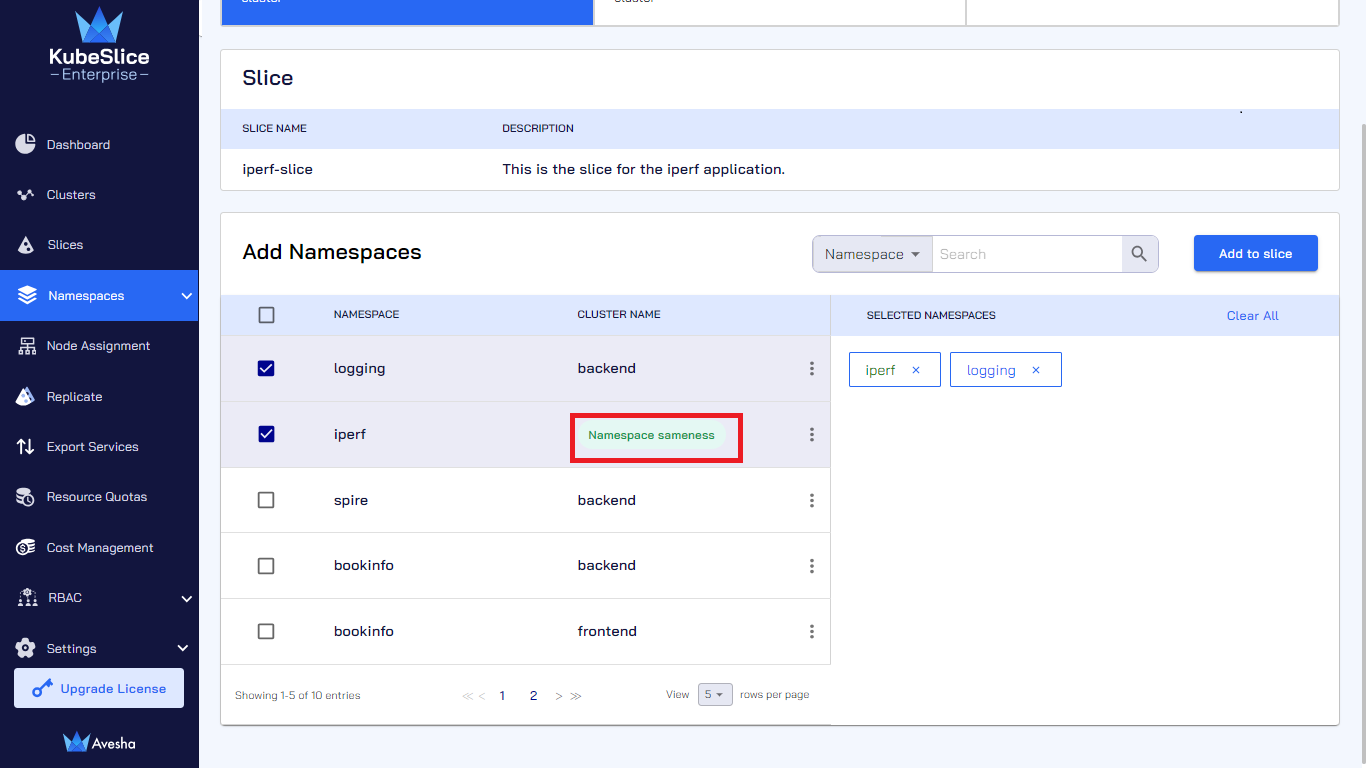
Under CLUSTER NAME, Namespace sameness is shown, which means that this namespace is onboarded from all the worker clusters in the slice.
-
After you have added all the namespaces that you want to onboard, click Add to slice.
-
On the Step 2- Generate YAML and Apply tab, under Code Preview, review the YAML file. You will find the following property added in the YAML file:
applicationNamespaces:
- clusters:
- "*"
-
After you have reviewed and certain about the changes, click Apply YAML.
infoYou can click Step 1 - Add Namespaces to do any additional changes.
-
On the Step 3 - Finalize tab, click Done.
-
On the Namespaces page, click View all to verify the namespace sameness for the slice that you have added.
After adding namespaces to the slice, you must create a service export for the application to be discoverable by other worker clusters of the same slice.
Disable Namespace Sameness
To disable namespace sameness:
-
On the Namespaces page, select the slice that you want namespaces added to.
-
On the Step 1 - Add Namespaces tab, under Add Namespaces, select a namespace.
-
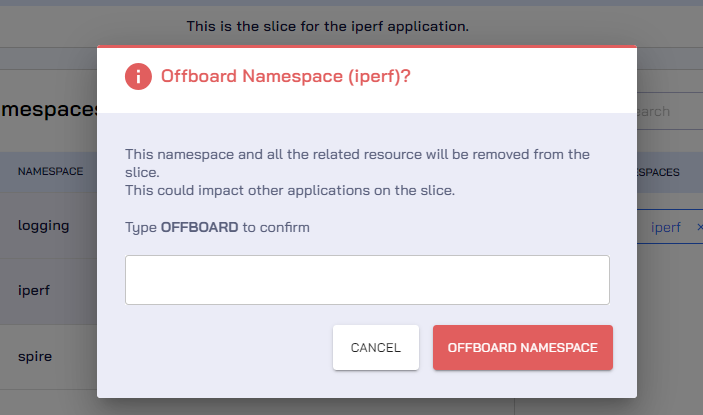
Click the vertical ellipsis against the namespace and disable the Namespace sameness button.
-
Enter the text OFFBOARD and click the OFFBOARD NAMESPACE button to confirm.
-
After you disable the namespace sameness, you can see the namespace in question removed.
-
To update the latest namespace configuration, click Add to slice.
-
On the Step 2 - Generate YAML and Apply tab, review the YAML file in which the
namespaceIsolationProfiledoes not have the*(asterisk) value for clusters.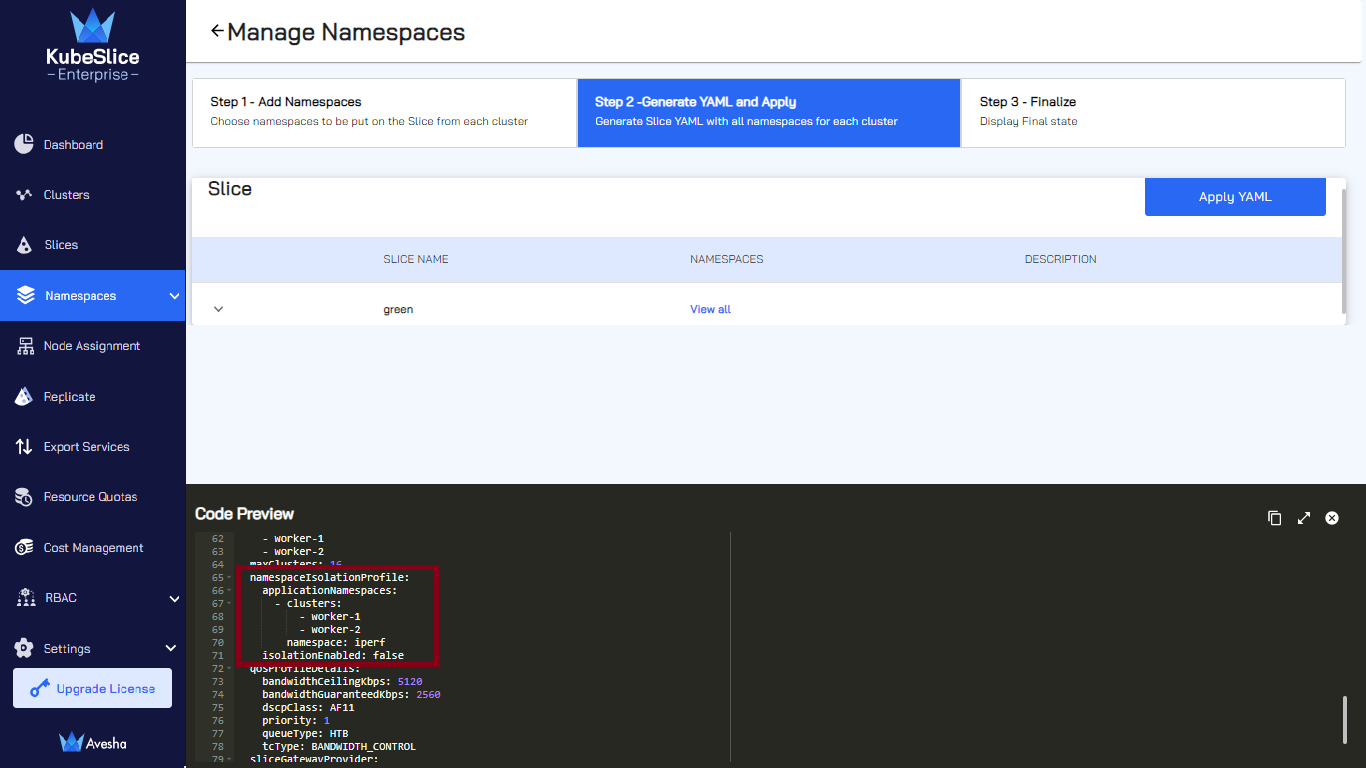
-
Click Apply YAML.
-
On the Step 3 - Finalize tab, click Done.
Limitations
We cannot have an application namespace placed in the Kubernetes Pod Security Standard (PSS) restricted profile.
KubeSlice is interoperable with the Kubernetes PSS-defined profiles: baseline and privileged. These profiles could be applied to an application namespace that is part of a multi-cluster slice created using KubeSlice. To be fully operational, KubeSlice requires certain privileges that are allowed in the baseline and privileged profiles, but not in the restricted profile. Hence, an application namespace should not be placed in the restricted profile if it needs to be connected to a slice.
Isolate Namespaces and Allow External Namespaces
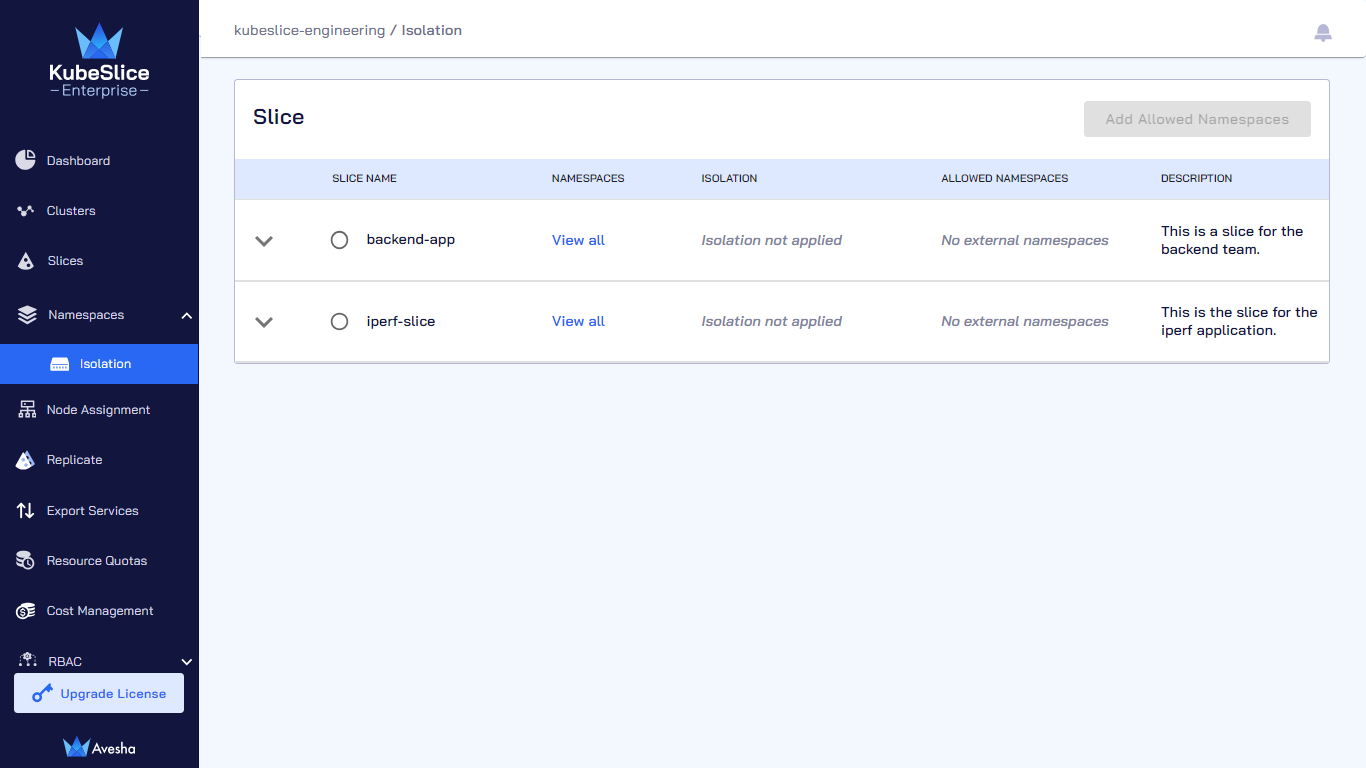
By default, all namespaces on a slice are not isolated and accept traffic from any source. To secure the slice, you can allow traffic to onboarded namespaces by isolating the slice using the namespace isolation feature.
Isolate Namespaces
-
Expand the Namespaces dropdown menu on the left sidebar.
-
Go to the Isolate submenu.
-
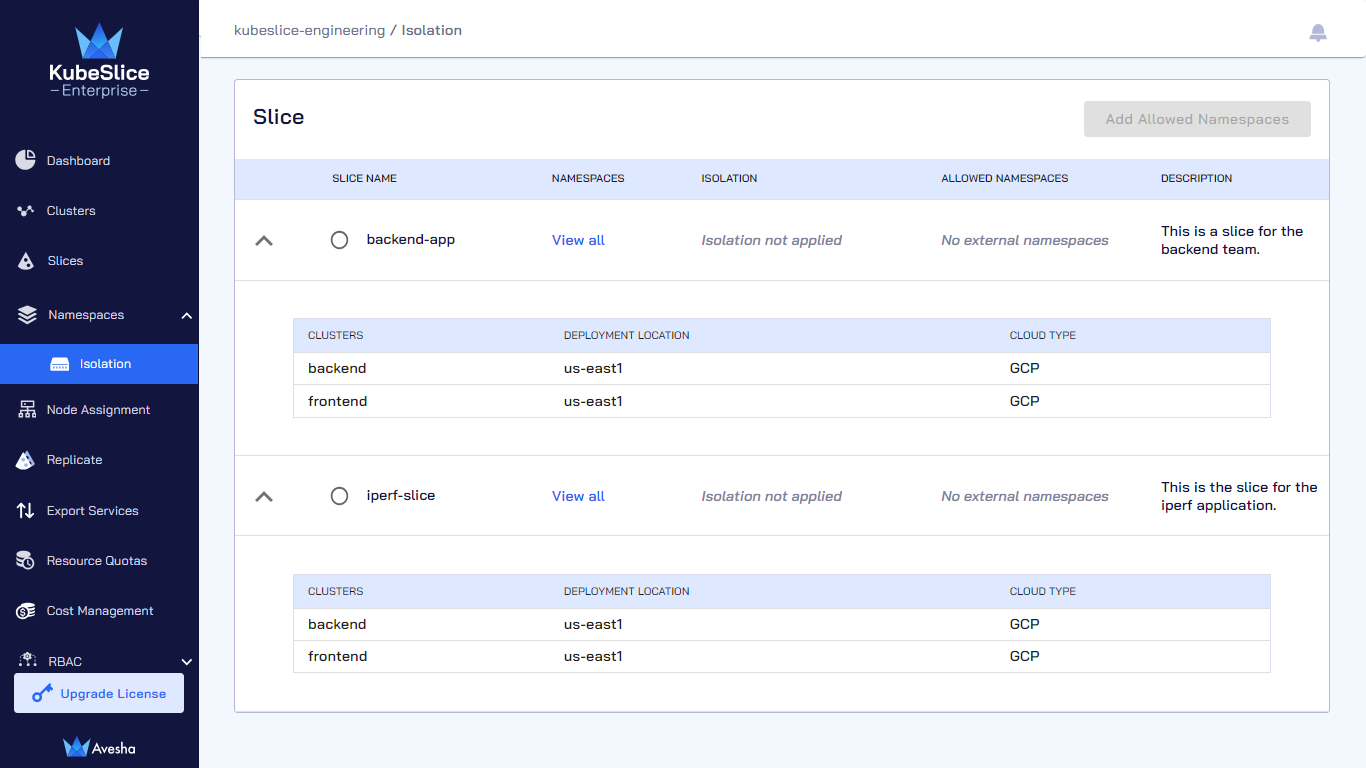
(Optional) Expand the dropdown menu for each slice to see the clusters, deployment location, and cloud type.
-
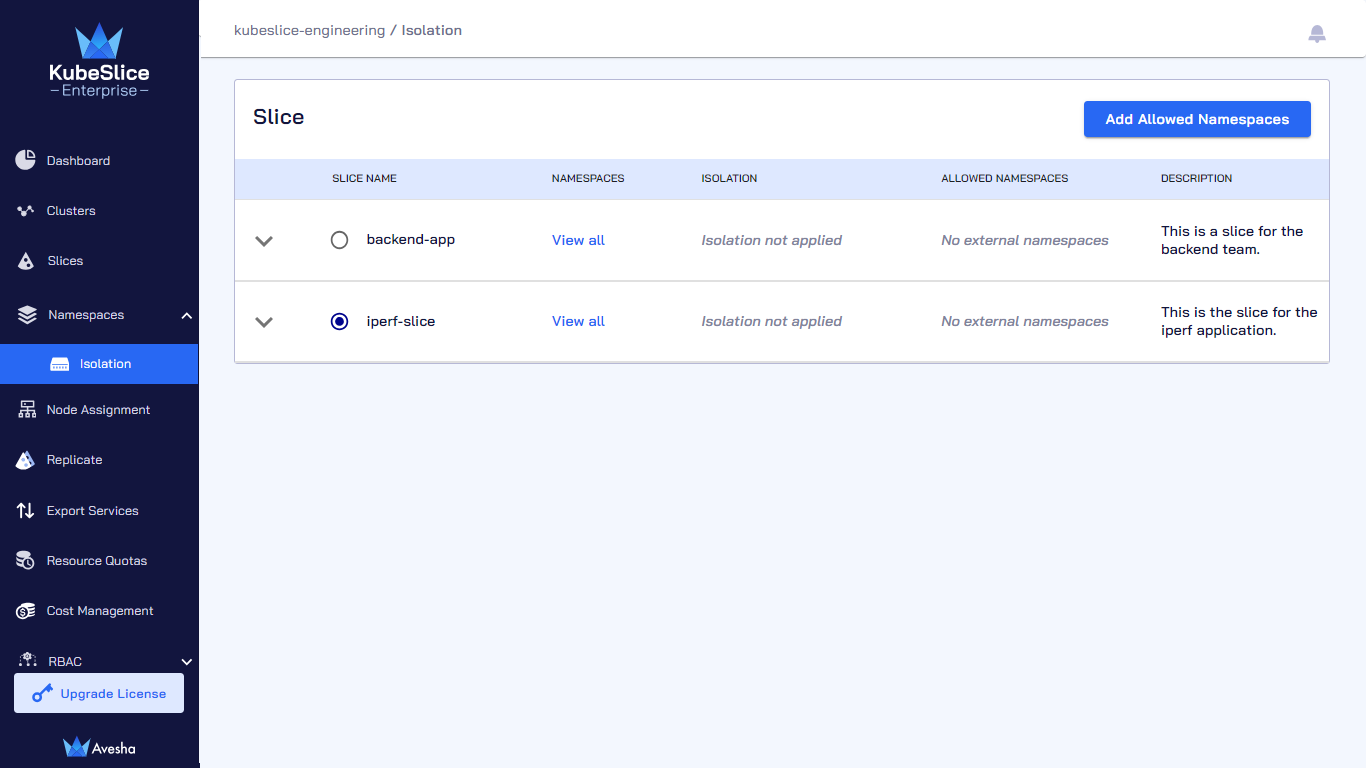
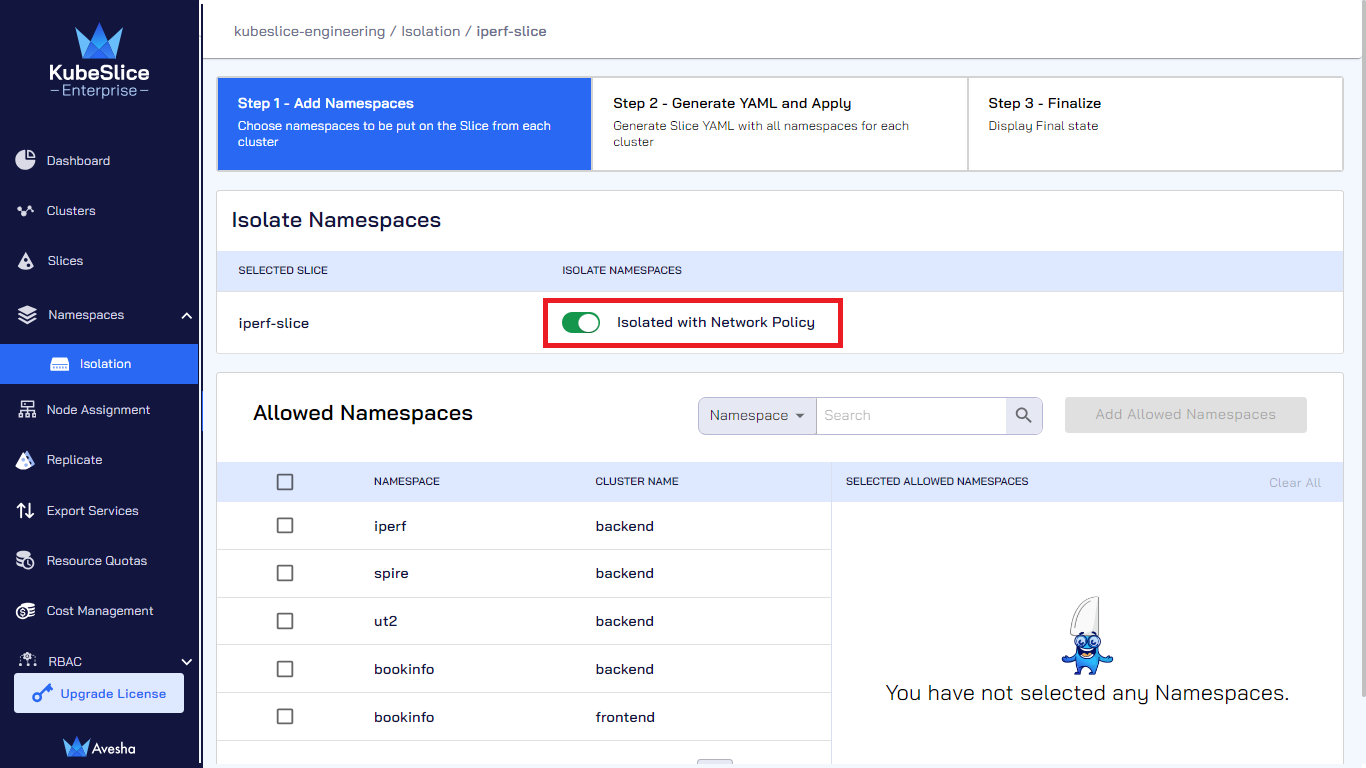
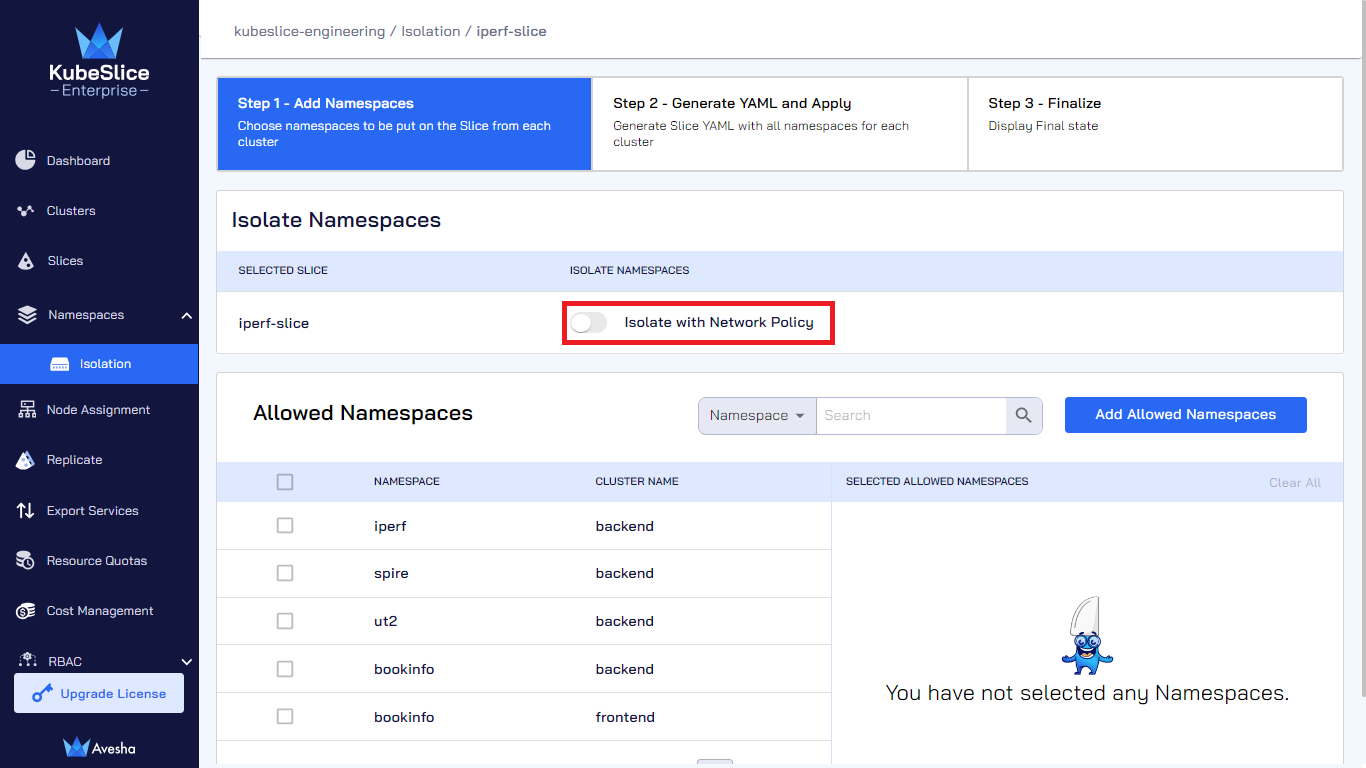
On the Isolate Namespaces page, select the slice that you want to isolate and click Add Namespaces.
-
On the Step 1 - Add Namespaces tab, under Isolate Namespaces, enable the Isolate with Network Policy button.
Allow External Namespaces
-
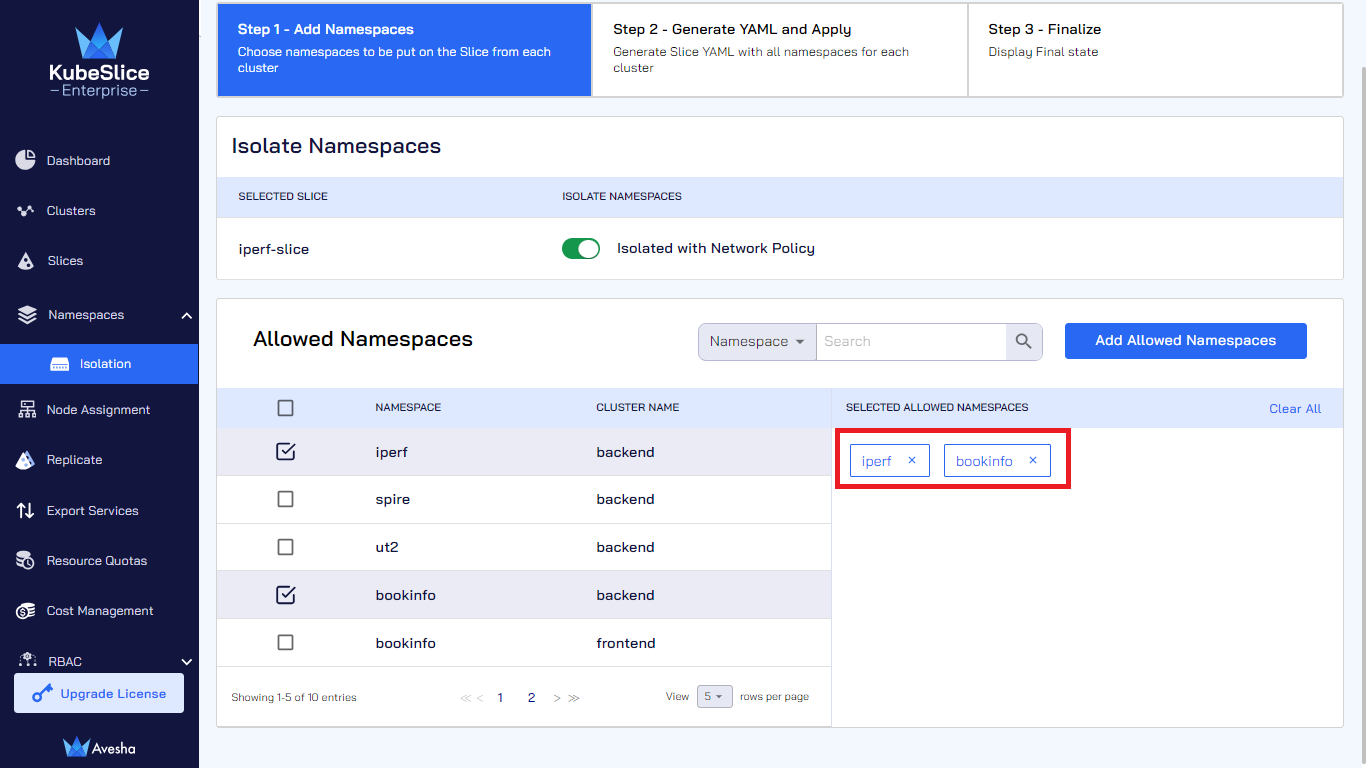
(Optional) You can allow external namespaces to communicate with the onboarded namespaces on the slice. Under Allowed Namespaces, select the external namespaces to allow them to communicate with the onboarded namespaces on the slice.
-
Click Add Allowed Namespaces to add the selected external namespaces.
-
Under the Step 2 - Generate YAML and Apply button, review the YAML file that validates the
isolationEnabledset totrueandallowedNamespaceswith the namespace value(s).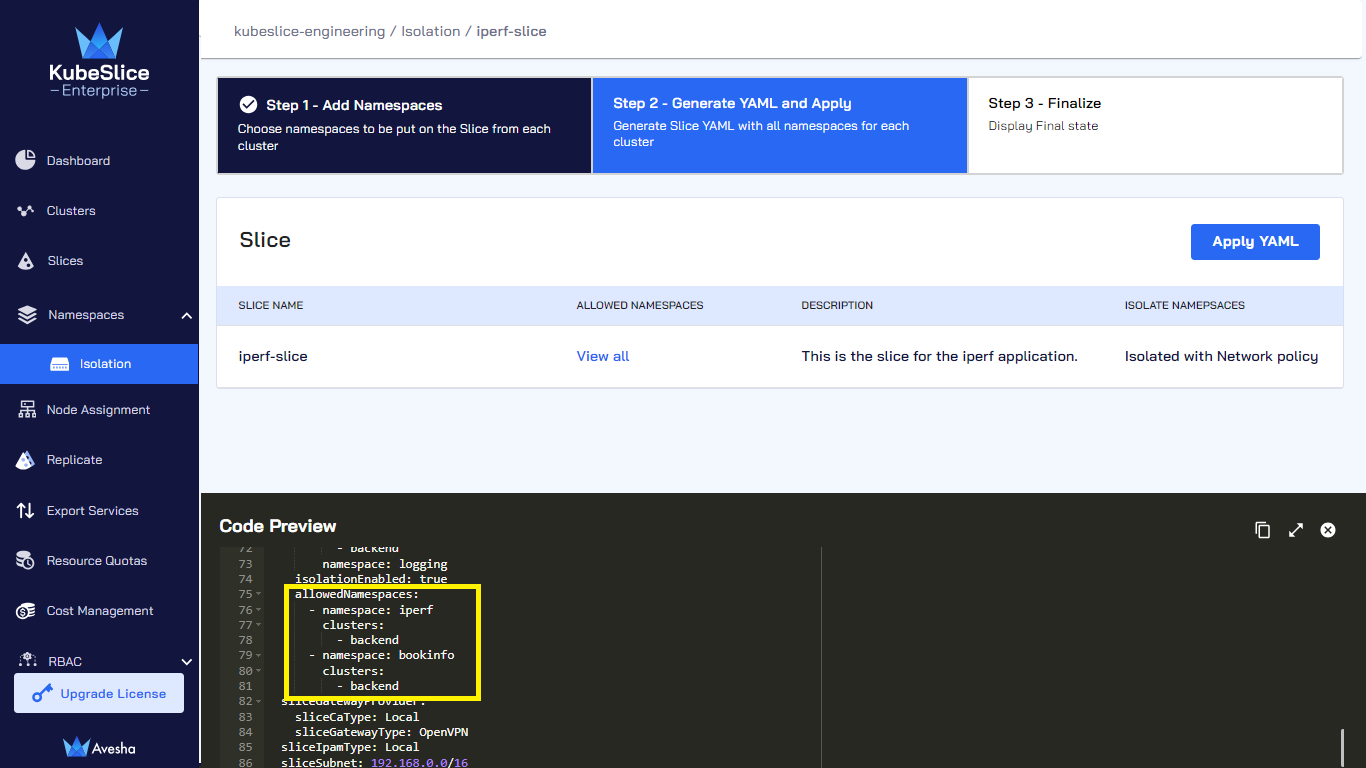
-
Click Apply YAML.
-
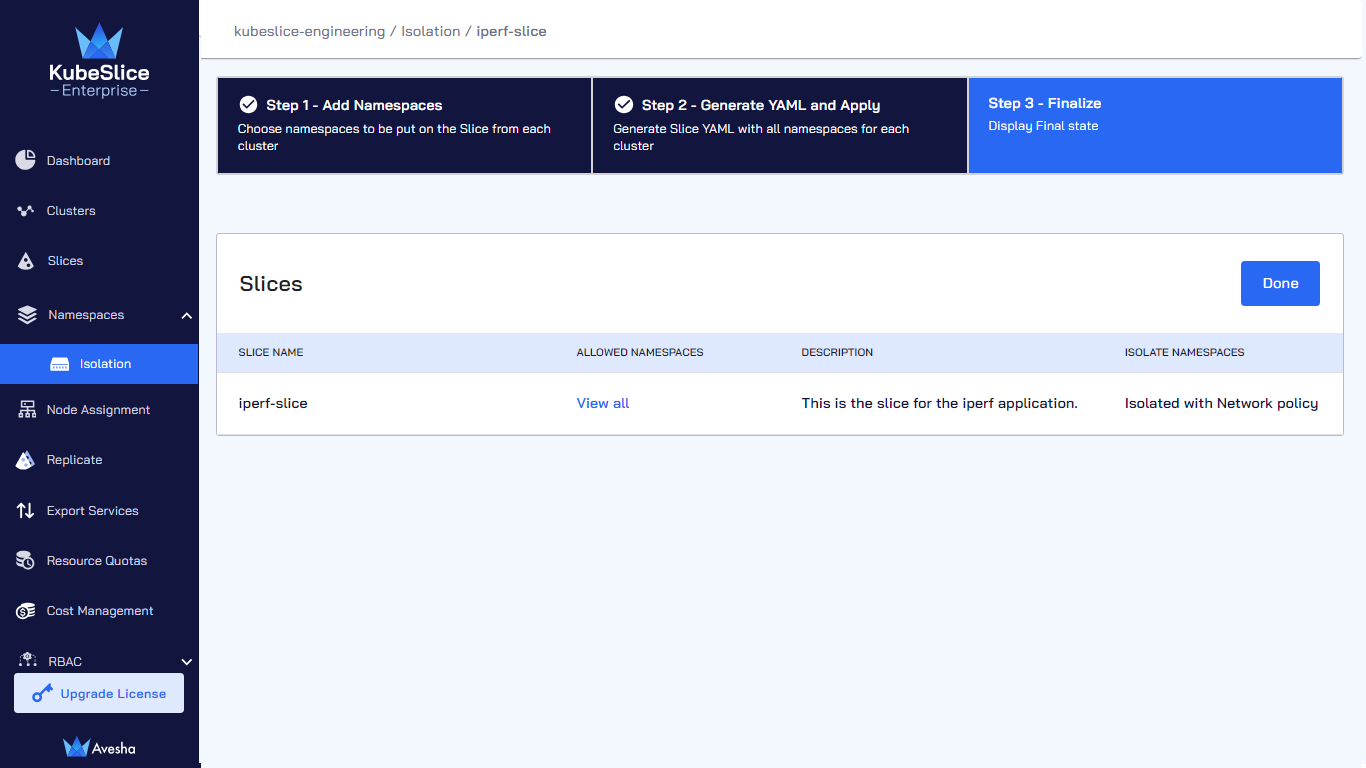
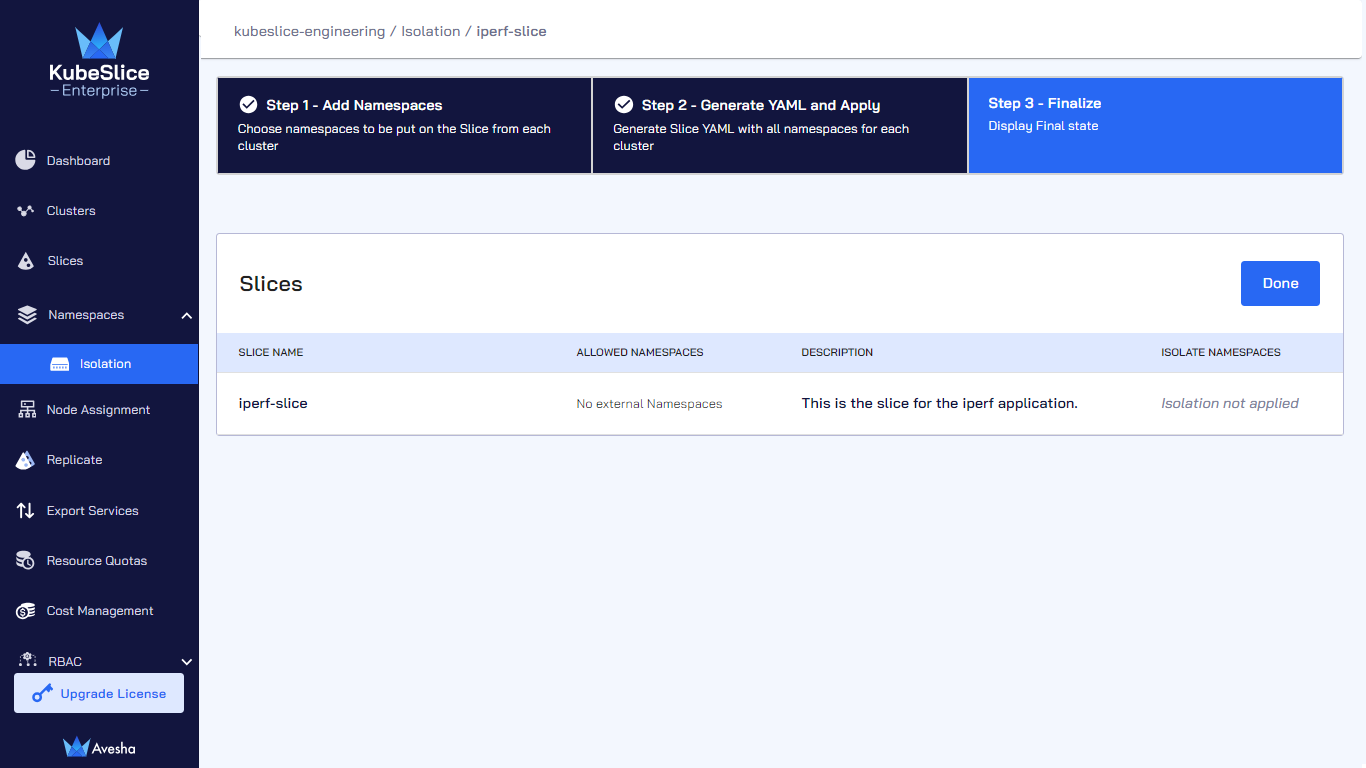
On the Step 3 - Finalize tab, click View all to verify the allowed namespaces, and you can see that isolation for the namespaces is enabled.
-
Click Done.
-
On the Isolate Namespaces page, under Slice, the status indicates that the namespace isolation is enabled. Click View all to see the list of allowed namespaces for the selected slice.
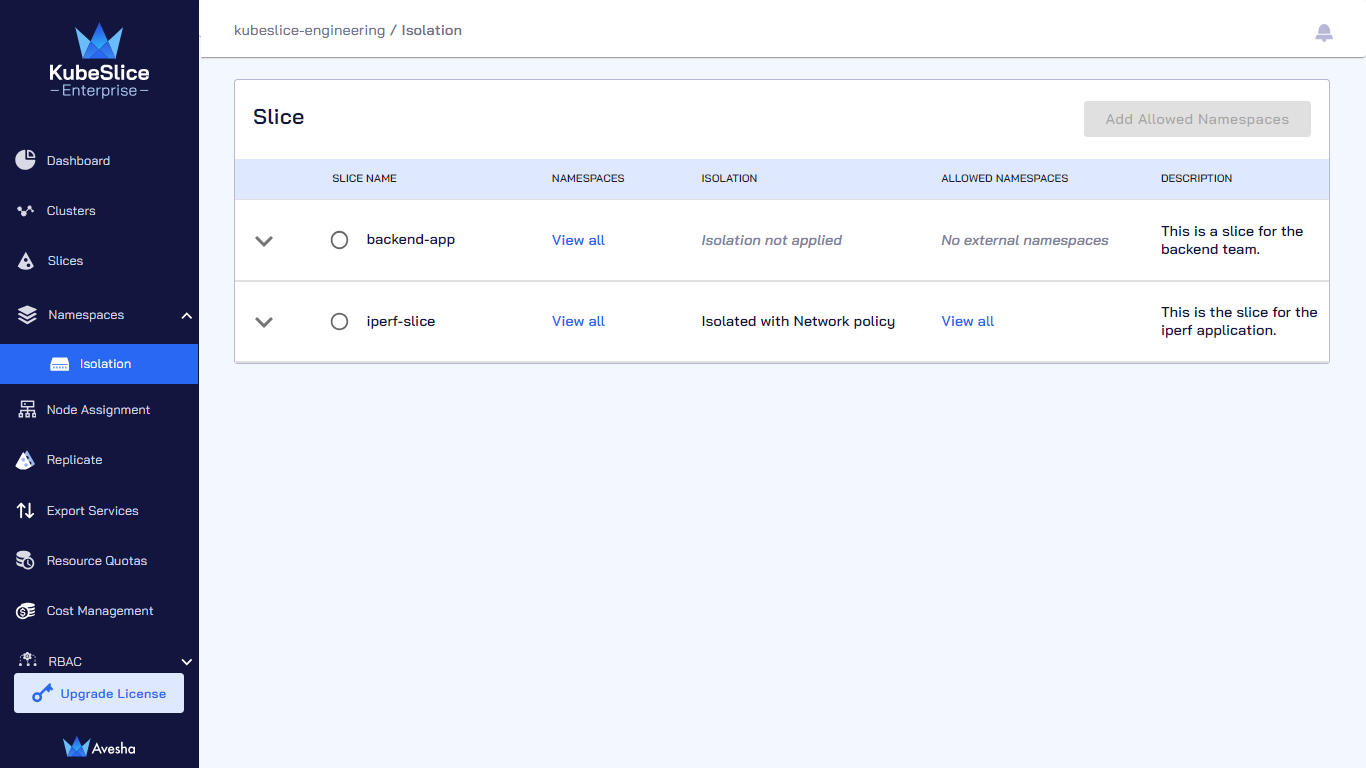
Disable Namespace Isolation
To disable the namespace isolation:
-
Expand the Namespaces dropdown menu on the left sidebar.
-
Go to the Isolation submenu.
-
On the Isolate Namespaces page, select the slice on which you want to disable the namespace isolation.
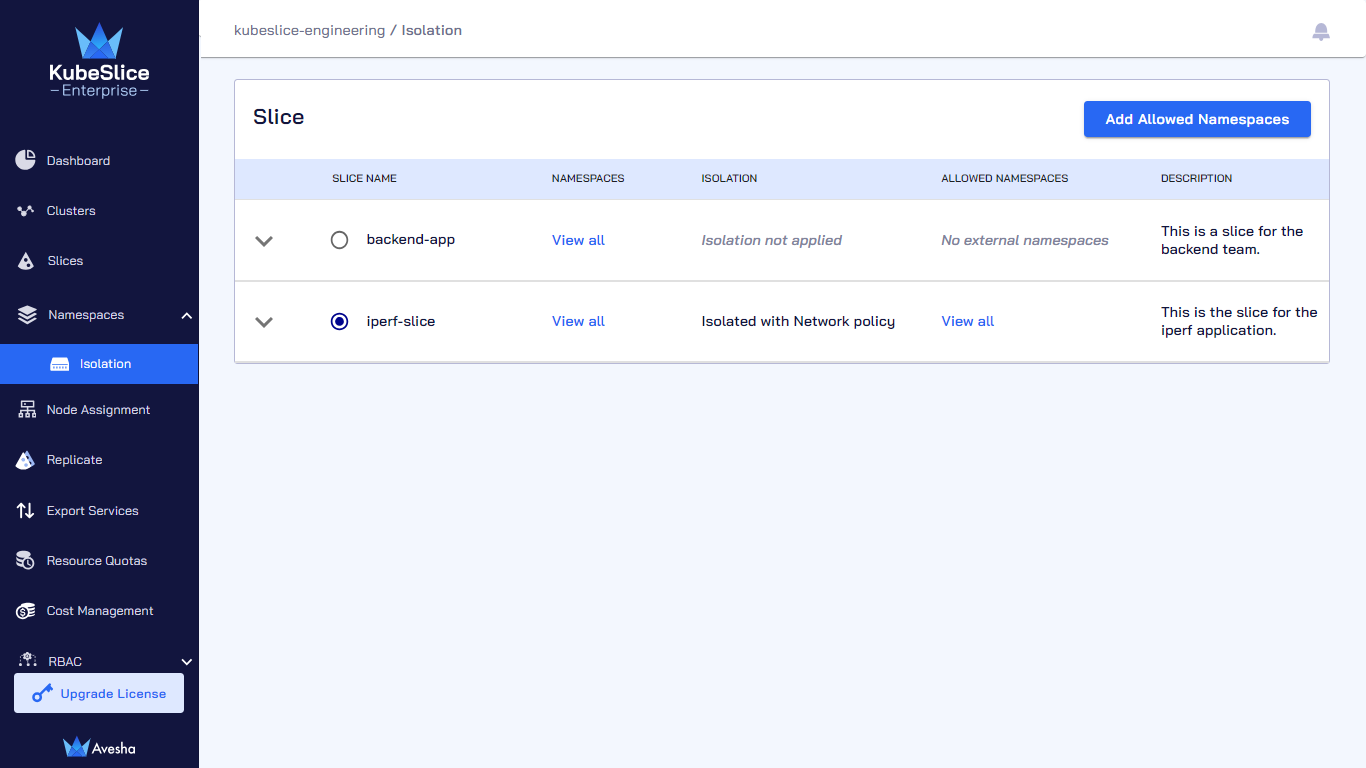
-
Click Add Namespaces to disable the namespace isolation on that slice.
-
On the Step 1 - Add Namespaces tab, under Isolate Namespaces, disable the Isolate with Network Policy for the selected slice.
-
Click Add Allowed Namespaces to review and apply the updated YAML file.
-
On the Step 2 - Generate YAML and Apply tab, under Code Preview, review the YAML file to validate that
allowedNamespacesdoes not have any value andisolationEnabledis set tofalse.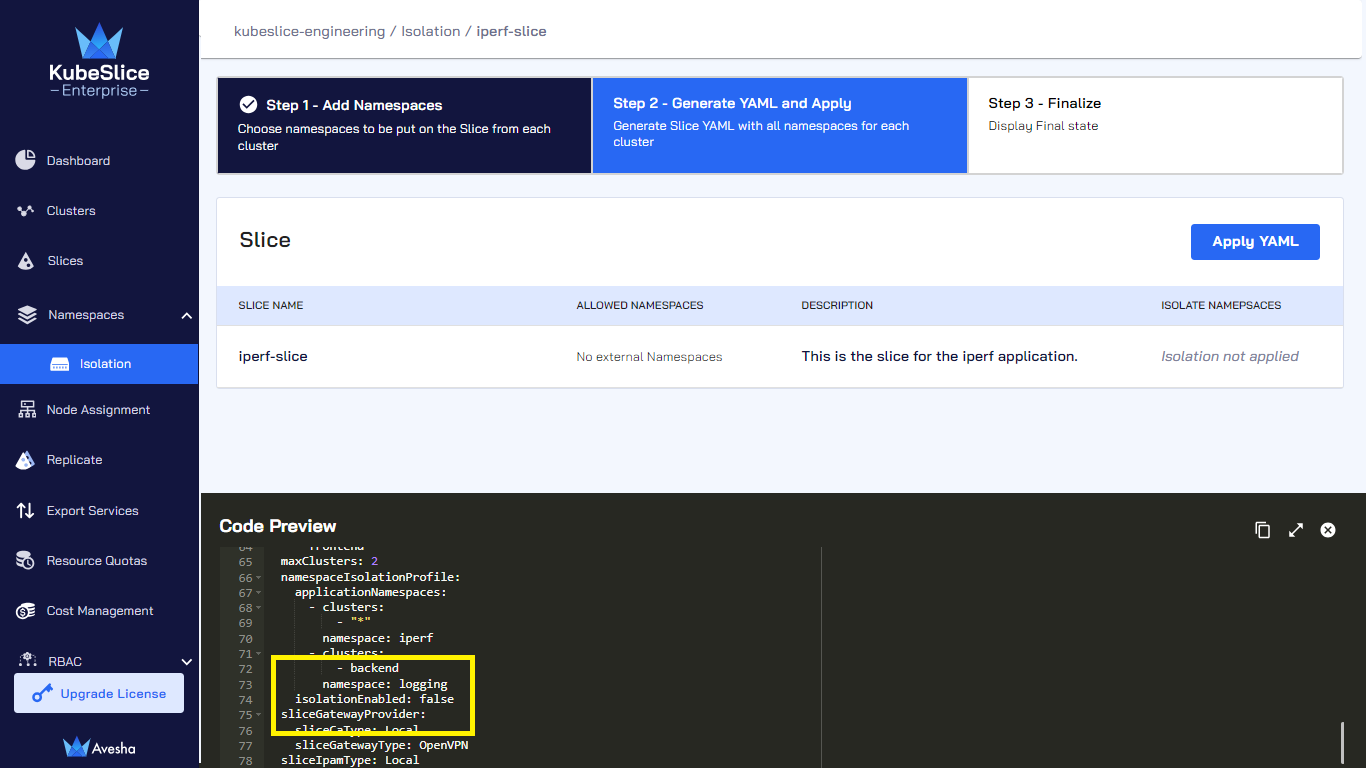
-
Click Apply YAML to disable the namespace isolation.
-
On the Step 3 - Finalize tab, under Slices and Namespaces, the status shows that the isolation is disabled and there are no allowed namespaces.
-
Click Done to complete disabling the namespace isolation.
-
On the Isolate Namespaces page, you can see that isolation is disabled for your slice.

Offboard Namespaces from a Slice
To offboard namespaces from a slice:
-
Go to Namespaces on the left sidebar.
-
Select the slice from which you want to offboard namespace(s) from and click Add Namespaces. For example, select the *iperf-slice from which you will offboard the
loggingnamespace.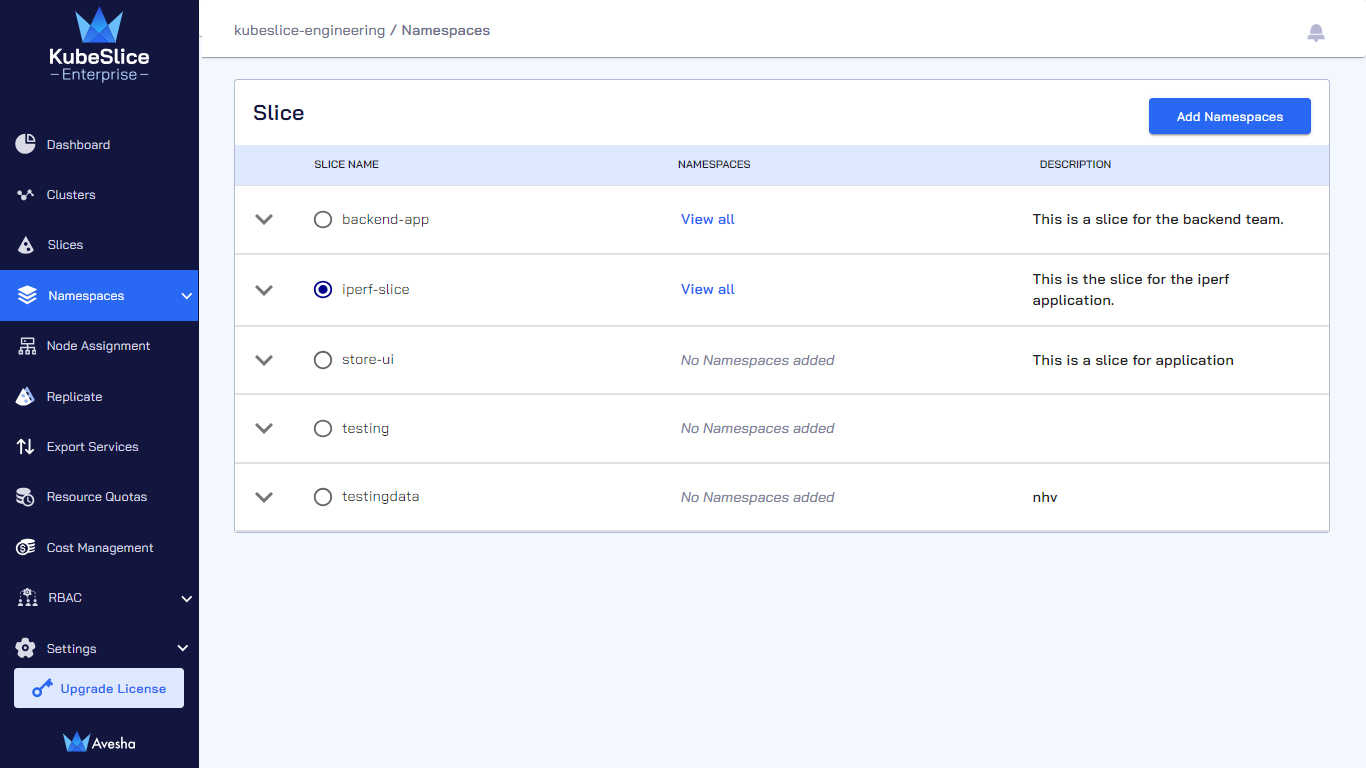
-
On the Step 1 - Add Namespaces tab, in the Add Namespaces section, unselect the onboarded namespaces. Alternatively, under SELECTED NAMESPACES, click x icon next to the onboarded namespaces.
-
Enter the text OFFBOARD to offboard the namespace from a slice.
infoWhile the namespace offboarding is in progress, no operations on the slice are allowed.
-
On the Step 2 - Generate YAML and APPLY tab, you see offboarding namespace from a
iperf-sliceslice is in progress.