OIDC Token Authentication
IDP integration is required for Manage RBAC functionality with KubeSlice Manager. The following instructions show how to configure OIDC Token Authentication with the below supported OIDC Identity Providers.
The process involves configuring OIDC token authentication, and configuring the Identity Provider to use OIDC token authentication.
IdP OIDC Token Authentication
OpenID Connect 1.0 is a simple identity layer on top of the OAuth 2.0 protocol. It enables clients to validate the end user's identity based on authentication performed by an authorization server. The client can obtain basic profile information about the end user in an interoperable and REST-like manner.
This topic describes how to configure OIDC Token based authentication with popular IdPs such as Google, Amazon Cognito, Okta, and Github,
as well as the configurations required to authenticate users.
Amazon Cognito
Amazon Cognito provides authentication, authorization, and user management for web and mobile apps. Users can log in using their user name and password, or they can use a third party service such as Facebook, Amazon, Google or Apple.
Configure Token Authentication
Follow these steps to configure OIDC Token authentication with the Amazon Cognito user pool.
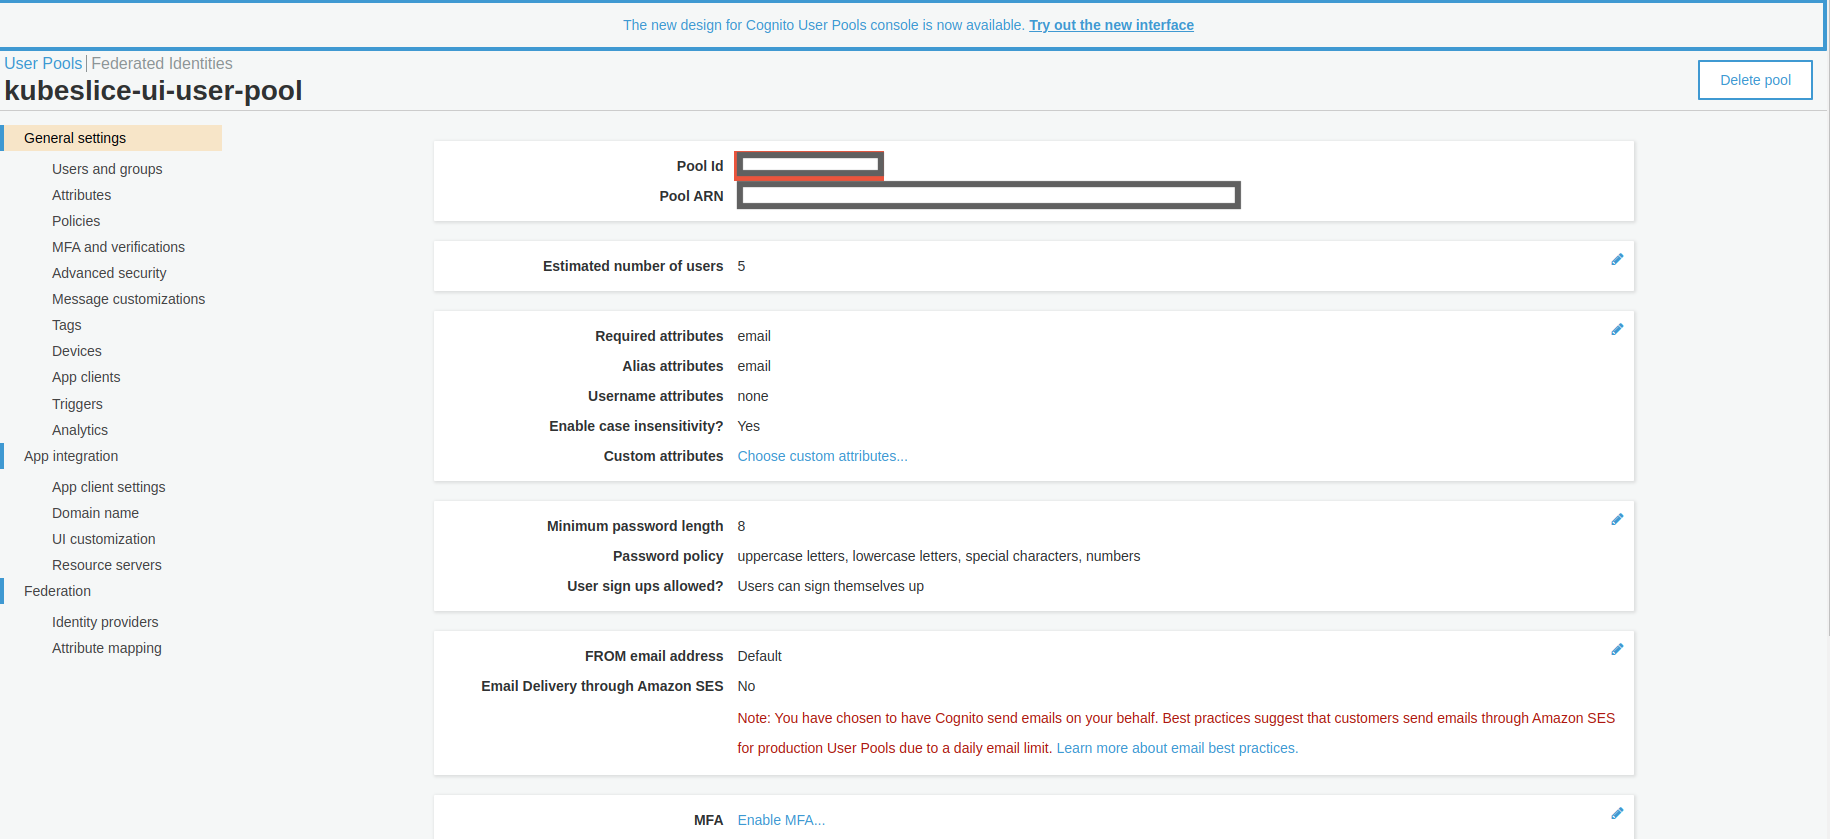
Create a User Pool
Using an Amazon Cognito user pool, you can create and manage a user directory and add authentication mechanisms for the users. For more information, see Amazon Cognito documentation to create a user pool.
Add Users and Groups to the User Pool
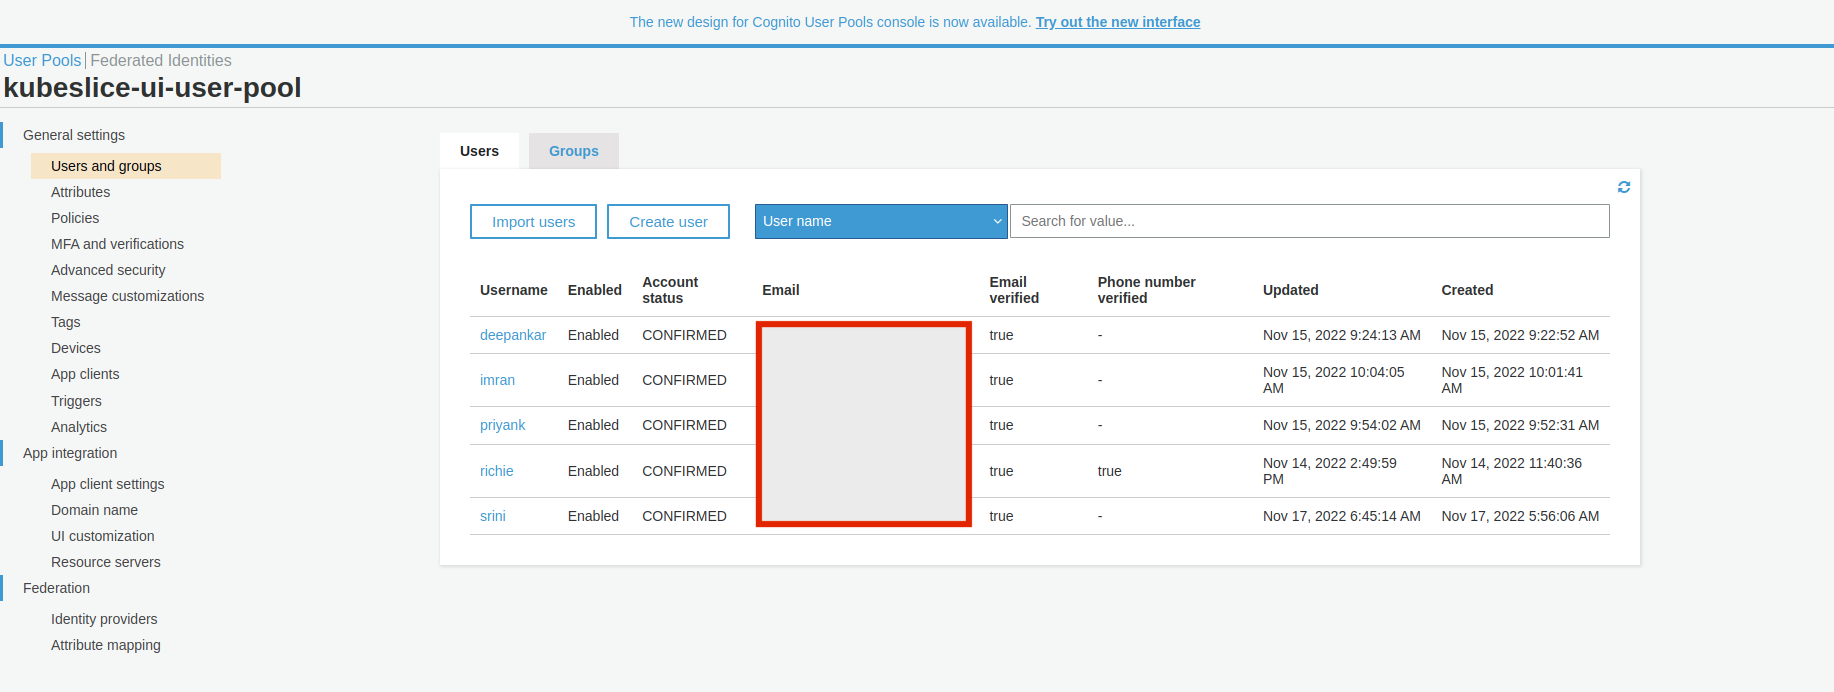
Add users and groups to the created user pool to obtain user and group claims to be later used for RBAC configuration.
The following figure illustrates the user added to the kubeslice-ui-user-pool user pool.
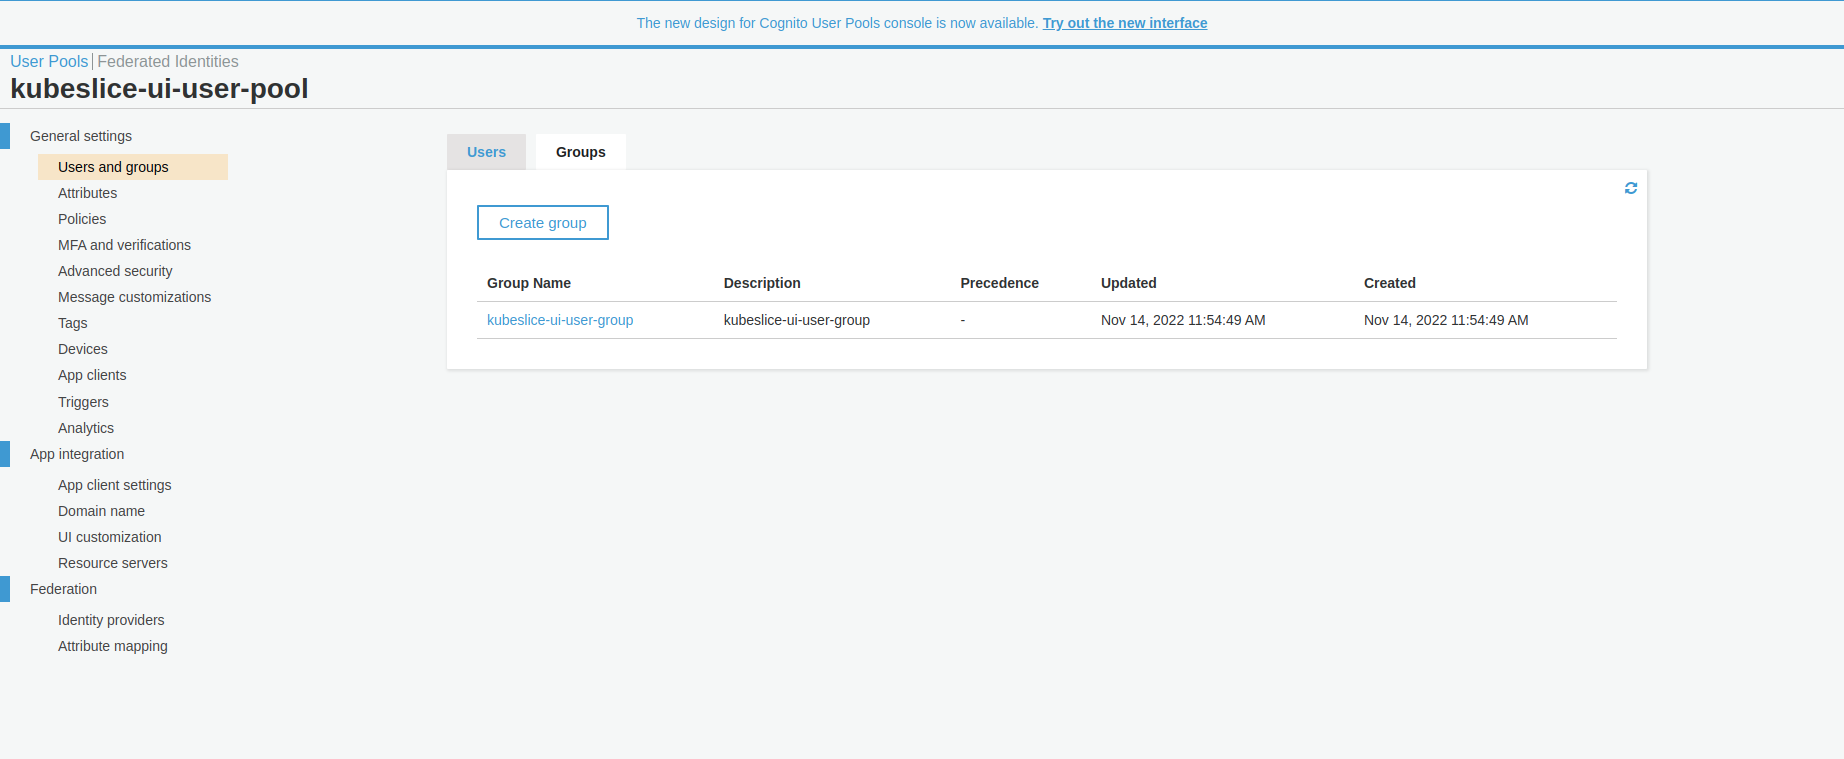
The following figure illustrates the groups added to the kubeslice-ui-user-pool user pool.
Create an App Client
After you create a Cognito user pool, you can create an app to use the built-in webpages for your users to register and log in. To create an app in your user pool, follow the instructions in configuring an App Client.
The hosted UI and custom domain prefix can be configured to be used with the hosted UI.
The following figure illustrates the Amazon Cognito App clients page.
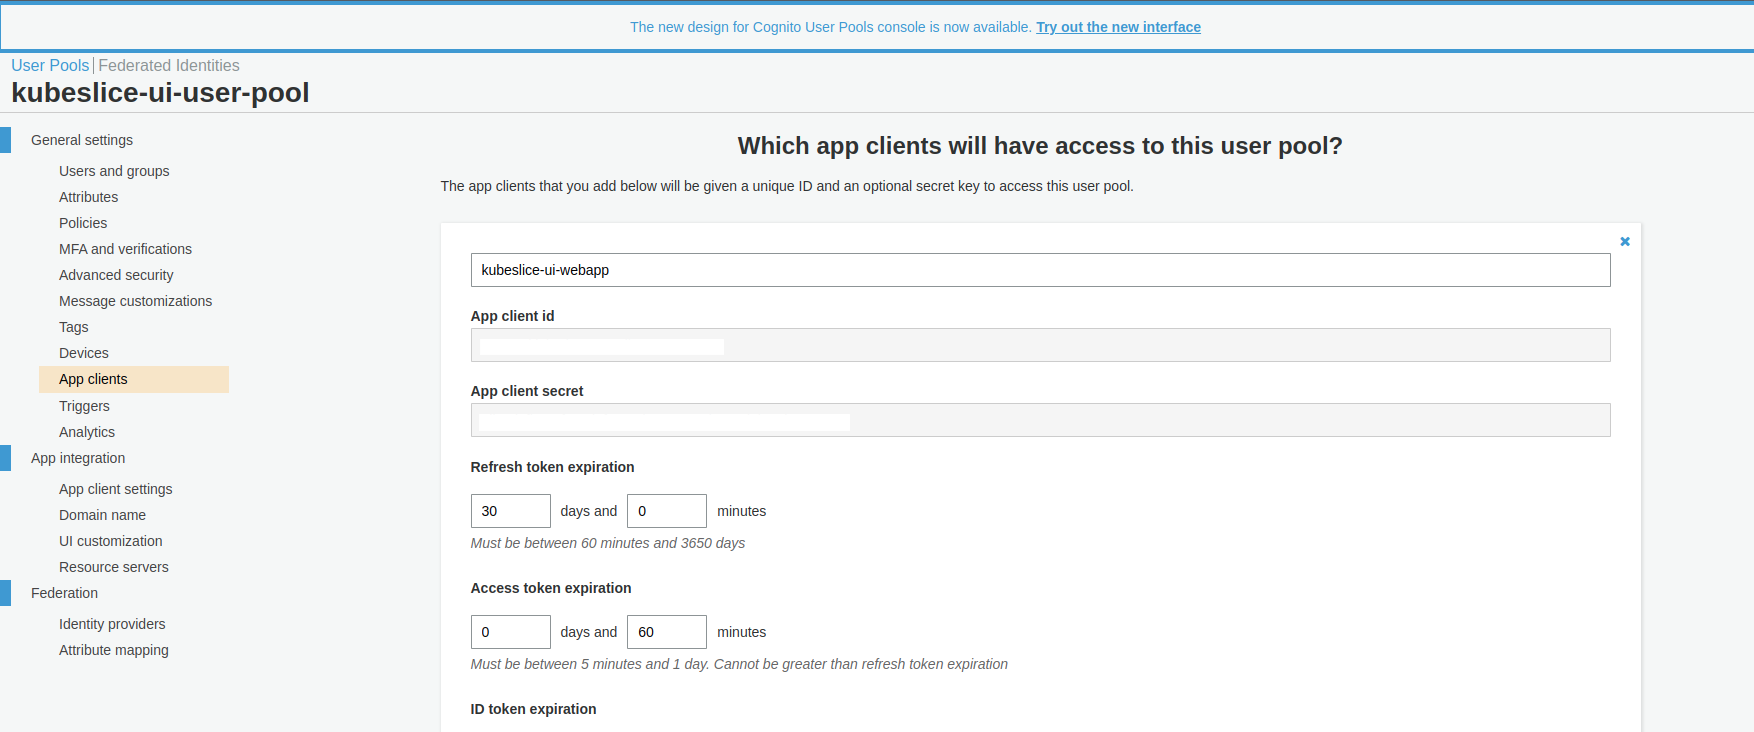
After configuring the App client, you must the configure the required callback URLs.
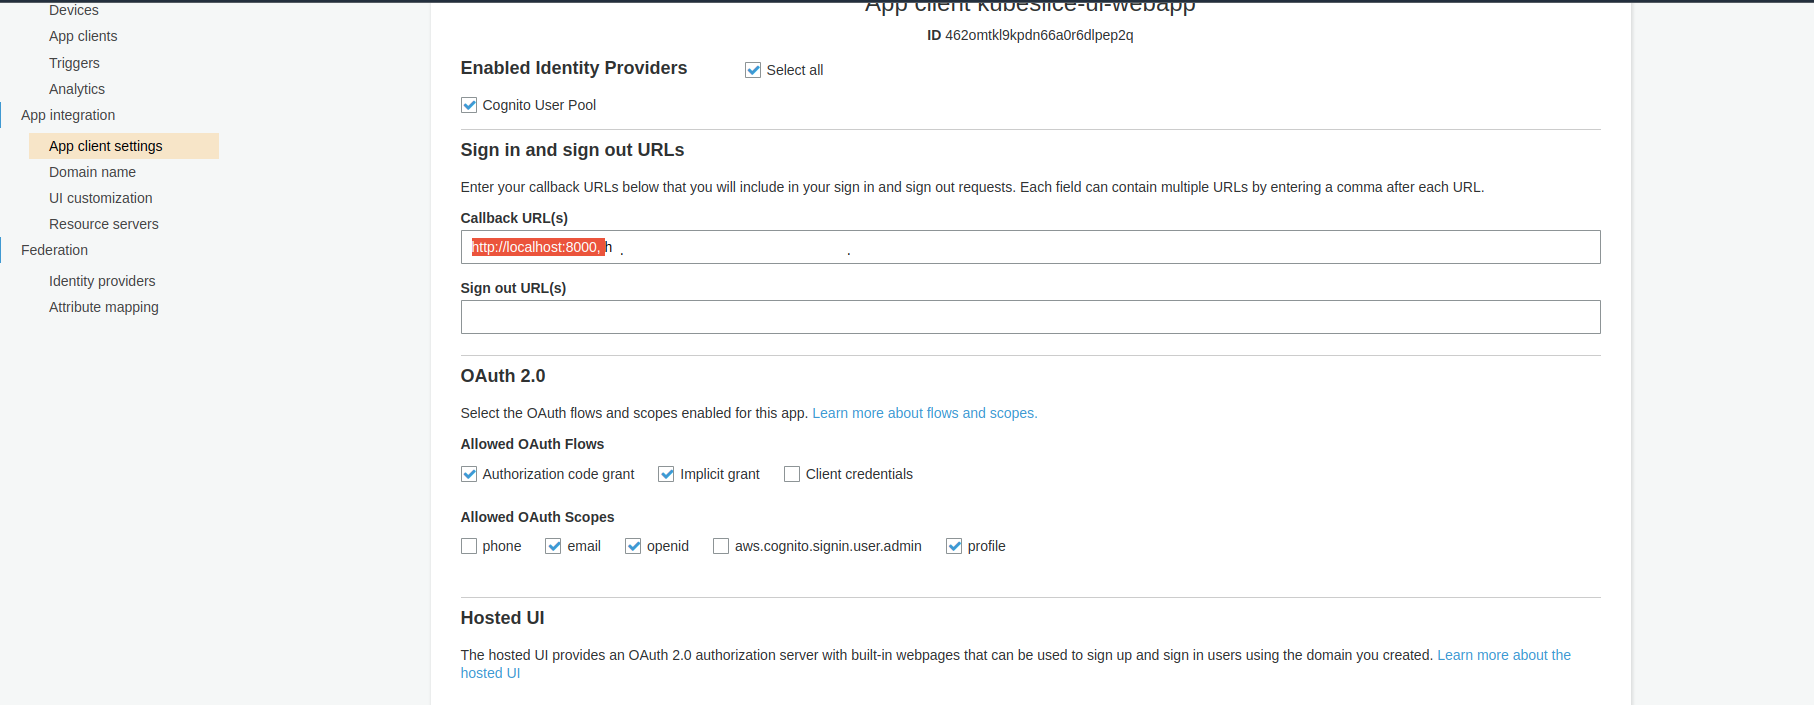
Configure Callback URL
- Select the App Integration tab.
- Go to App Client Settings and then enter a callback URL.
- If you want to use the oidc-login plugin to access your Kubernetes
clusters, you must additionally add
http://localhost:8000to the Callback URL(s) section and ensure the following are enabled:- openId and email under Allowed OAuth Scopes.
- Cognito User Pool as an Identity Provider.
- Authorization code grant under Allowed OAuth Flows.
Google
Google APIs use the OAuth 2.0 protocol for authorization and authentication. Google supports OAuth 2.0 scenarios such as those for web server, client-side, installed, and limited-input device applications.
This topic describes how to configure Google's OpenID certified OAuth 2.0 for authentication, which complies to the OpenID Connect specification.
Configure Token Authentication
Obtain OAuth 2.0 Credentials
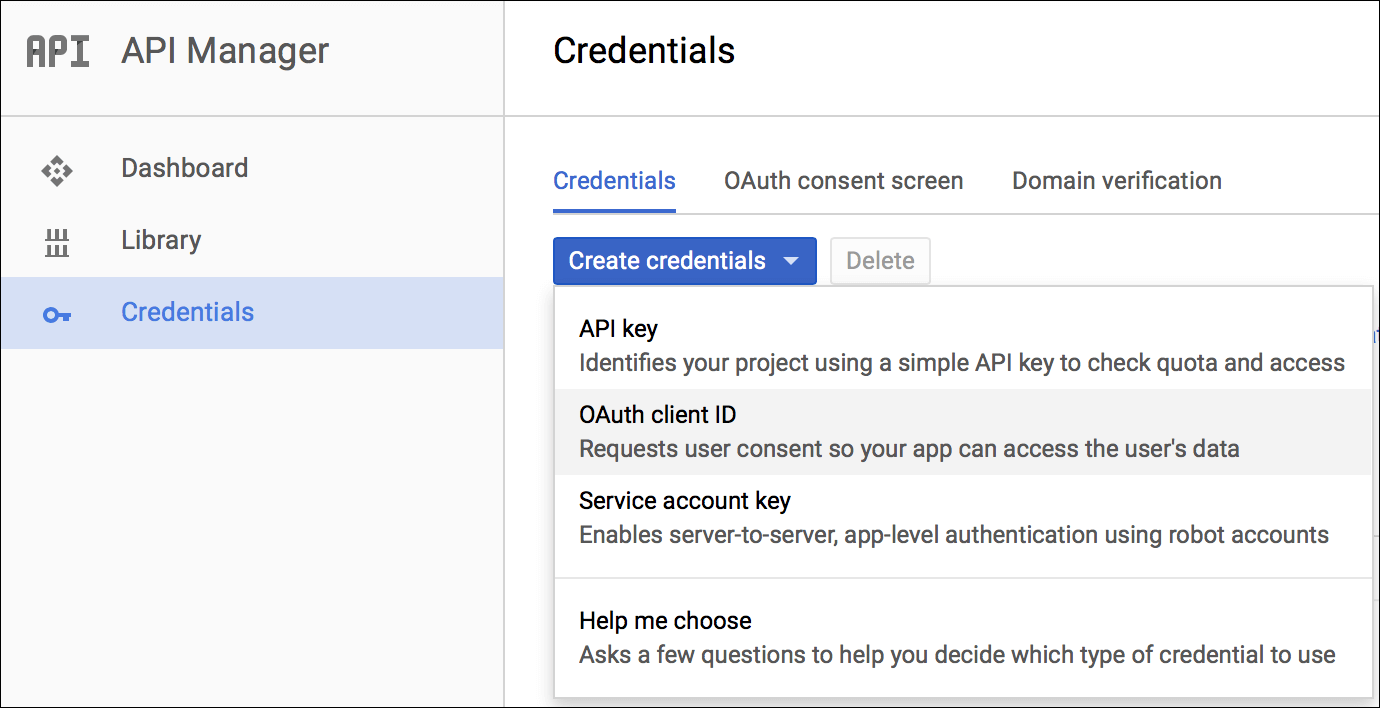
Follow the steps to generate the GCP client credentials:
- Log in to your GCP console.
- Under the Credentials tab, click Create credentials > OAuth client ID.
Configure a Web Application
To configure a web application:
- In the OAuth Client ID configuration page, under Application, type select Web application.
- Enter a name for Identity Provider configuration.
- Enter the redirect URIs to handle authorization redirects.
note
You must additionally add
http://localhost:8000to use the oidc-login plugin to access your Kubernetes clusters. - Click Create.

Okta
Configure Token Authentication
Okta is a secure, and easy-to-integrate solution for adding authentication and authorization services to your applications. Follow these steps to configure Okta as your identity provider:
-
Create an app integration. App integrations are configured connections between Okta and external applications.
The following figure illustrates the
kubeslice-uiapplication registered with the Okta.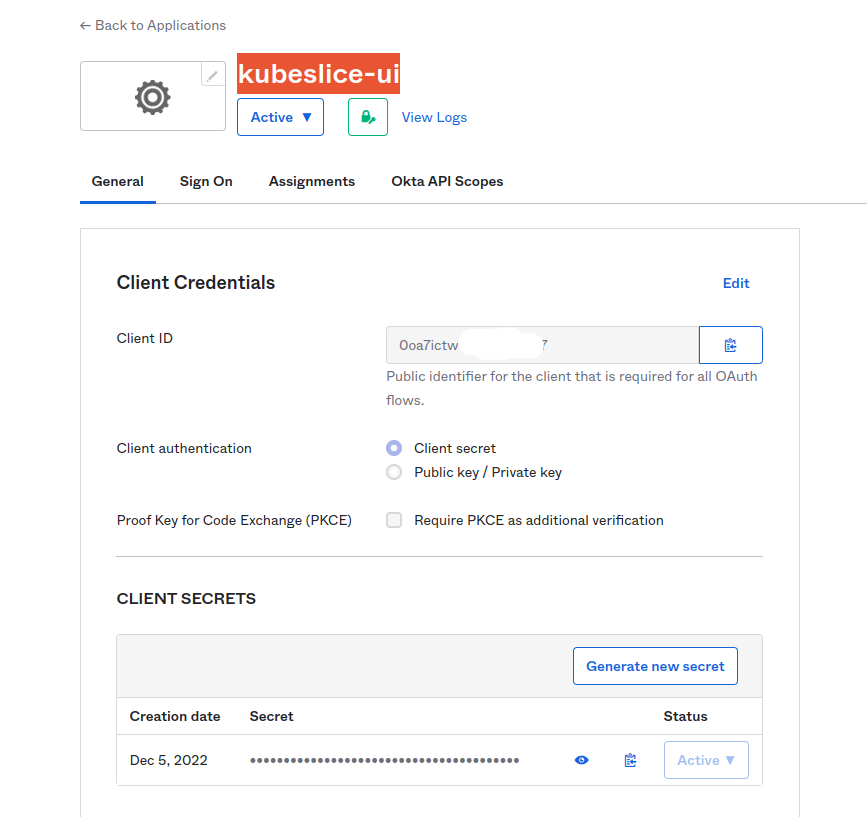
-
Create a group and assign people to the group.
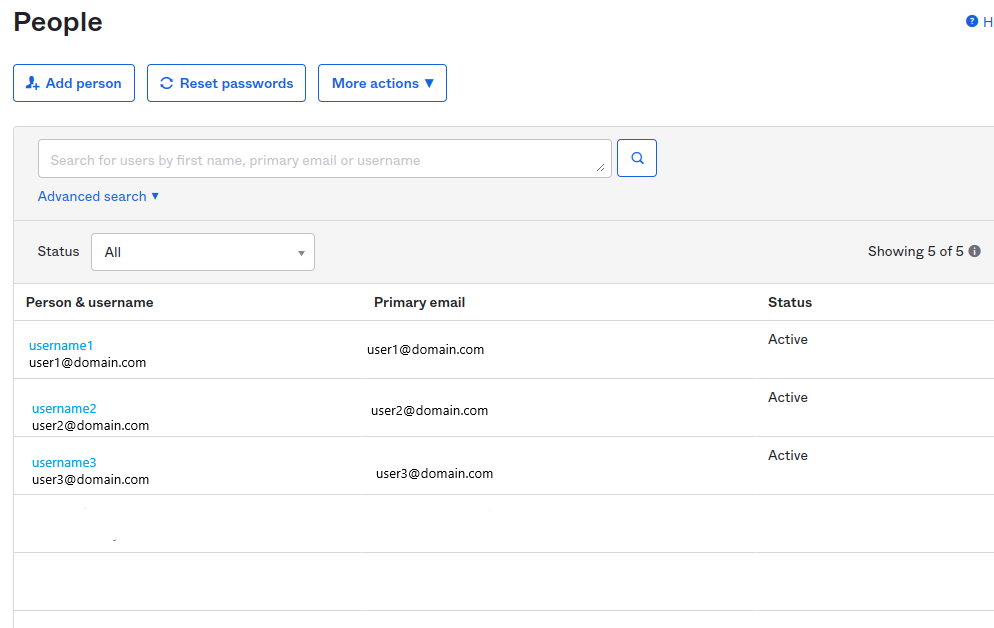
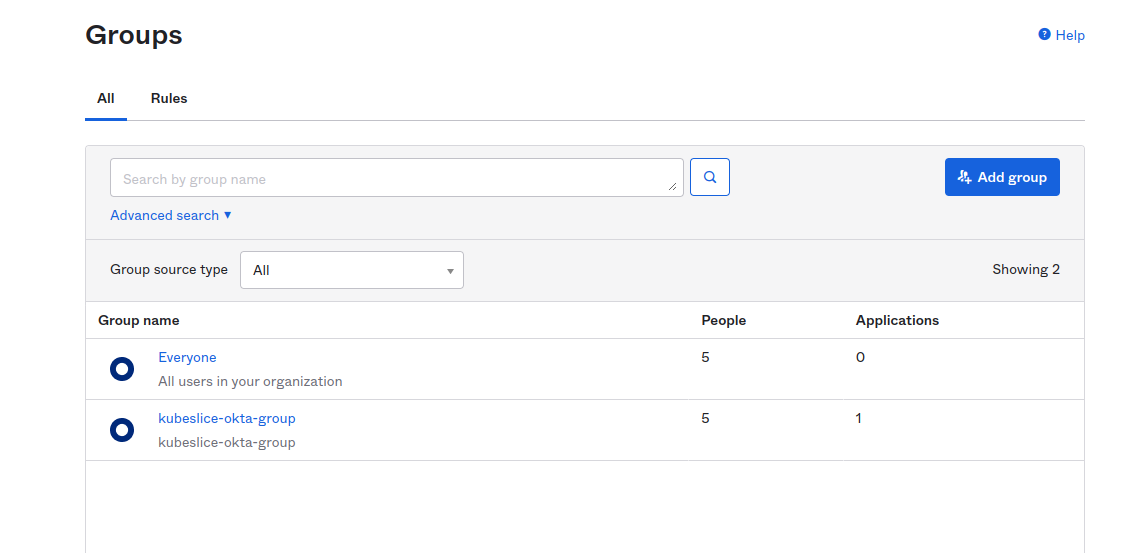
-
Assign an app integration to a group created in the above step.
The following figure illustrates the
kubeslice-uiintegration assigned to thekubeslice-okta-groupgroup.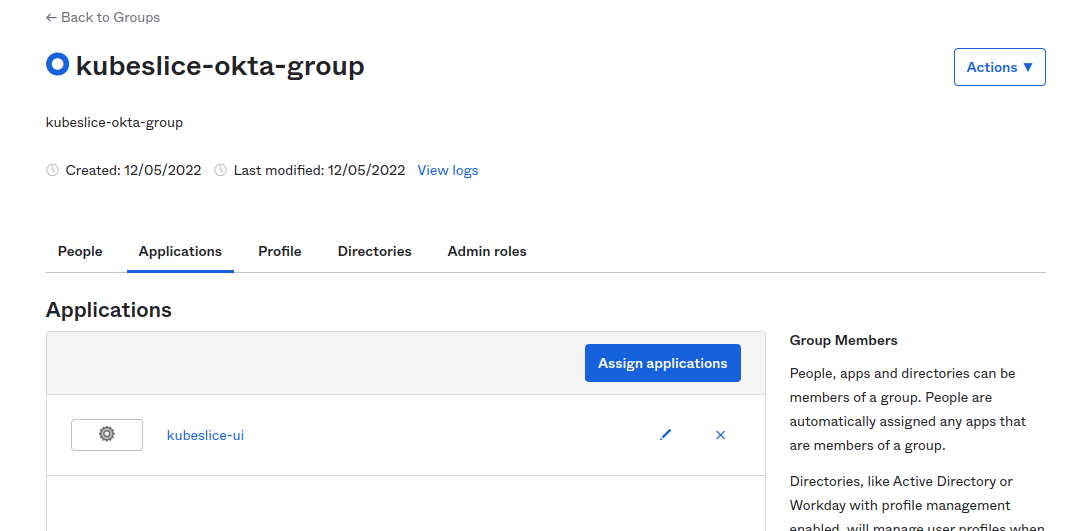
-
Create an Authorization Server to manage access between Okta and client applications after you register your app in Okta.
noteMake sure your app is configured to use TLS.
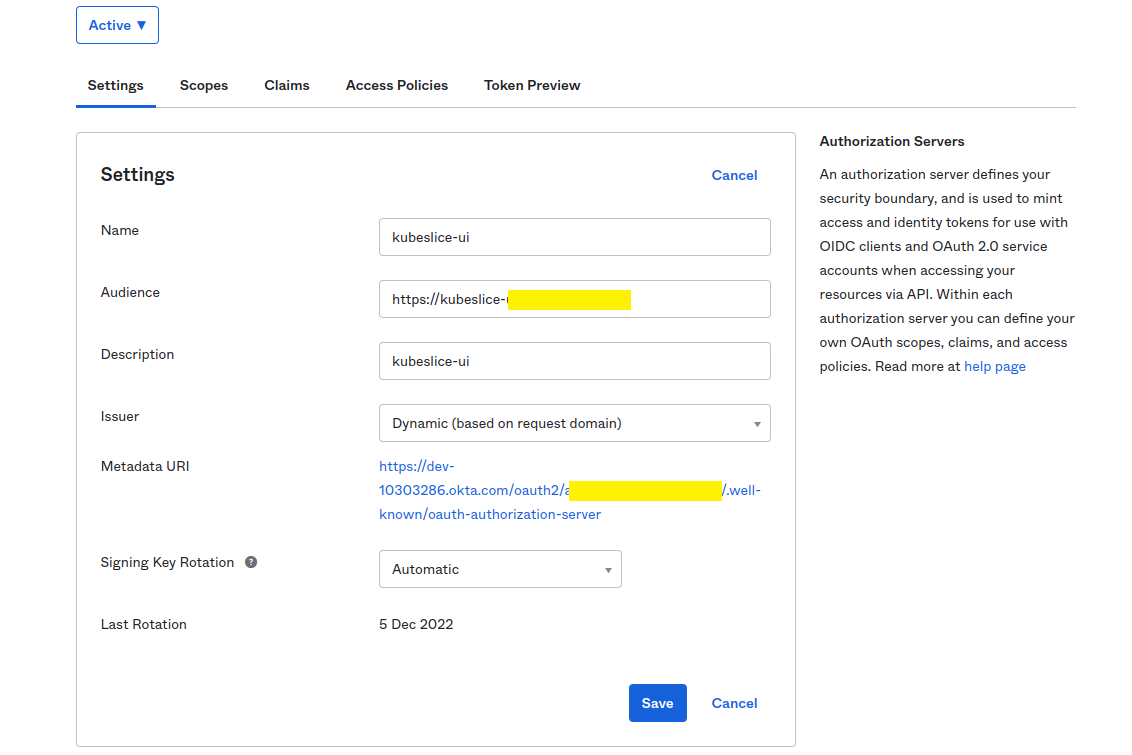 info
infoThe discoveryURL is in the format:
https://${yourOktaDomain}/oauth2/${authorizationServerId}/.well-known/openid-configuration. -
Create Scopes to specify which access privileges are being requested as part of the authorization.

GitHub: Dex
Dex is a popular OIDC provider that provides connectors for external OAuth providers to obtain an identity. A single instance of Dex is deployed into the controller cluster that will service all the other components in all clusters including signing the OIDC tokens. During the authentication process, Dex redirects authentication requests to GitHub, which prompts the user to login with their GitHub credentials.
Setup Dex on a New Cluster
If you have already set up the Dex on a new cluster, you can skip these steps (1- 3) and configure the cluster OIDC Authentication with Dex.
- Install the certificate manager.
helm repo add jetstack https://charts.jetstack.io
helm install cert-manager jetstack/cert-manager --namespace cert-manager --create-namespace --version v1.10.1 --set installCRDs=true - Install the Nginx ingress controller for SSL connectivity.
kubectl apply -f https://raw.githubusercontent.com/kubernetes/ingress-nginx/controller-v1.5.1/deploy/static/provider/aws/deploy.yaml - Create a certificate user for Nginx ingress.
kubectl apply -f - <<EOF
kind: ClusterIssuer
apiVersion: cert-manager.io/v1
metadata:
  name: acme
spec:
  acme:
      email: user@domain.com
      preferredChain: ''
      privateKeySecretRef:
          name: aveshalabs-account-key
      server: 'https://acme-v02.api.letsencrypt.org/directory'
      solvers:
         - http01:
             ingress:
             class: nginx
 EOF
Configure the Cluster OIDC Authentication with Dex
Create the OAuth application within the GitHub organization that you intend to use in the GitHub connector settings in the Dex configuration. If not, the OAuth application can be moved to the appropriate GitHub organization to meet the configuration.
-
Create an Oauth App on Github to use it as your primary IdP.
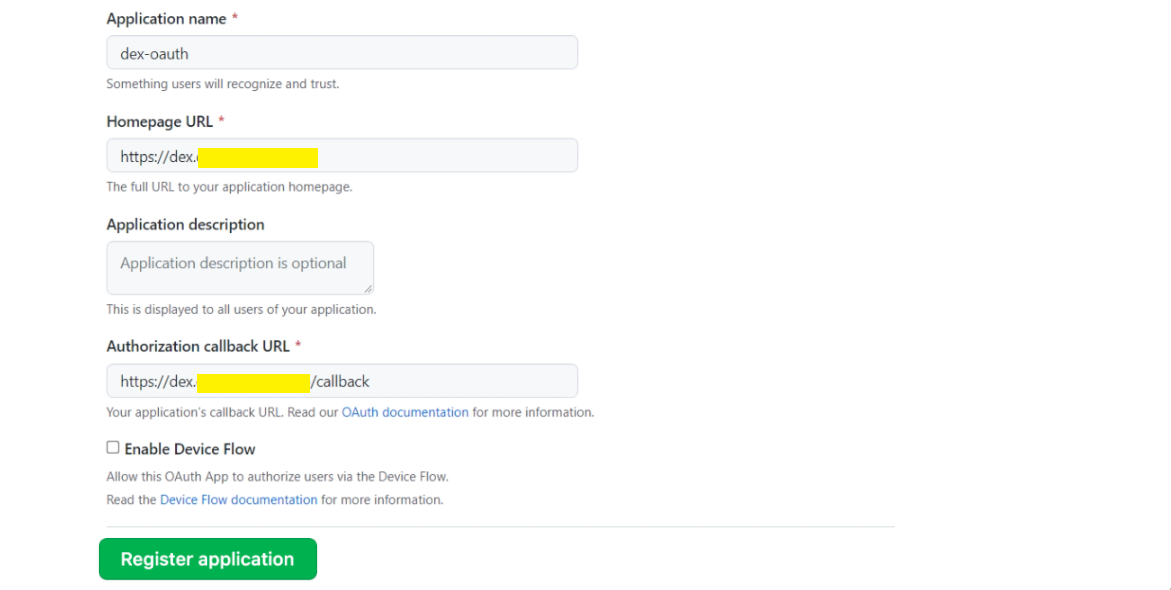
For Homepage URL, enter the URL for the Dex web application, for example,
https://dex.server.com.For Authorization callback URL, append /callback to the URL for the Dex web application, for example
https://dex.server.com/callback.For more information, see creating a GitHub OAuth application.
-
Generate a GitHub OAuth client secret. Dex uses the client ID and client secret to obtain an access token from GitHub. To generate a client
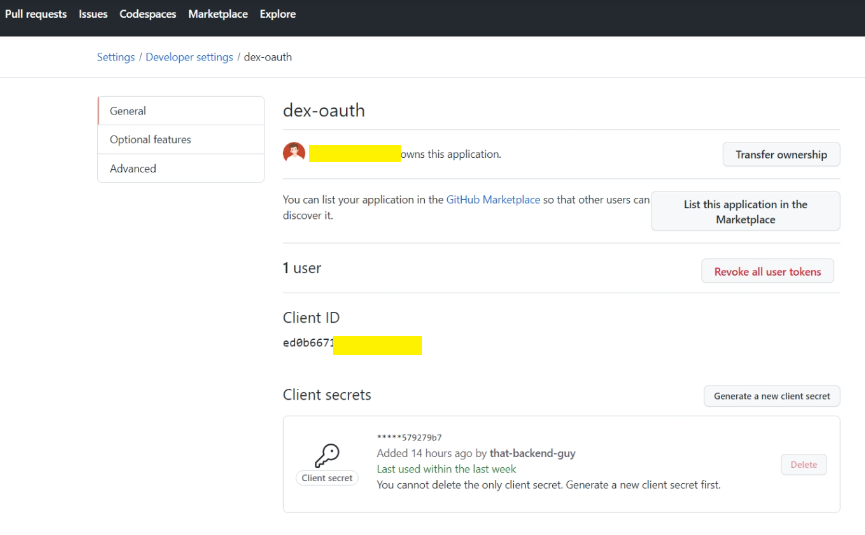
-
Install and configure Dex on the controller cluster using helm.
Add the Dex helm repository using the following command:
helm repo add dex https://charts.dexidp.ioUpdate your helm cache using the following command:
helm repo updateIf you have setup a new cluster with ingress enabled using the above steps (1-3), then include the ingress configuration parameters in the
dex.values.yamlfile. Create adex.values.yamlfile with ingress configuration parameters using the following template.ingress:
enabled: true
className: nginx
annotations:
kubernetes.io/tls-acme: "true"
cert-manager.io/cluster-issuer: acme
hosts:
# The `dex.server.com` is the endpoint of the Dex server, set this on the domain registrar.
- host: dex.server.com
paths:
- path: /
pathType: ImplementationSpecific
tls:
- secretName: dex-tls
hosts:
# The `dex.server.com` is the endpoint of the Dex server, set this on the domain registrar.
- dex.server.com
config:
issuer: https://dex.server.com
storage:
type: kubernetes
config:
inCluster: true
oauth2:
responseTypes: ["code", "token", "id_token"]
skipApprovalScreen: true
connectors:
- type: github
id: github
name: GitHub
config:
clientID: "{{ .Env.GITHUB_CLIENT_ID }}"
clientSecret: "{{ .Env.GITHUB_CLIENT_SECRET }}"
redirectURI: https://dex.server.com/callback
#orgs:
#- name: kubeslice
loadAllGroups: true
staticClients:
- id: your-cluster-client-id
secret: your-cluster-client-secret
name: "KubeSlice Manager"
redirectURIs:
- https://kubeslice.server.com/api/v1/authentication/oidc/callback
# Note: This will inject the environment variables directly to the pods.
# In a production environment you should mount these keys from a secret using envFrom.
# See https://artifacthub.io/packages/helm/dex/dex#values
env:
GITHUB_CLIENT_ID: "github-client-id"
GITHUB_CLIENT_SECRET: "github-client-secret"
If you have already have Dex installed, you can skip adding the ingress configuration parameters in the dex.values.yaml file.
Create the Dex configuration YAML file using the following template.
config:
  issuer: https://dex.server.com

  storage:
    type: kubernetes
    config:
      inCluster: true

  oauth2:
    responseTypes: ["code", "token", "id_token"]
    skipApprovalScreen: true

  connectors:
    - type: github
      id: github
      name: GitHub
      config:
        clientID: "{{ .Env.GITHUB_CLIENT_ID }}"
        clientSecret: "{{ .Env.GITHUB_CLIENT_SECRET }}"
        redirectURI: https://dex.server.com/callback
        orgs:
        - name: kubeslice

  staticClients:
    - id: your-cluster-client-id
      secret: your-cluster-client-secret
      name: "KubeSlice Manager"
      redirectURIs:
        - https://kubeslice.server.com/api/v1/authentication/oidc/callback

  # Note: this will inject the environment variables directly to the pods.
  # In a production environment you should mount these keys from a secret using envFrom.
  # See https://artifacthub.io/packages/helm/dex/dex#values
env:
  GITHUB_CLIENT_ID: "github-client-id"
  GITHUB_CLIENT_SECRET: "github-secret"
- Apply the Dex configuration YAML file using the following command:
helm upgrade -i dex dex/dex --namespace dex --create-namespace --values <dex-configuration.yaml>
Cloud Provider Managed Kubernetes
You can configure IdP on some of the popular KaaS platforms such as Google Kubernetes Engine (GKE), Amazon Elastic Kubernetes Service (EKS), and Azure Kubernetes Service (AKS) as described below.
AWS EKS
To configure OIDC provider with an EKS cluster:
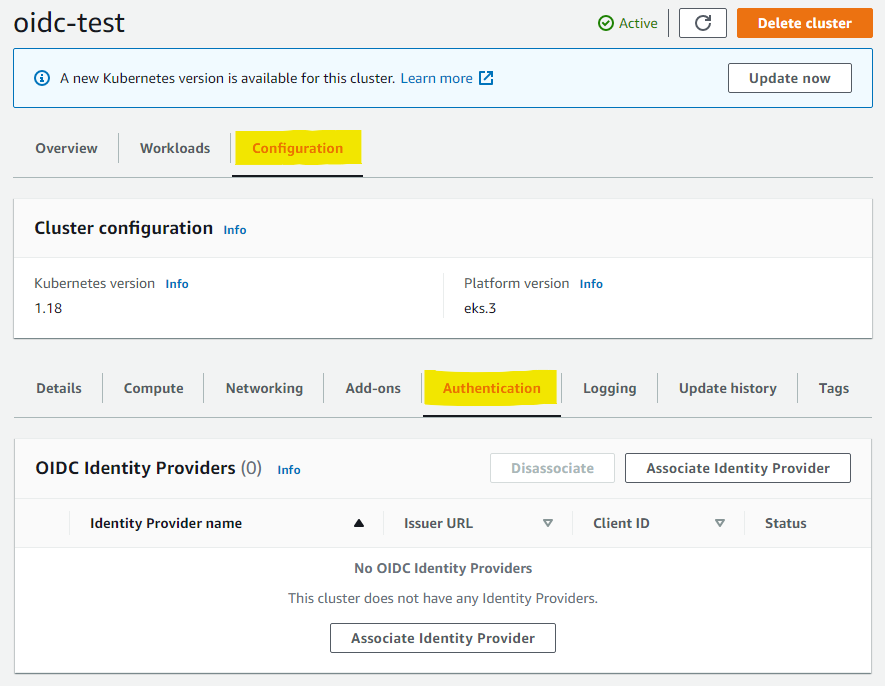
- Open the Amazon EKS console at https://console.aws.amazon.com/eks/home#/clusters.
- In the left navigation pane, select Clusters, and then select the name of your cluster on the Clusters page.
- Click the Associate Identity Provider button within the Configuration > Authentication tab in the cluster configuration console.
-
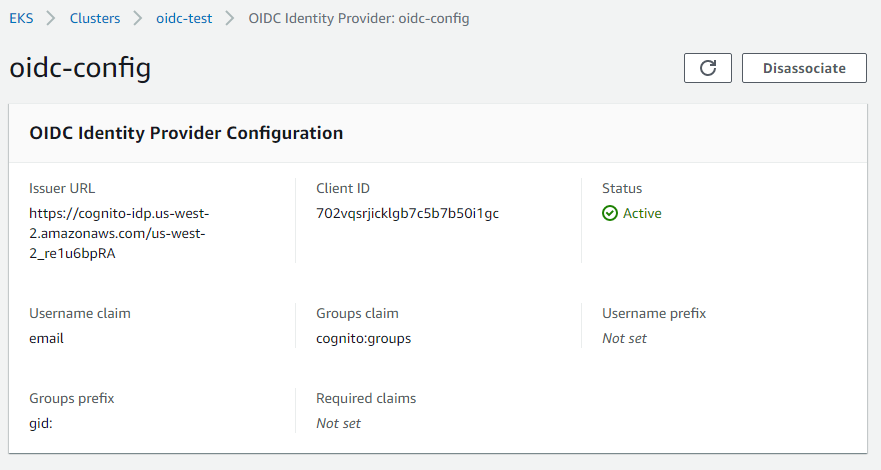
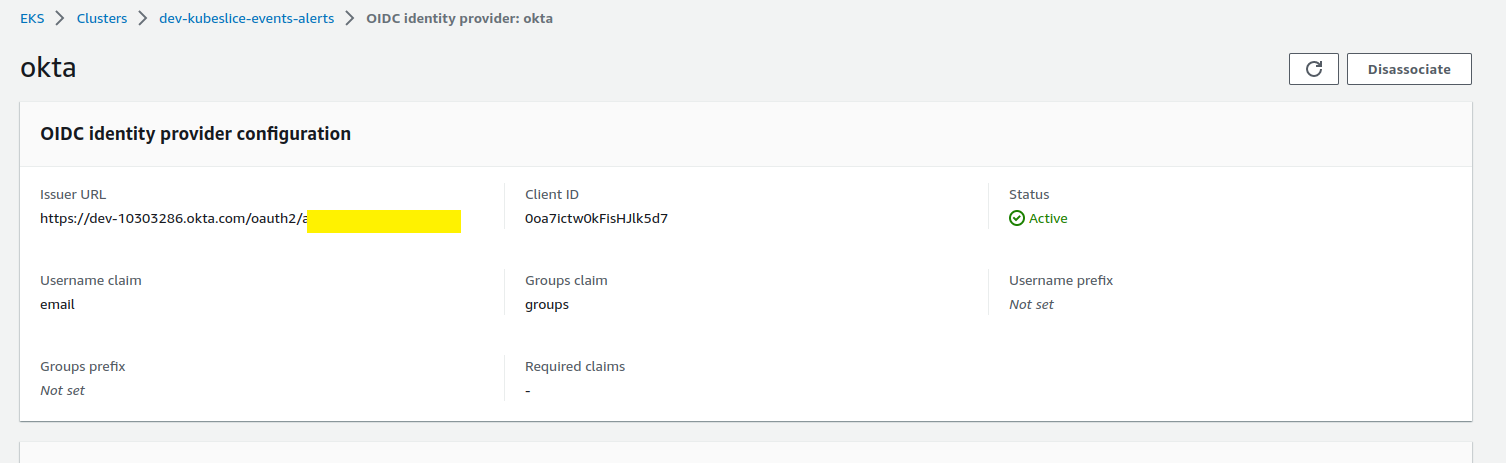
Enter a name of the Identity Provider, Issuer URL, and Client ID. The username claim, Group claim, Username prefix, and Groups prefix are optional.

-
Click Associate to initiate the association of the identity provider with your cluster. This takes about 15-20 minutes to complete.
The following figure illustrates the OIDC identity provider configuration for the above values.
The following figure illustrates the Okta identity Provider configuration details.
For more information, see Creating an IAM OIDC provider for EKS Cluster.
Google GKE
If you want to use OIDC with third-party identity providers, use the Google Cloud CLI to enable identity service for GKE on new or existing clusters. For more information, see Enable Identity Service for GKE on a Cluster.
Enable the Identity Service for GKE on an Existing Cluster
Enable the identity service for GKE on an existing cluster using the following command:
gcloud container clusters update <CLUSTER_NAME> --enable-identity-service
Replace the <CLUSTER_NAME> with the name of your cluster.
Enable the Identity Service for GKE on a New Cluster
Configure the identity service for GKE parameters by downloading and modifying the default ClientConfig.
-
Download the default ClientConfig:
kubectl get clientconfig default -n kube-public -o yaml > client-config.yaml -
Update the
spec.authenticationsection with your preferred settings: The following is an exampleclient-config.yamlfile to enable Google IdP.apiVersion: authentication.gke.io/v2alpha1
kind: ClientConfig
metadata:
creationTimestamp: "2023-09-28T14:20:23Z"
generation: 1
name: default
namespace: kube-public
resourceVersion: "19071"
uid: 2f7bf78f-783b-4d5f-b111-aefede660eda
spec:
certificateAuthorityData: LS0tLS1CRUdJTiBDRVJUSUZJQ0FURS0tLS0tCk1JSUVMRENDQXBTZ0F3SUJBZ0lRWEdHeDlCSSs3U3RSazJ4cTVWZVpFakFOQmdrcWhraUc5dzBCQVFzRkFEQXYKTVMwd0t3WURWUVFERXlSbU56QTRabU0zTVMwMllUTXhMVFExTlRJdFlXRmhPQzB6T0RrNVl6STBPREZtT1RndwpJQmNOTWpNd09USTRNVEl6TXpFMVdoZ1BNakExTXpBNU1qQXhNek16TVRWYU1DOHhMVEFyQmdOVkJBTVRKR1kzCk1EaG1ZemN4TFRaaE16RXRORFUxTWkxaFlXRTRMVE00T1Rsak1qUTRNV1k1T0RDQ0FhSXdEUVlKS29aSWh2Y04KQVFFQkJRQURnZ0dQQURDQ0FZb0NnZ0dCQUpiRUxNQTZ3WDBhb3ZjOXhJVU80YzJjTTRpWjFxSHJoakhDaTlIMgpCR2w5NmZEdmR1bHZzNnBHVXIrV0k2Tkw5SG1DYnlSbkNocU5VR1Z2cVZwajdmejBKYVpidVIxNnYrM1VFem5iCkV5KzR5ckVtWHBsNFlkSldQT0RsMXdZbUZQOFNmdGlhUGkyOUNyY2ZMUXZjcVFEN0QrSzhycFlTKzcvcVJ6a2QKMlVML2huVTBkem0xVjZXS0hMNWRrbEpZUEtydml5OXFVaTN0Y2VBTlY3YlIyNHRaTlZxK3ZNZGdybFo2bVhyOQpQLysrRkxiejM3dVp5UEVNbGV2K0JwNGplSXduZm1vbjJnQUdqNWV0c1VSSnR3UUlZd1k2N00vL1JudnQwU2ZwCkwwU2ZwQ1lDUUNWUjhzZ1RzV1hSQVFtbTl4NUlSblovaXYzN2VJcWRyYzZrdi9yRmkzWjZuMHlZYy9qS25CZnMKNHBwbEFleUpqclo2bXh6WlJuTi9nUEkxTzZGMjFSZVJ4bGJQZEhabjhKWHBPMmJPb0haYXhwQmpOUml5Z2FQOQorRDBhbHNxU24rczFJUHBCSEVnUFpvY3lpRklUQ3hsOHdYaGJEYlExSDdKOEU1aVJvN0RIWVAva1N4QytmZnByCmRSY2JGaDhPY1FWRW9DREZLenNDNDg1T01RSURBUUFCbzBJd1FEQU9CZ05WSFE4QkFmOEVCQU1DQWdRd0R3WUQKVlIwVEFRSC9CQVV3QXdFQi96QWRCZ05WSFE0RUZnUVVCQmZqK29ROTBvQml2aXVpeDdFbStnK0p1ejh3RFFZSgpLb1pJaHZjTkFRRUxCUUFEZ2dHQkFBcjlkcnlvZ25ZT2FCVUs5a3RCMjc1SE0xYWxlNXpiMjY5cjhlYzdZWFRVClI2aFNxc1M2MklXa0FIYUpzdy92Z0ZXZ3psQzdmbUVLbDIxZXhaM2tHc2YxbjRLOXN6TGZzQ2RSYjRXWG5ybmwKb2NpeCtTa2E1THR5OFVZWmU4cWttcDhxUDk3eHdmUGowMEpzMWthSmZJdFRJMHdrNFZMQlgyQjNTdVFqWEo5MQp0Skk4clFWczdydE1FT3FVL3ppRmRLWU51ZDAxQm5GQUpYNzdaYmZXU2s4d1dQbTZQZDdyU3lnOUVlaWlXUmFUCkQrZU5QTG5wbDdEZVhYS09kNFVtTkprNWdOZlROMlc2NE1CSzZrZkpwQ0c3SUdCT3JUZ2tKQUgvRVhGRnFaNkYKckJGc002QmUzVXYwc3FTMlVuZEtkVTlXRVR4bHhydTJ6M05SUDV1OFJoTEhiZFhrVUQ4NDQ4N2M3TnhFVVEyNApOK2R5SlVMVzcySmNNaTZ3M241Tmc1ZTFyNnM1VEhZbzdST3RWZTdncndGT2JYUE9aTTdEQWdhbGZXNjBoaDhhCmdZU2xLOUJZclpNZmEzZ1VFeUx0N29wMmsyWGd6K0FHZUhrNGpYNWtSNTJ0UWUrQUNjeFJIVzdVL0NVcENOUnoKd0MraWJjZGVKMWJvTjRaM09zeU5nQT09Ci0tLS0tRU5EIENFUlRJRklDQVRFLS0tLS0K
internalServer: ""
name: gke-controller
server: https://34.42.243.133:443
authentication:
- name: oidc
oidc:
clientID: <client-id>.apps.googleusercontent.com
issuerURI: https://accounts.google.com
cloudConsoleRedirectURI: https://console.cloud.google.com/kubernetes/oidc
scopes: 'openid, email'
userClaim: email
groupsClaim: groups
The following is an example client-config.yaml file to enable Okta IdP.
apiVersion: authentication.gke.io/v2alpha1
kind: ClientConfig
metadata:
  creationTimestamp: "2022-12-05T13:39:49Z"
  generation: 1
  name: default
  namespace: kube-public
  resourceVersion: "674835"
  uid: a6508e6f-1319-492f-bfb6-193a638e9aff
spec:
  certificateAuthorityData: LS0tLS1CRUdJTiBDRVJUSUZJQ0FURS0tLS0tCk1JSUVMRENDQXBTZ0F3SUJBZ0lRY3pkd0NETjM3UStoRFpJaExEL2tCekFOQmdrcWhraUc5dzBCQVFzRkFEQXYKTVMwd0t3WURWUVFERXlSbE16Vmtaamt3WlMwNVpESmtMVFJpTWpjdFlXVXdaUzFtTW1ReU5HRXdNbVV3TURndwpJQmNOTWpJeE1qQTBNVFl4T0RBeFdoZ1BNakExTWpFeE1qWXhOekU0TURGYU1DOHhMVEFyQmdOVkJBTVRKR1V6Ck5XUm1PVEJsTFRsa01tUXROR0l5TnkxaFpUQmxMV1l5WkRJMFlUQXlaVEF3T0RDQ0FhSXdEUVlKS29aSWh2Y04KQVFFQkJRQURnZ0dQQURDQ0FZb0NnZ0dCQU9MNXoySlVoWkE4aVIrejloM0VFcEdCN3RjVnJGejlLNFhQa0c3aApPeGQrQm0yeUxmOHlvNHUyWkhib3haOHZhY0VPallhR0I0UTVDSnprOERtQW1sZExmenFEQXN2MjhLS21NRkFaCjNJL3BuSngzV2drN1BZM2YraEowM1Yyd0p6dDhDS3QwZ2ZObEVXZWRIcUR5TUlIUE1wV2NNRlBqUlU0bDU0WEgKLzJEUC9pVkZ6Wms1NVh5U2dhREU3STd0TDhSc0VXZXREQXJ5dXZWN3FkOFVJWHQwZmIxZGNSVXlOay9WcWdJaQpGZmc4TzF3d29MSkhlODBSNis0cnJlZEoxMUl0K0JwYXRieDRxcmFRTkdFbHMzRm1NSDRUSTVmTE4rTXNodGhyCkxZeldlcjlSQmllVm9zNStNS2R6dUxqdzd6Y0ZHNTR2N3R1Zk5ZOWZ3cFNJMDJvVnZ3aGRXVDByYTJiMUpybGgKaE9CUU5ZM3YyZ3BiTkFObjBDZmhFekE5YVRvS0psMThWbldaSVRkclRWbkV1NS8zbUwwQ0g4NkI2VThGTVU0MwpjMElMUHBLR2YwOUUrMkRLVW12dEZtUEFtK2lBVDJiS1hkaVhZQ1hBelVYRnJTSnA4OWkvcXN6eXVyVEFTejkzClhwK3RDQ0w1azlTMFBTZlM5RUlyUlVQc1pRSURBUUFCbzBJd1FEQU9CZ05WSFE4QkFmOEVCQU1DQWdRd0R3WUQKVlIwVEFRSC9CQVV3QXdFQi96QWRCZ05WSFE0RUZnUVVLNmpXYWFwSlBmZ1R3MUhER0h3L2dHNG5aOUl3RFFZSgpLb1pJaHZjTkFRRUxCUUFEZ2dHQkFCd09yWlJnb3F2VklQcWlXY0dma1lHSW9OdjNFSmZuNGxRb2hYRFpFRWpSCjdPbTduUGFSaXhMVmFWSHk2cUc1Z29aUTUwMlJRSlVpM1hJSHM2TXZHb1ZOejV2NGE3V0hRUDNtN2JLZXh5UzYKdWFWWHNaSUJFV3hudGt2SGk5VDB0RDdIOXlmSVhnaEpVakJ6S2wvUkh6OWp1cU5qeG9ySUxvU2RjYzVBQkgyTApOZlpsT0w0ZmVhOEgxYmNldGpETCtTMWNxUks5THpYeGEwYllmWEtKbGVsSnEyL24vbDRQKzFVMXU5RFZCRHlpCmU1Q2RMYVRIS2laU2h3bmFyQjZsb2NhTERKMjlsLzNCSzE2VVFhVXB4UCs3WE55b3FwY2tiaTFZaXdUSHRyNkgKZUFyUzdkT1NyeXNzRkFiUzlJcnBNQ1pIcUFQK3MyTXJhd1ZTVkFSL1lVZCtIbktsMHB4NDNUbzAvbmRnbHU5ZApOdjJtR3FHK3Uvb0hLZ2dlNEgvTUgwZVd5M1FqS3hrRmNwQ2I4QVc3ZDc5bi9wSXlVeFZqT1kzQ2dnd0J6d0JrClI2bjJrRW53QlpRTU5za3daeVpTQVVFNVVxV2pTc1U0cHJKMmJXbWZMYUhSN1BUWXZaMmtUWHg0S2g4YlR2dEwKczRVcXQ5MnhqZFBGZGt3ZHZpUXo0Zz09Ci0tLS0tRU5EIENFUlRJRklDQVRFLS0tLS0K
  internalServer: ""
  name: kubeslice-events-alerts
  server: https://10.x.x.169:443 # The server name and the port.
  authentication:
    - name: okta-oidc
      oidc:
        clientID: <client_id>
        issuerURI: https://server.okta.com/oauth2/aus7icxxxxxxtT5d7
        scopes: "openid, email, offline_access"
        userClaim: email
        groupsClaim: groups
status: {}
The following is an example client-config.yaml file to enable Github IdP.
apiVersion: authentication.gke.io/v2alpha1
kind: ClientConfig
metadata:
  creationTimestamp: "2022-12-05T13:39:49Z"
  generation: 1
  name: default
  namespace: kube-public
  resourceVersion: "674835"
  uid: a6508e6f-1319-492f-bfb6-193a638e9aff
spec:
  certificateAuthorityData: LS0tLS1CRUdJTiBDRVJUSUZJQ0FURS0tLS0tCk1JSUVMRENDQXBTZ0F3SUJBZ0lRY3pkd0NETjM3UStoRFpJaExEL2tCekFOQmdrcWhraUc5dzBCQVFzRkFEQXYKTVMwd0t3WURWUVFERXlSbE16Vmtaamt3WlMwNVpESmtMVFJpTWpjdFlXVXdaUzFtTW1ReU5HRXdNbVV3TURndwpJQmNOTWpJeE1qQTBNVFl4T0RBeFdoZ1BNakExTWpFeE1qWXhOekU0TURGYU1DOHhMVEFyQmdOVkJBTVRKR1V6Ck5XUm1PVEJsTFRsa01tUXROR0l5TnkxaFpUQmxMV1l5WkRJMFlUQXlaVEF3T0RDQ0FhSXdEUVlKS29aSWh2Y04KQVFFQkJRQURnZ0dQQURDQ0FZb0NnZ0dCQU9MNXoySlVoWkE4aVIrejloM0VFcEdCN3RjVnJGejlLNFhQa0c3aApPeGQrQm0yeUxmOHlvNHUyWkhib3haOHZhY0VPallhR0I0UTVDSnprOERtQW1sZExmenFEQXN2MjhLS21NRkFaCjNJL3BuSngzV2drN1BZM2YraEowM1Yyd0p6dDhDS3QwZ2ZObEVXZWRIcUR5TUlIUE1wV2NNRlBqUlU0bDU0WEgKLzJEUC9pVkZ6Wms1NVh5U2dhREU3STd0TDhSc0VXZXREQXJ5dXZWN3FkOFVJWHQwZmIxZGNSVXlOay9WcWdJaQpGZmc4TzF3d29MSkhlODBSNis0cnJlZEoxMUl0K0JwYXRieDRxcmFRTkdFbHMzRm1NSDRUSTVmTE4rTXNodGhyCkxZeldlcjlSQmllVm9zNStNS2R6dUxqdzd6Y0ZHNTR2N3R1Zk5ZOWZ3cFNJMDJvVnZ3aGRXVDByYTJiMUpybGgKaE9CUU5ZM3YyZ3BiTkFObjBDZmhFekE5YVRvS0psMThWbldaSVRkclRWbkV1NS8zbUwwQ0g4NkI2VThGTVU0MwpjMElMUHBLR2YwOUUrMkRLVW12dEZtUEFtK2lBVDJiS1hkaVhZQ1hBelVYRnJTSnA4OWkvcXN6eXVyVEFTejkzClhwK3RDQ0w1azlTMFBTZlM5RUlyUlVQc1pRSURBUUFCbzBJd1FEQU9CZ05WSFE4QkFmOEVCQU1DQWdRd0R3WUQKVlIwVEFRSC9CQVV3QXdFQi96QWRCZ05WSFE0RUZnUVVLNmpXYWFwSlBmZ1R3MUhER0h3L2dHNG5aOUl3RFFZSgpLb1pJaHZjTkFRRUxCUUFEZ2dHQkFCd09yWlJnb3F2VklQcWlXY0dma1lHSW9OdjNFSmZuNGxRb2hYRFpFRWpSCjdPbTduUGFSaXhMVmFWSHk2cUc1Z29aUTUwMlJRSlVpM1hJSHM2TXZHb1ZOejV2NGE3V0hRUDNtN2JLZXh5UzYKdWFWWHNaSUJFV3hudGt2SGk5VDB0RDdIOXlmSVhnaEpVakJ6S2wvUkh6OWp1cU5qeG9ySUxvU2RjYzVBQkgyTApOZlpsT0w0ZmVhOEgxYmNldGpETCtTMWNxUks5THpYeGEwYllmWEtKbGVsSnEyL24vbDRQKzFVMXU5RFZCRHlpCmU1Q2RMYVRIS2laU2h3bmFyQjZsb2NhTERKMjlsLzNCSzE2VVFhVXB4UCs3WE55b3FwY2tiaTFZaXdUSHRyNkgKZUFyUzdkT1NyeXNzRkFiUzlJcnBNQ1pIcUFQK3MyTXJhd1ZTVkFSL1lVZCtIbktsMHB4NDNUbzAvbmRnbHU5ZApOdjJtR3FHK3Uvb0hLZ2dlNEgvTUgwZVd5M1FqS3hrRmNwQ2I4QVc3ZDc5bi9wSXlVeFZqT1kzQ2dnd0J6d0JrClI2bjJrRW53QlpRTU5za3daeVpTQVVFNVVxV2pTc1U0cHJKMmJXbWZMYUhSN1BUWXZaMmtUWHg0S2g4YlR2dEwKczRVcXQ5MnhqZFBGZGt3ZHZpUXo0Zz09Ci0tLS0tRU5EIENFUlRJRklDQVRFLS0tLS0K
  internalServer: ""
  name: kubeslice-events-alerts
  server: https://10.x.x.169:443 # The server name and the port.
  authentication:
    - name: okta-oidc
      oidc:
        clientID: <client_id>
        issuerURI: https://dex.server.kubeslice.com/oauth2/aus7icxxxxxxtT5d7
        scopes: "openid, email, groups"
        userClaim: email
        groupsClaim: groups
status: {}
- Apply the updated configuration YAML file using the following command:
kubectl apply -f client-config.yaml
Microsoft Azure
To configure OIDC provider with an AKS cluster, see Create an AKS Cluster with OIDC Issuer.
OIDC Login Plugin
Install Plugin
After configuring you cluster for OpenID Connect authentication, use the oidc-login krew plugin to authenticate users and access your cluster.
Installing the krew plugin is a prerequisite. Install the krew plugin for Kubectl on your computer if you haven't already.
To install the OIDC Login plugin, use the following command:
kubectl krew install oidic-login
Configure KubeConfig File
Use the following values to configure your KubeConfig file to use OIDC authentication.
apiVersion: v1
kind: Config
current-context: <Context-Name>
contexts:
  - name: <Context-Name>
    context:
      cluster: <Cluster-Name>
      user: oidc # Name of the oidc user
      namespace: kube-system
clusters:
  - name: <Cluster-Name>
    cluster:
      certificate-authority-data: <redacted>
      server: <Kubernetes-server-url>
users:
  - name: oidc
    user:
      exec:
        apiVersion: client.authentication.k8s.io/v1beta1
        args:
          - oidc-login
          - get-token
          - --oidc-issuer-url= <Issuer-URL>
          - --oidc-client-id=<Client-ID>
          - --oidc-client-secret=<Client-Secret>
          - --oidc-extra-scope=openid
          - --oidc-extra-scope=email
        command: kubectl
        interactiveMode: IfAvailable
Access Kubernetes Clusters
kubectl executes oidc-login before calling the Kubernetes APIs. oidc-login automatically opens the browser and you can log in to the provider. After authentication, kubectl gets the token from oidc-login and you can access the cluster.
Use the following command to trigger the authentication flow:
kubectl get pods -n default
You see the list of pods in the default namespace if the authenticated user has access to get pods.
For more information, see Authentication in Kubernetes.
OpenShift OIDC Configuration with Google's IdP
Although the example is on Google IdP, OpenShift supports a variety of IdPs, as shown here.
Configure Google's IdP using the following document:
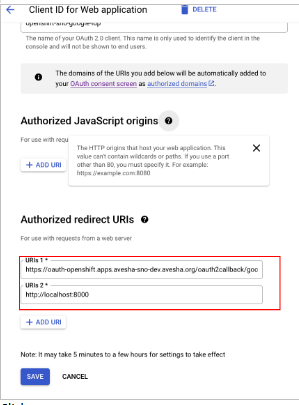
To create an OAuth 2.0 client ID in the console:
-
Go to the Google Cloud Platform Console.
-
From the projects list, select a project or create a new one.
-
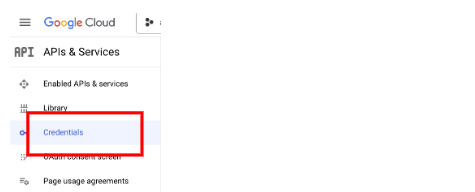
If the APIs & services page isn't already open, navigate to the console left-side menu, and select APIs & services.
-
On the left, click Credentials.
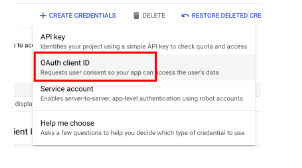
-
Click CREATE CREDENTIALS, then select OAuth client ID.
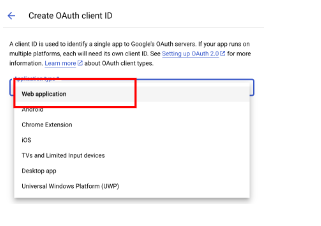
-
Under Create OAuth client ID > select Web application.
-
Get the callback identifier using the OpenShift documentation.
For example, https://oauth-openshift.apps.<cluster_name>.<cluster_domain>/oauth2callback/<idp_provider_name>
-
Click Save.
Configure OpenShift OIDC using Management Console
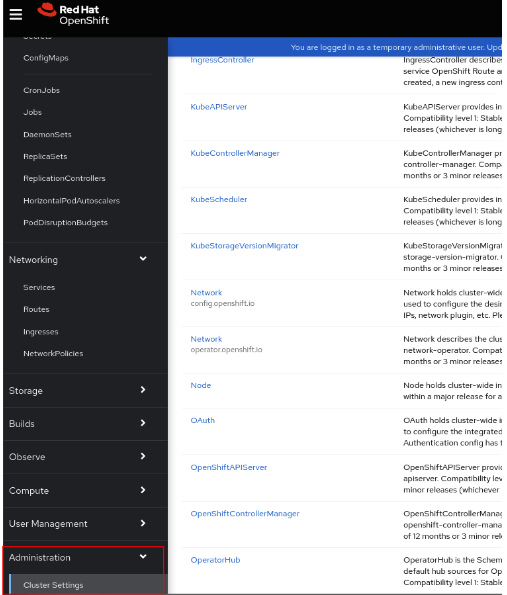
To configure OpenShift OIDC using management console:
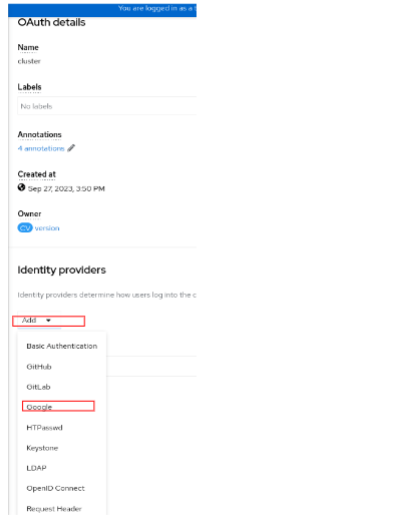
- Navigate to Administration > Cluster Settings.
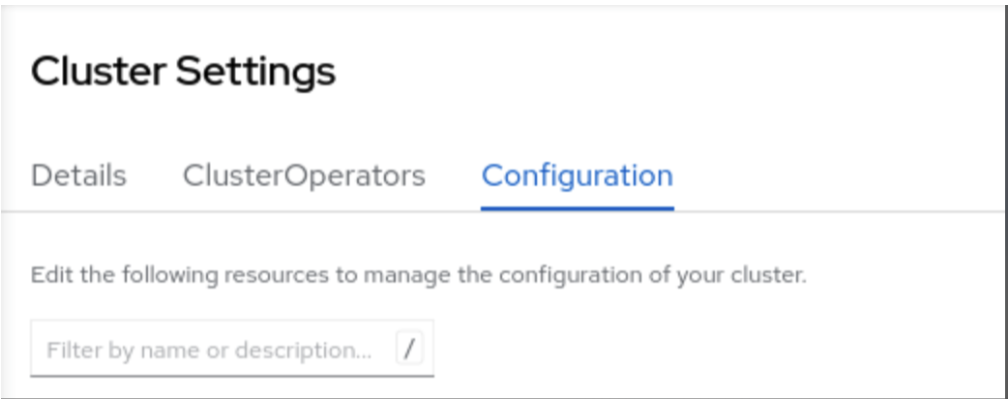
- Click the Configuration tab of the Cluster settings.
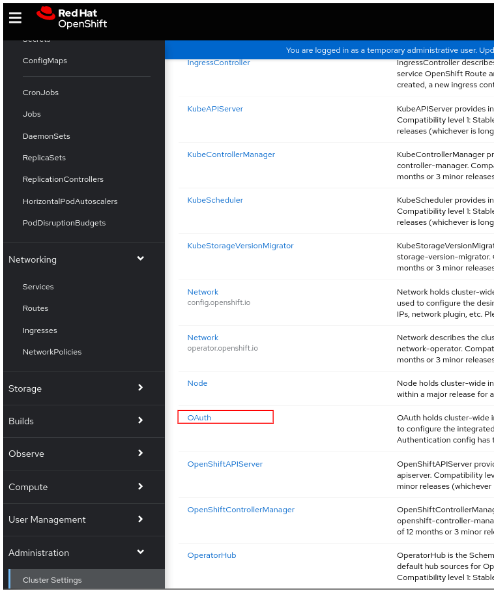
-
Under Configuration tab, click OAuth from the list.
-
Under the Add menu, select Google.
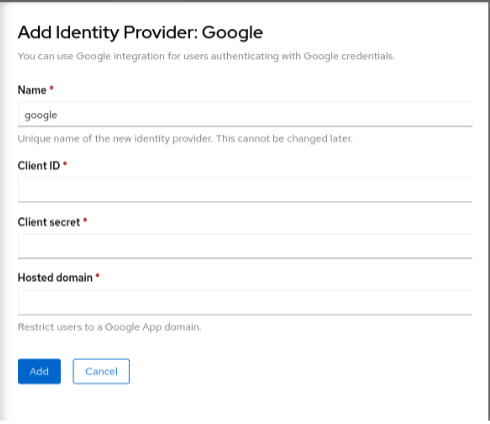
-
Enter the client configuration detail from the Google Oauth Setup.
The following figure shows that the OIDC configured.

-
Authenticate from the management console.

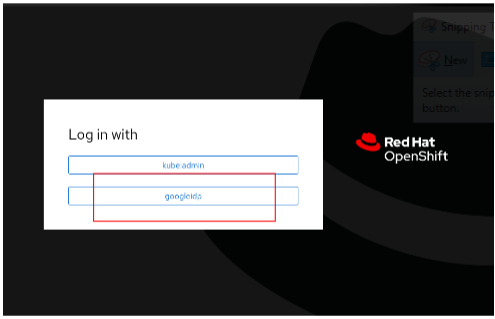
 note
noteAfter authentication, you see a blank page with a link to Display Token.
-
Click Display Token.
-
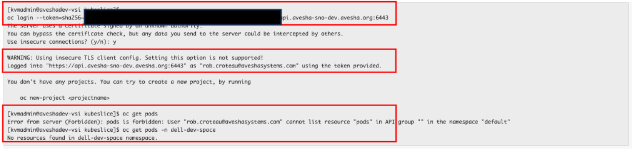
Use the
oc logincommand provided to authenticate to the cluster through the command line.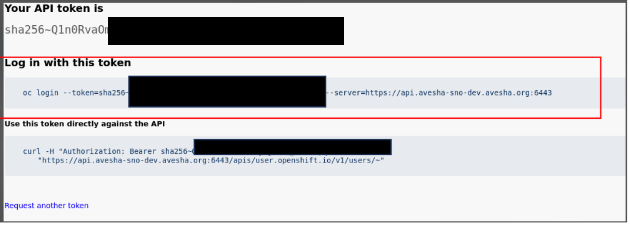
-
Verify access with the above login.