Rancher Deployments
The prerequisites section specifically addresses the requirements for Rancher deployments of KubeSlice. If you are not using Rancher for your KubeSlice installation, you can safely skip this section as it pertains only to Rancher-specific configurations and dependencies. However, if you are utilizing Rancher, it is recommended to review the prerequisites carefully to ensure a seamless integration of KubeSlice with Rancher and to ensure the smooth functioning of your cluster management.
Infrastructure Requirements
KubeSlice Controller
| Cluster Requirements | 1 Kubernetes Cluster |
| Minimum Nodes Required | 1 with a minimum of 2vCPU and 1.25 Gi of RAM |
| Supported Kubernetes Versions | 1.23 and 1.24 |
| Supported Kubernetes Services | Azure Kubernetes Service (AKS), Elastic Kubernetes Service (EKS), Google Kubernetes Engine (GKE), and Rancher Kubernetes Engine (RKE) |
| Required Helm Version | 3.7.0 |
KubeSlice Worker Clusters
| Minimum Clusters Required | 1 Kubernetes Clusters |
| Minimum Nodes or NodePools Required | 2, Each with a minimum of 4 vCPUs and 16 GB of RAM |
| NodePools Reserved for KubeSlice Components | 1 NodePool |
| Cluster Requirements | 1 Kubernetes Cluster, 2 minimum nodes or NodePools each with a minimum of 4 vCPUs & 16 GB of RAM, and 1 NodePool for KubeSlice components |
| Supported Kubernetes Versions | 1.23 and 1.24 |
| Supported Kubernetes Services | Azure Kubernetes Service (AKS), Elastic Kubernetes Service (EKS), Google Kubernetes Engine (GKE), and Rancher Kubernetes Engine (RKE) |
| Required Helm Version | 3.7.0 |
| Required Istio Version | 1.13.3 |
Open the TCP and UDP Ports on the KubeSlice Worker Clusters
The UDP ports should be open on the nodes in the Rancher-managed worker clusters for inter-node communication.
On all the Rancher-managed worker clusters, ensure that the TCP 6443 port and the UDP 30000-33000 ports are opened for inter cluster communication.
Label the KubeSlice Gateway Nodes on the KubeSlice Worker Clusters
If you have multiple node pools on your worker cluster, then you can add a label to each node pool. Labels are useful in managing and scheduling rules for nodes.
Labeling gateway nodes only applies to the worker cluster. You must perform these steps on all the participating worker clusters.
Label Node Pool
To label your node pool from the Rancher UI:
- Log in to the Rancher UI.
- Navigate to the top-left menu, and select the worker cluster.
- Under the Cluster tab, click Nodes.
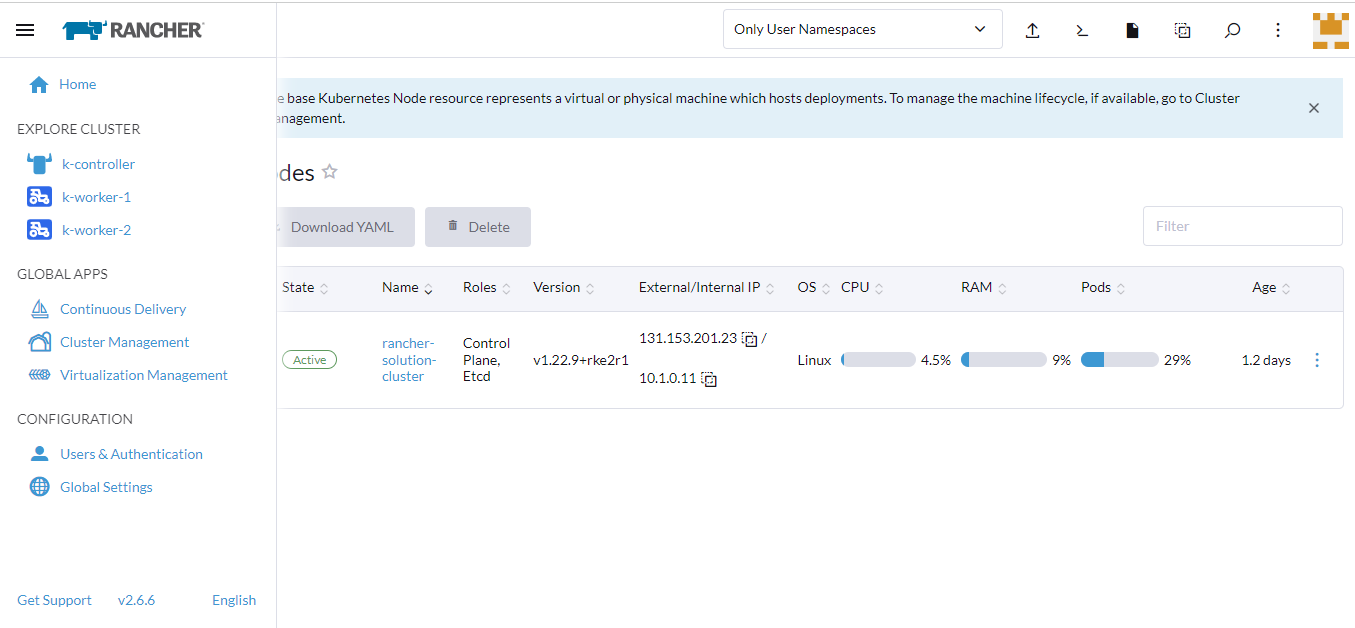
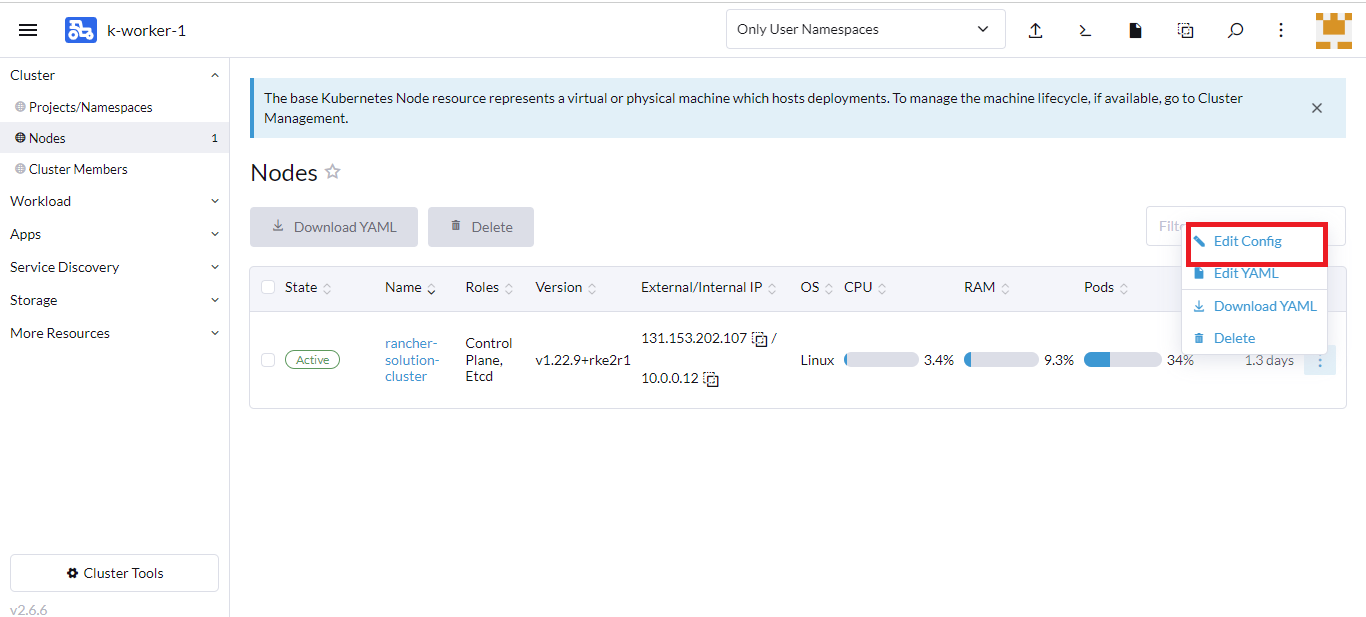
- On the Nodes page, select the node you want to label and click the vertical ellipsis.

- Click Edit Config.
- Click the Labels&Annotations tab.
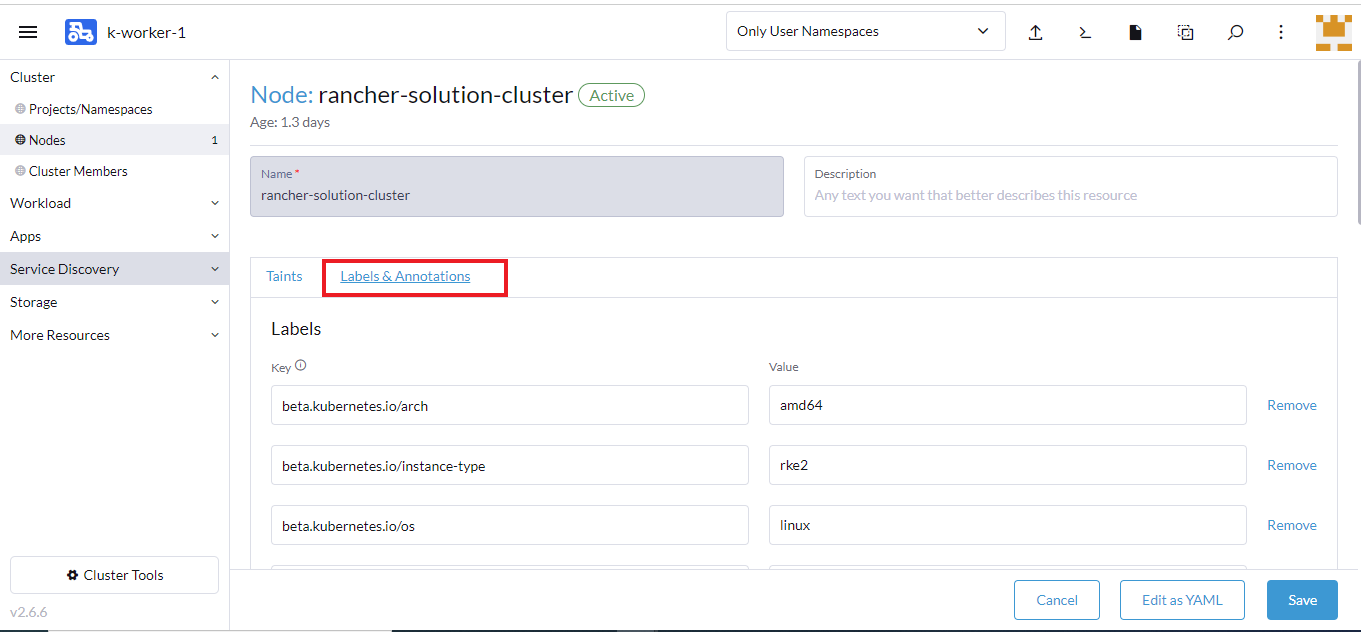
- Under the Labels section, click Add Label and enter these details:
- For Key, enter kubeslice.io/node-type as the value.
- For Value, enter gateway as the value.
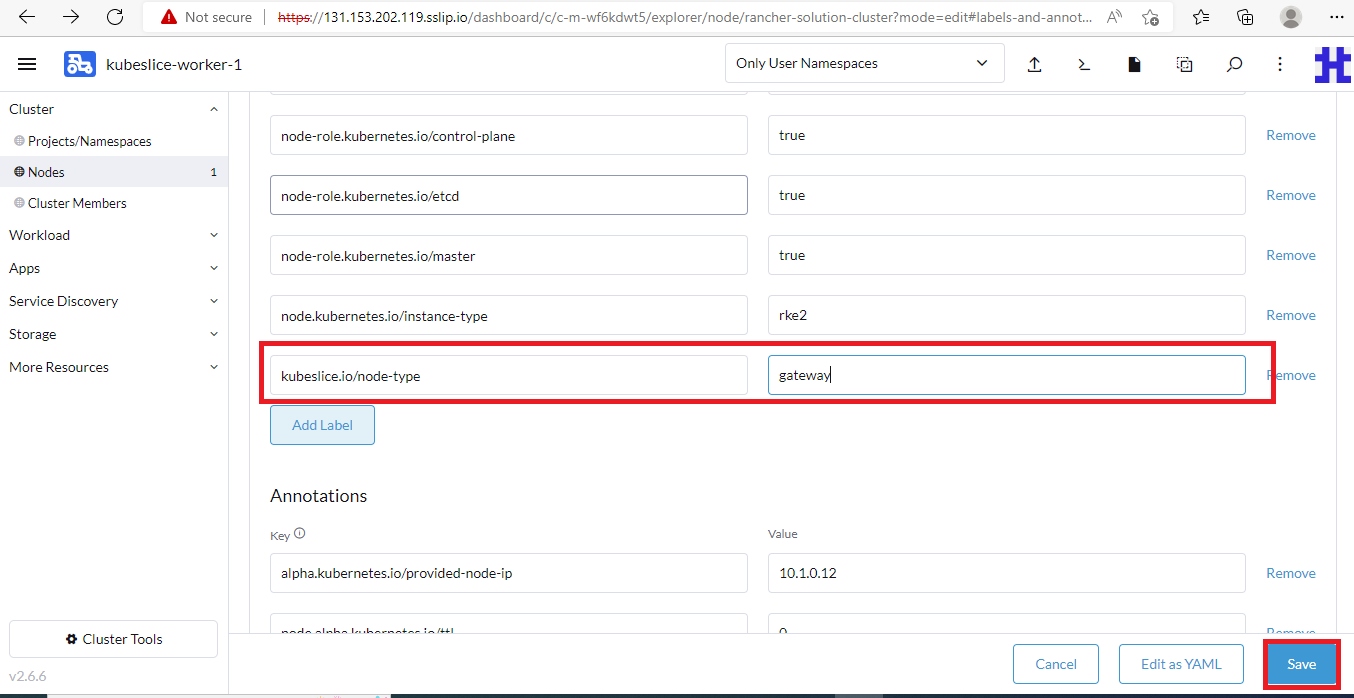
- Click Save.
You have completed labeling the nodepools of your worker cluster.
KubeSlice Controller Cluster
If you are a Rancher Marketplace user, it is important to note that you should not follow external documentation for creating a Rancher workload cluster. Instead, follow the instructions below to create a Rancher workload cluster using Rancher Kubernetes Engine (RKE) specifically for installing the KubeSlice Controller + Manager (referred to henceforth as KubeSlice Controller Cluster) through the Rancher user interface:
-
Log into your Rancher account and navigate to the Cluster Manager by clicking the Global option on the left-hand side of the screen.
-
Click the Add Cluster button to create a new cluster.
-
Select RKE Cluster from the options provided.
-
Provide a name for your cluster and select the desired options for your cluster nodes.
-
Click on the Create button to create your new cluster.
-
Wait for the cluster to be created and then proceed with the installation of the KubeSlice Controller + Manager.
- Do not install the KubeSlice Controller on the Rancher server cluster to avoid authentication conflicts with the Rancher's authentication proxy.
- Make sure the ACE is enabled on the Rancher workload cluster, where you want to deploy the KubeSlice Controller.
- Be sure that the API server endpoint you provide while installing the KubeSlice Controller
does not use the Rancher authentication proxy. Instead use the downstream workload cluster's
API server endpoint. When you enable ACE, you get the downstream workload cluster's API
server endpoint in the
kubeconfigfile.
Enable ACE on the KubeSlice Controller Cluster
KubeSlice Controller must be installed on a cluster only provisioned by Rancher Kubernetes Engine (RKE) with the authorized cluster endpoint (ACE) enabled.
To enable ACE on the Rancher user interface:
-
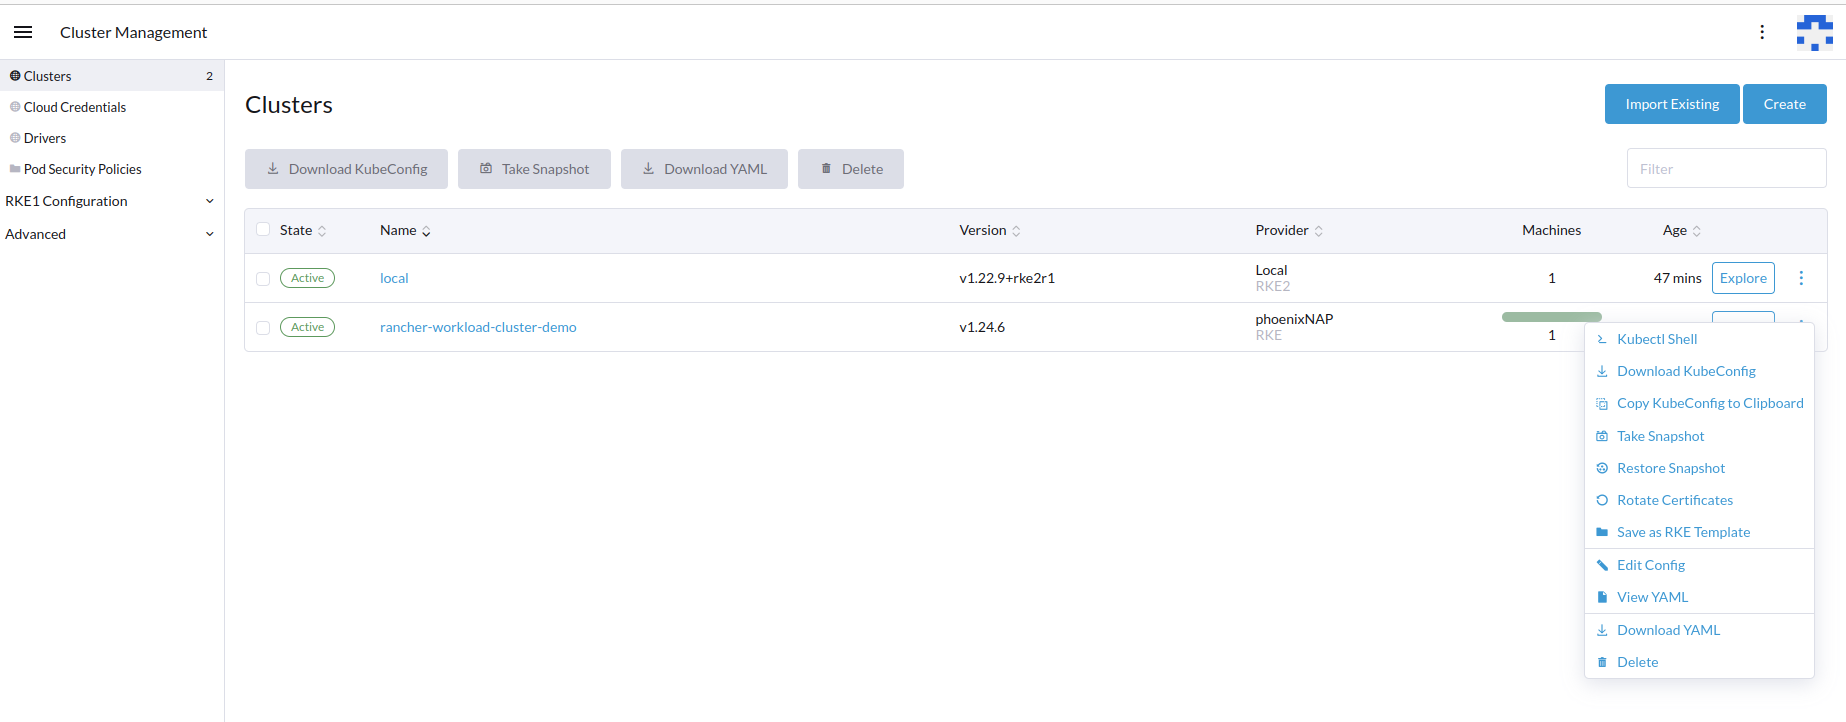
Go to Cluster Management.
-
Select the workload cluster and click its vertical ellipsis.
-
Select Edit Config from the menu.
-
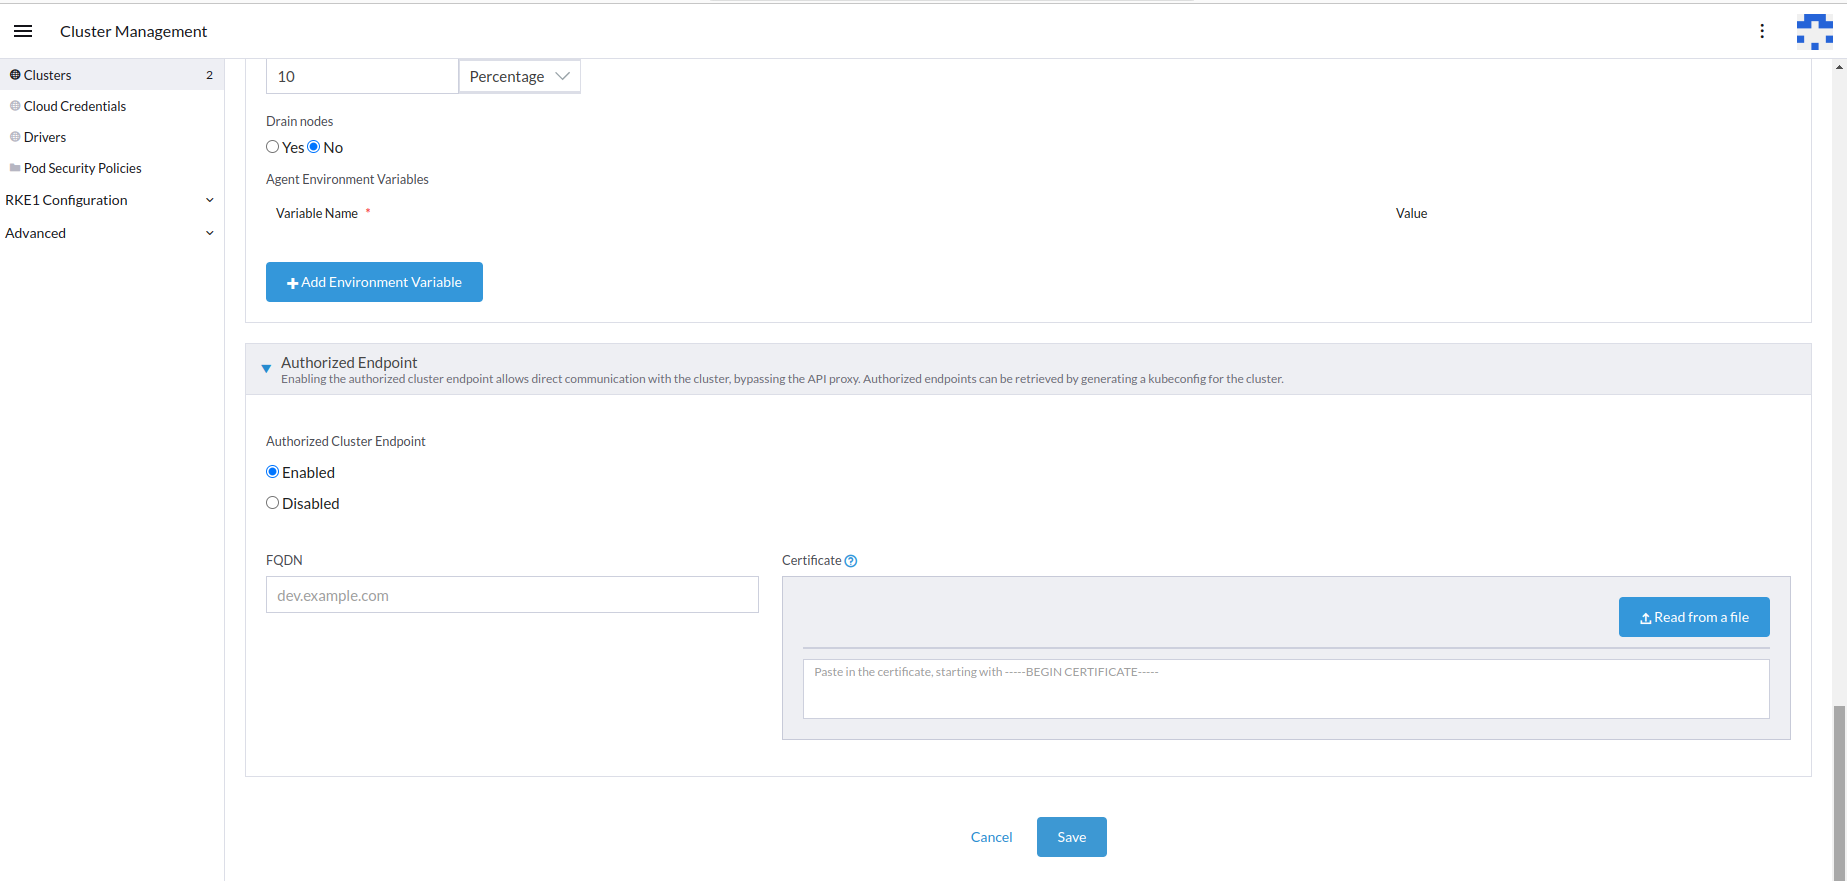
Enable the authorized endpoint.
-
To verify if ACE is enabled, click the workload cluster's vertical ellipsis.
-
From the menu, click View YAML.
-
In the YAML file, look for
localClusterAuthEndpoint, which must beenabled.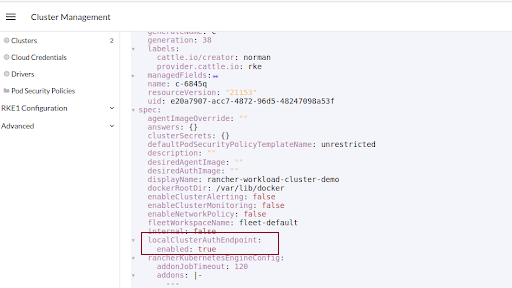
Get the Controller Cluster Endpoint
The Controller Cluster endpoint is required to install the KubeSlice Controller. To get the controller cluster endpoint:
-
Download the kubeconfig file from the Rancher user interface for the KubeSlice Controller cluster using this command:
export KUBECONFIG=<fully qualified path of the kubeconfig file> -
Set up kubectl proxy using the following command:
kubectl proxy --append-server-path -
Go to the web browser and type http://localhost:8001/api/ on the address bar.
-
You see the
serverAddressas shown in this example.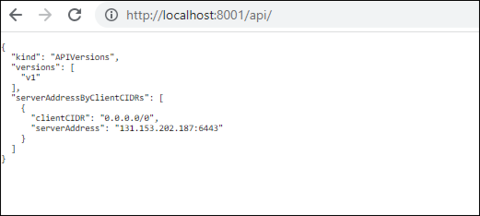
-
To install the KubeSlice Controller, you need to copy the
serverAddress, which is the endpoint of the controller cluster. You will then use this endpoint value to fill in the appropriate field in the values.yaml file during installation.