Azure Active Directory Integration for Single Sign-On
This topic describes how to integrate Azure Active Directory or Microsoft Entra ID with your applications to enable Single Sign-On (SSO).
Overview
Azure Active Directory as Single Sign-On (SSO) is a feature that allows users to authenticate once and get access to multiple applications without needing to log in again for each one. This integration simplifies the user experience by reducing the number of times they need to enter their credentials.
Prerequisites
Before you begin, ensure you have the following:
- Azure Active Directory: Ensure you have an Azure Active Directory (Microsoft Entra ID) instance set up and configured.
- Administrative Access: Ensure you have administrative access to your Azure Active Directory and the applications you want to integrate.
- Smart Scaler Application: Ensure you have the Smart Scaler application set up and running. Supported versions are 2.16.0 and above.
How to Set Up Microsoft Entra ID as SSO
Ensure that your Microsoft Entra ID is properly configured to support SSO.
To set up Microsoft Entra ID as a Single Sign-On solution, follow these steps:
Step 1: Access Microsoft Entra ID
-
Sign in to the Azure portal using your Azure administrator credentials.
-
On the Welcome to Azure page, locate the Manage Microsoft Entra ID tile.
-
Click the View button.
Step 2: Create an Application Registration
-
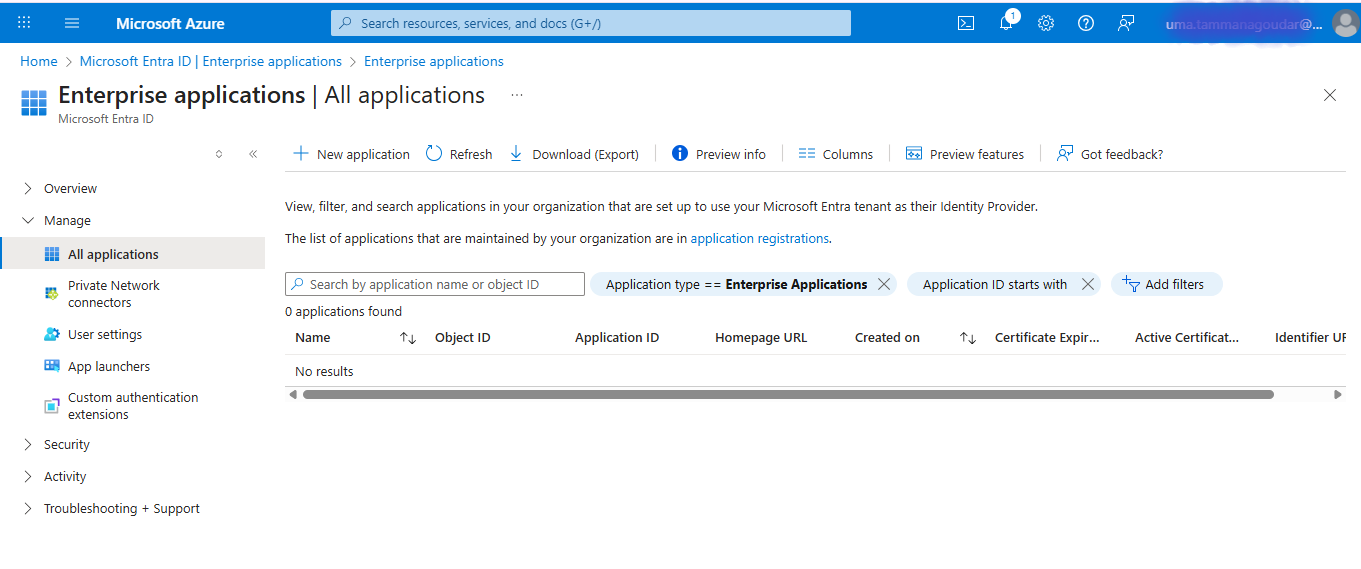
Navigate to Manage > Enterprise applications > All applications in the left-hand menu of the Azure portal.
-
Click the +New application button at the top.
-
On the Browse Microsoft Entra gallery page, click the +Create your own application button on the top.
-
On the Create your own application pane, enter a name for your application (example, Smart Scaler).
-
Select the option Register an application to integrate with Microsoft Entra ID (App you're developing) or Integrate any other application you don't find in the gallery.
-
Click Create to register the application.
After the application is created, you are redirected to the application overview page. The Smart Scaler application is listed under All applications in the Enterprise applications section.
-
Select your newly created application (example, Smart Scaler) from the list of applications in the Enterprise applications section. This takes you to the application overview page where you can manage the application's settings and configurations.
Step 3: Configure Single Sign-On
-
On the application overview page, navigate to Manage > Single sign-on section in the left-hand menu.
-
Click the +Add a single sign-on method button to start configuring SSO for your application.
-
On the Select a single sign-on method page, select OAuth or OpenID Connect as the SSO method.
This allows you to configure the application to use Azure AD for authentication. Follow the prompts to complete the configuration, including providing any necessary redirect URIs and scopes.
-
(Optional) Click Add a certificate or secret next to Client credentials to generate client secret. If you already have a client secret, you can skip this step.
If you don't have a client secret, follow these steps:
- Click Certificates & secrets in the left-hand menu.
- Under the Client secrets section, click + New client secret.
- Enter a description for the secret and select an expiration period.
- Click Add to generate the secret.
- Copy the generated secret value and paste it in the Client Secret field in your application configuration.
-
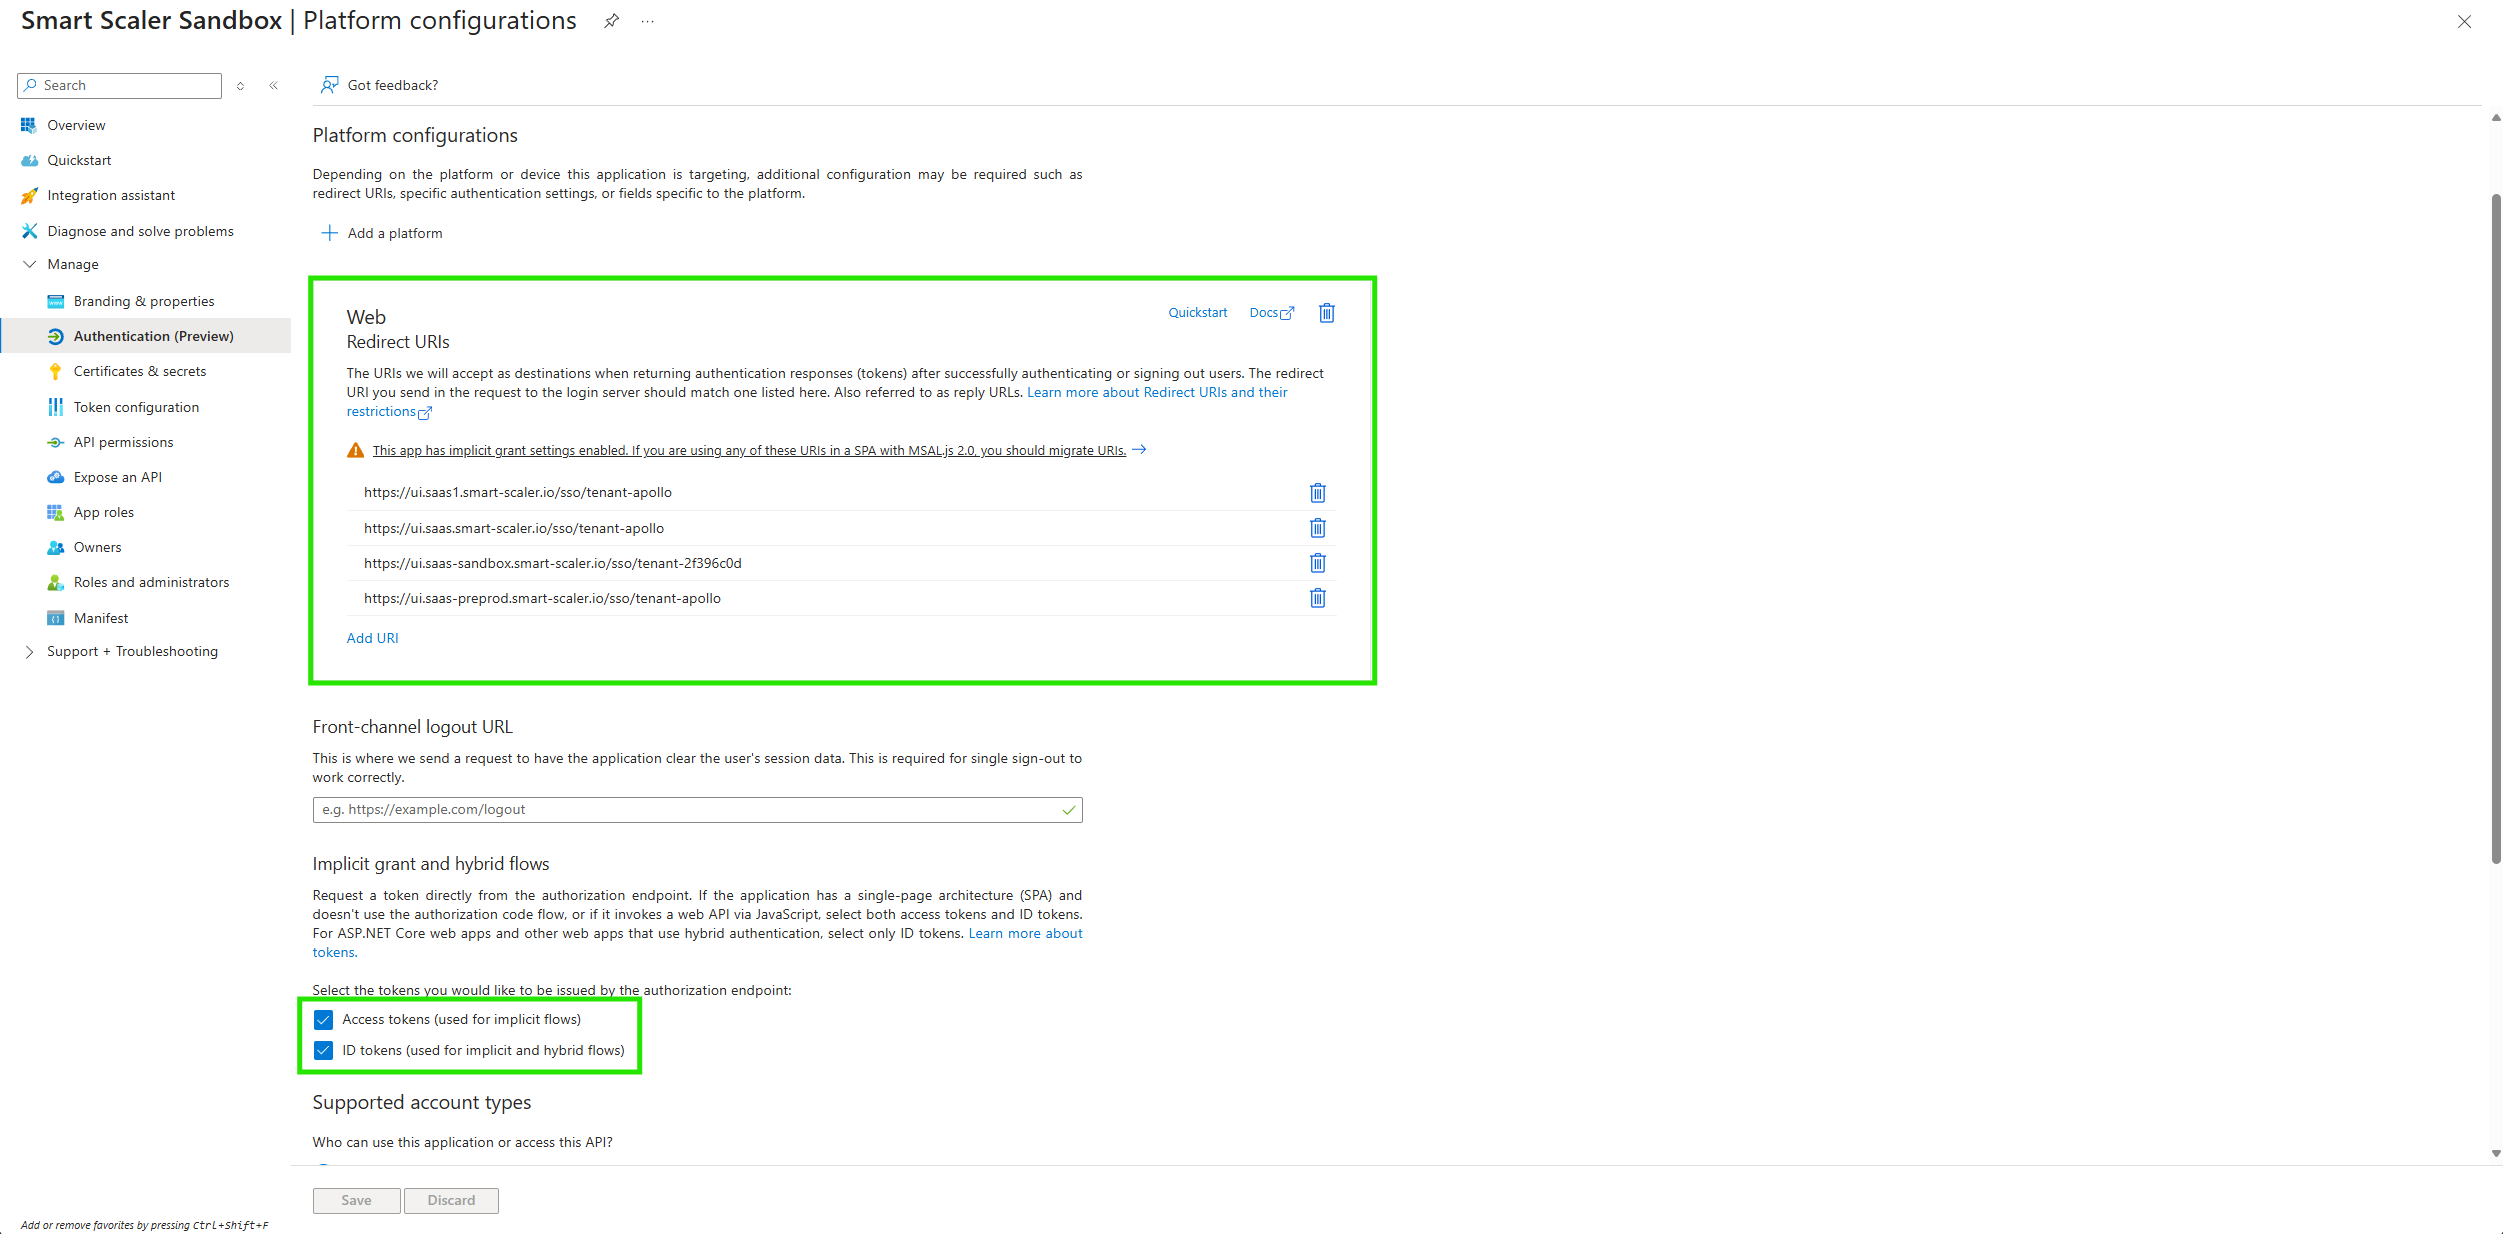
If the client secret was not generated, navigate to the Authentication section in the left-hand menu of the application settings.
-
Under Implicit grant and hybrid flows, ensure that you enable the following options:
- ID tokens: This allows your application to receive ID tokens from Azure AD.
- Access tokens: This allows your application to receive access tokens for API calls.
-
If you are using OAuth 2.0, make sure to configure the redirect URIs correctly. You can add multiple redirect URIs if needed.
-
After making changes, click Save to apply the settings.
noteIf you are using OpenID Connect, you may need to configure additional settings such as scopes and claims based on your application's requirements.
-
-
If you are using OAuth or OpenID Connect, copy the Application (Client) ID and Client Secret for use in your application configuration.
-
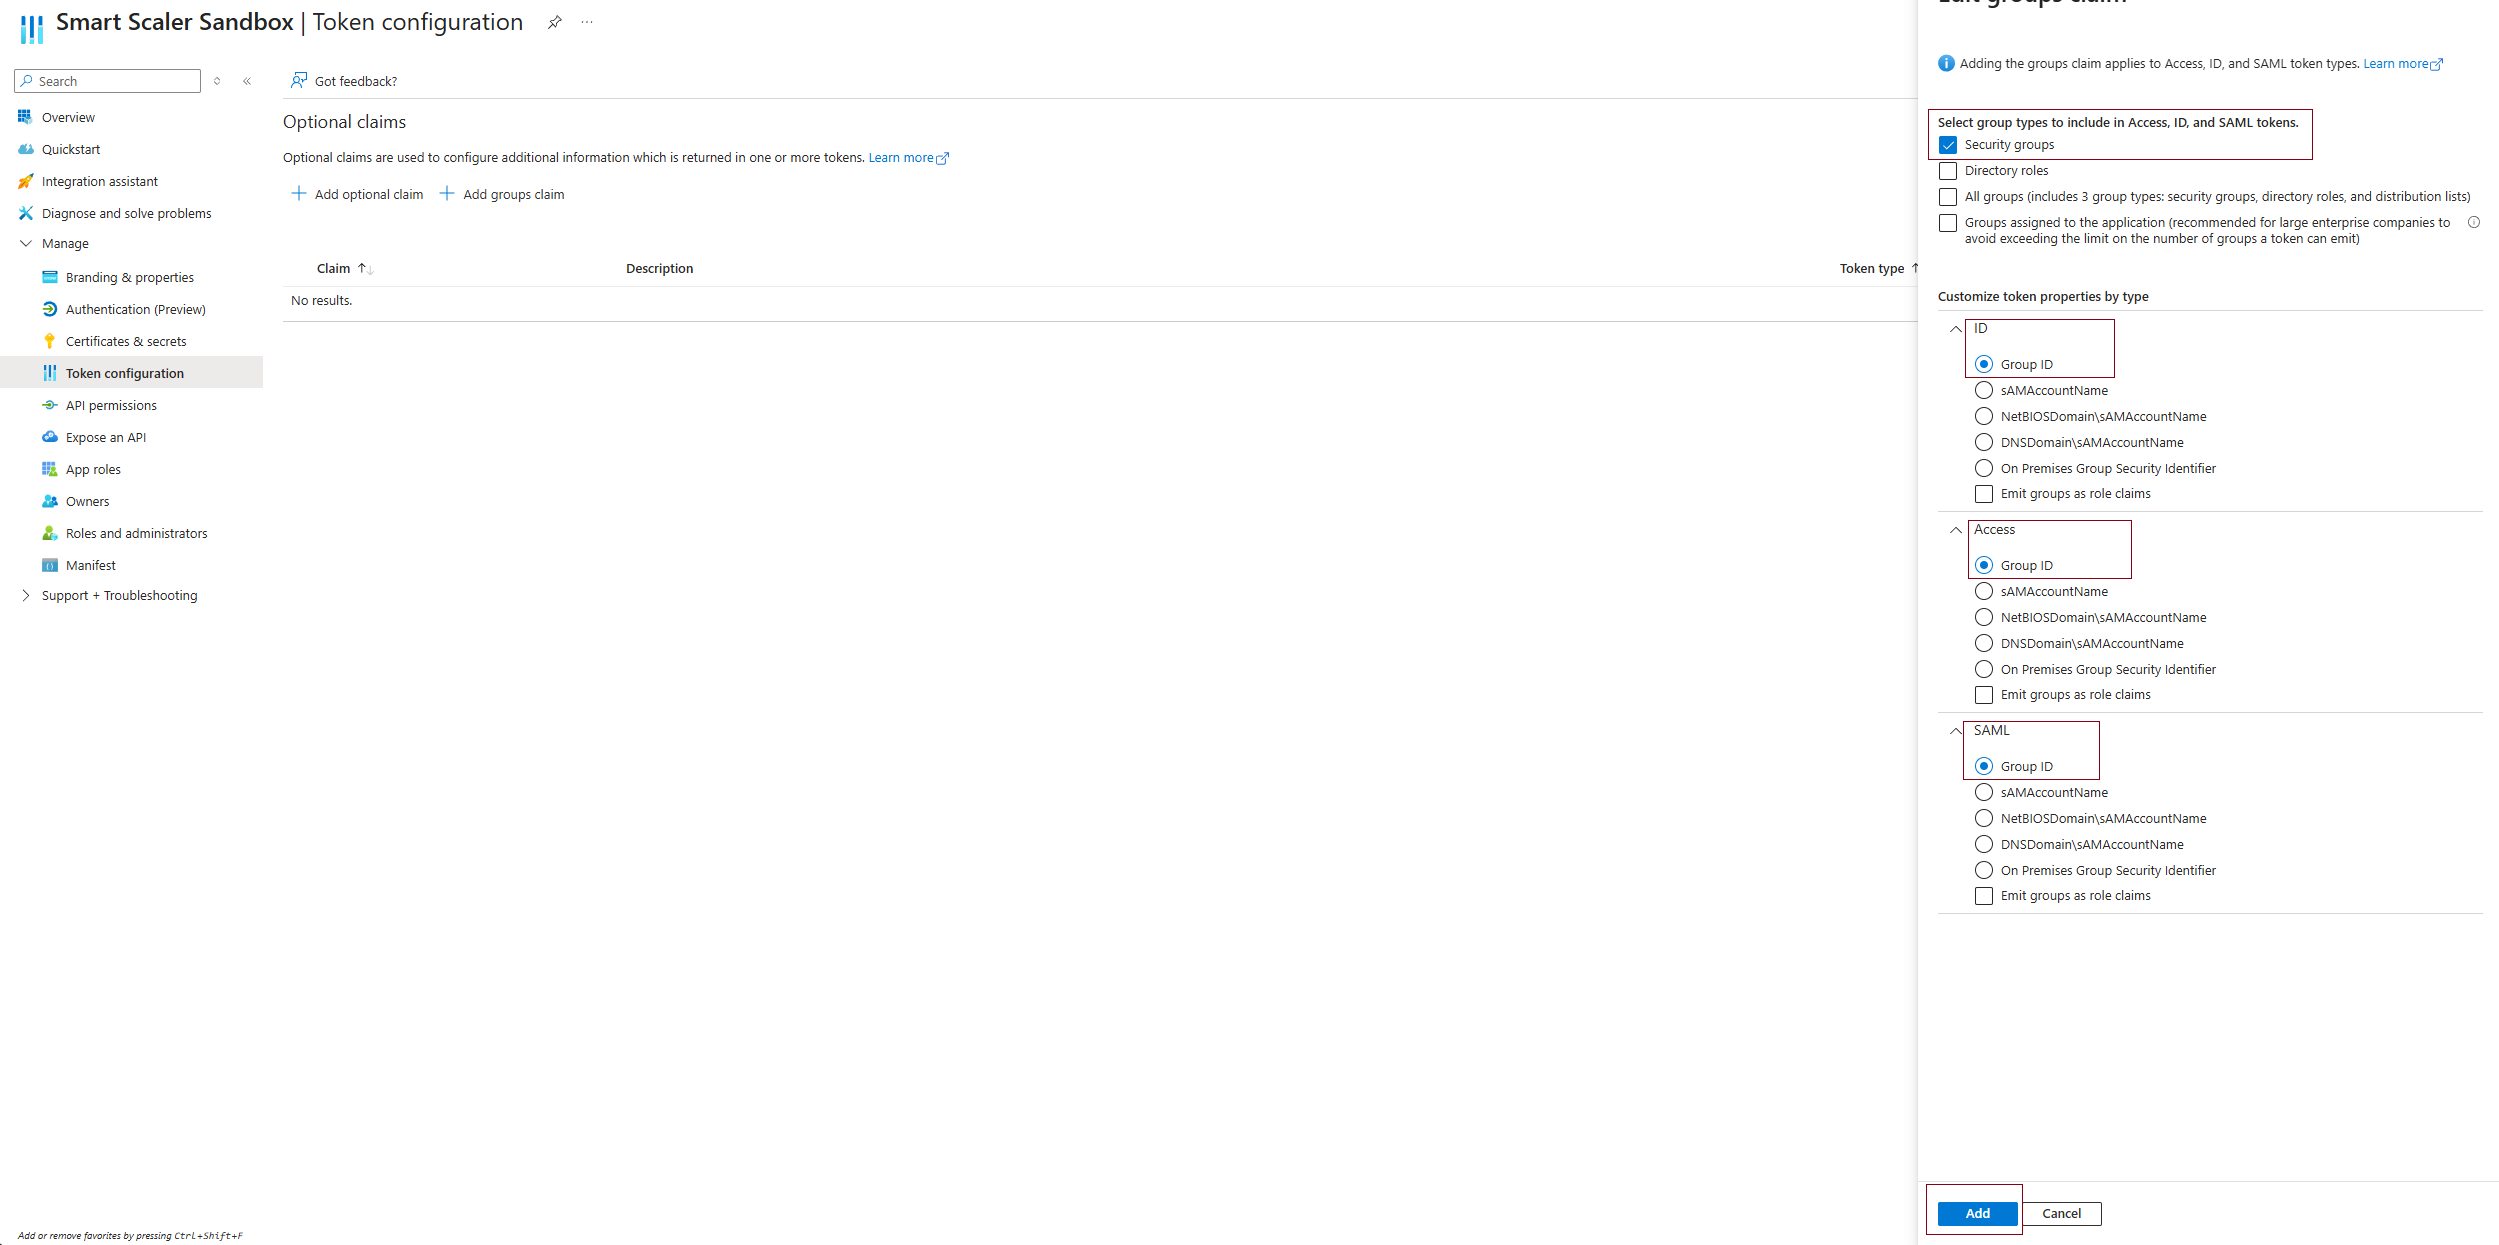
To configure group claims, go to Token Configuration on the left sidebar.
-
Click Add groups claim. In the Add groups claim pane, under select group types to include in Access, ID, and SAML, tokens, choose Security Groups.
-
Under Customize token properties by type, select Group ID for ID, Access, and SAML.
-
Click Add to add the groups claim.
-
Go to Authentication (Preview) on the left sidebar to verify the platform configuration.
Step 4: Get Endpoint URLs
-
After configuring the SSO method, copy the following endpoint URLs from the Endpoints section:
- Issuer URL: This is the authority URL for your application.
- Authorization Endpoint: OAuth 2.0 authorization endpoint (v2)
- Token Endpoint: OAuth 2.0 token endpoint (v2)
- User Info Endpoint: Microsoft Graph API endpoint + "/oidc/userinfo"
These URLs will be used in your application to communicate with Azure AD for authentication.
Step 5: Configure SSO Settings in Smart Scaler
-
Log in to your Smart Scaler application as an administrator.
-
Go to Settings on the left sidebar.
-
On the Settings page, under the Single Sign-On tab, configure the authentication settings.
noteThe endpoints, start URL, and redirect URL are prefilled.
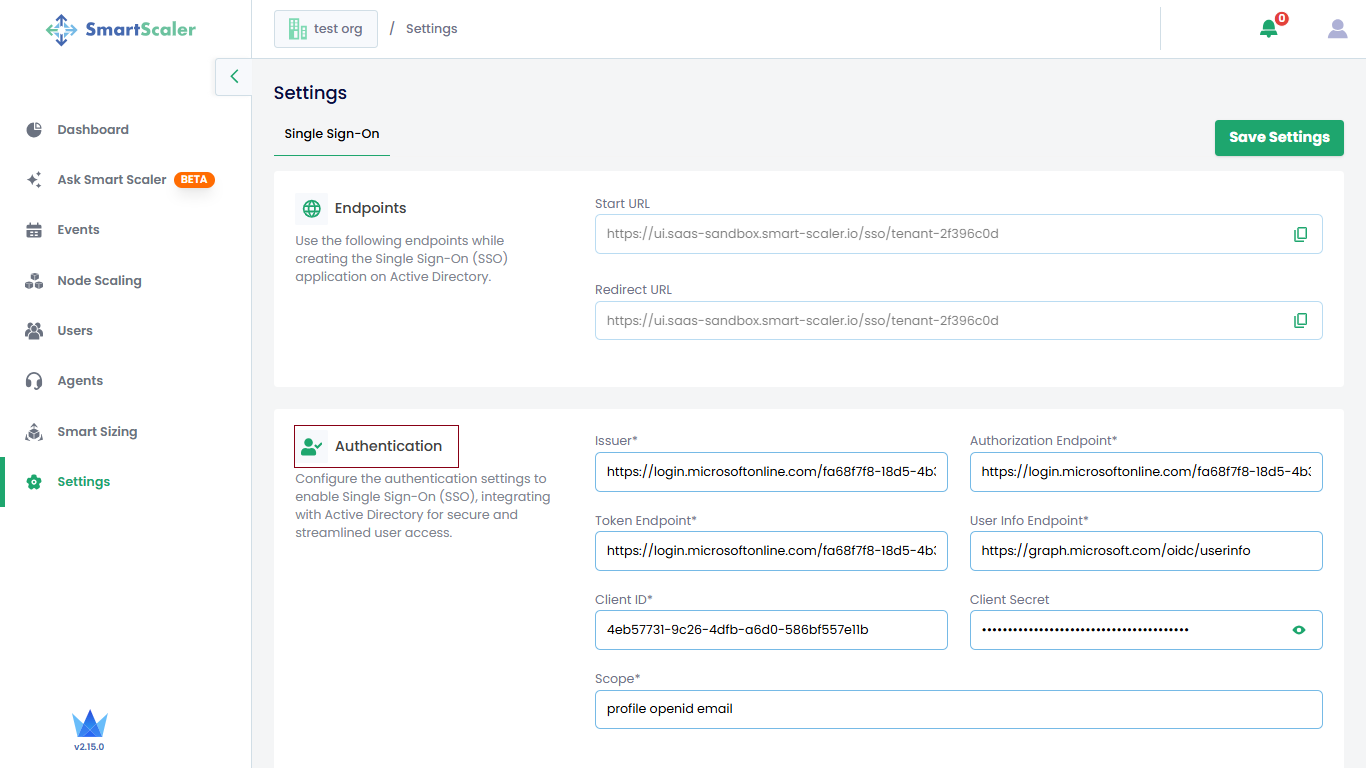
Enter the following details whose values you copied from the Azure portal:
- Issuer URL: The authority URL.
- Authorization Endpoint: The OAuth 2.0 authorization endpoint URL.
- Token Endpoint: The OAuth 2.0 token endpoint URL.
- User Info Endpoint: The Microsoft Graph API endpoint + "/oidc/userinfo".
- Client ID: The Application (Client) ID you copied in the Step 6 of Configure Single Sign-On.
- (Optional) Client Secret: The client secret you generated in the Step 6 of Configure Single Sign-On.
-
(Optional) Configure authorization settings such as scopes, claims, and token validation based on your application's requirements.
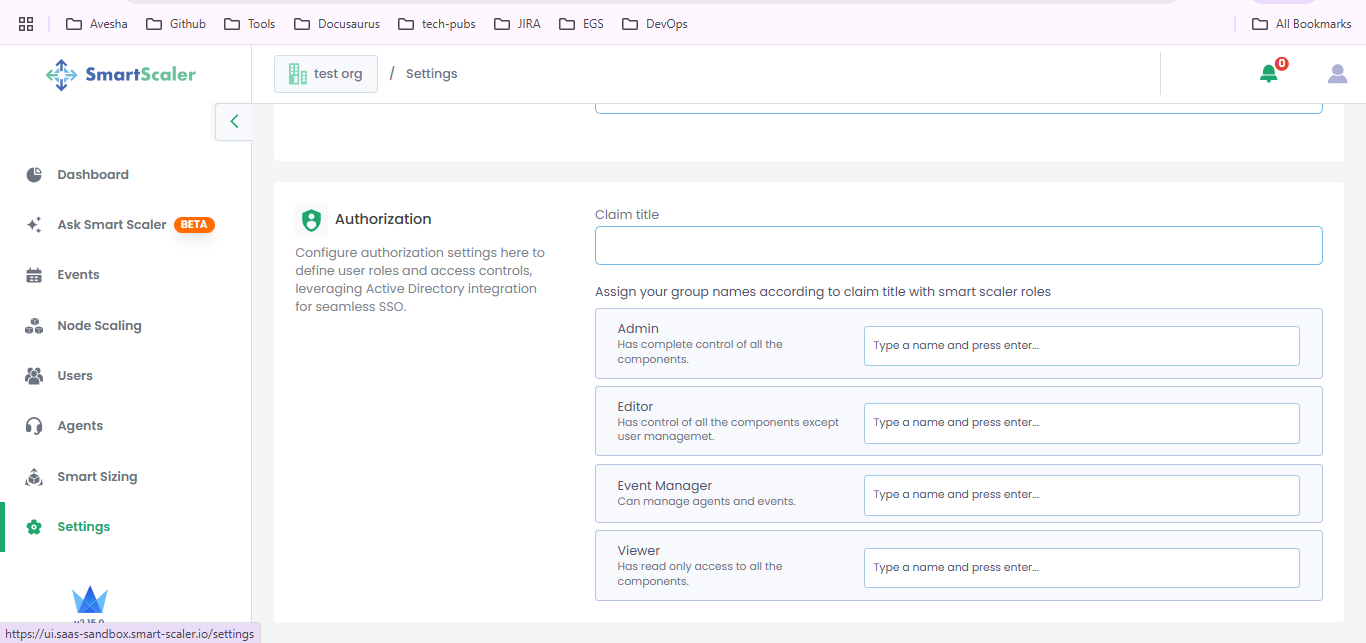 For example:
-
Claim Title:
<Group-ID>infoEnter the group ID instead of the group name in the Claim Title text box.
-
Admin: SmartScaler-Admins
-
Editor: SmartScaler-Editors
-
Event Manager: SmartScaler-EventManagers
-
Viewer: SmartScaler-Viewers
-
-
Save the configuration settings in your application.
Step 6: Test the SSO Integration
- Test the SSO integration by attempting to log in to the application using an account from your Active Directory.
- Verify that the user is authenticated without being prompted for credentials again.