Amazon Web Services
Integrating Amazon Web Services (AWS) allows the AI SRE Agent to directly interact with your cloud infrastructure and operational data.
-
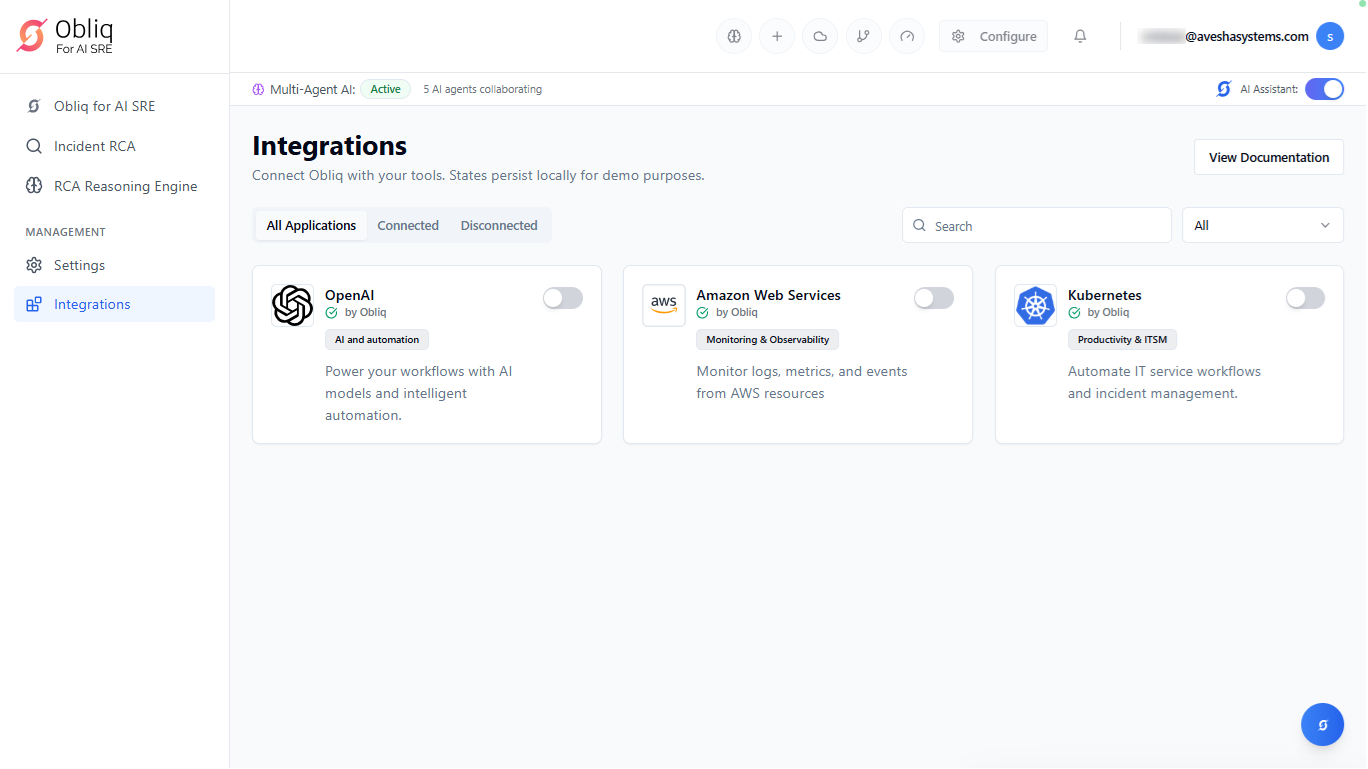
Go to Integrations on the left sidebar.
-
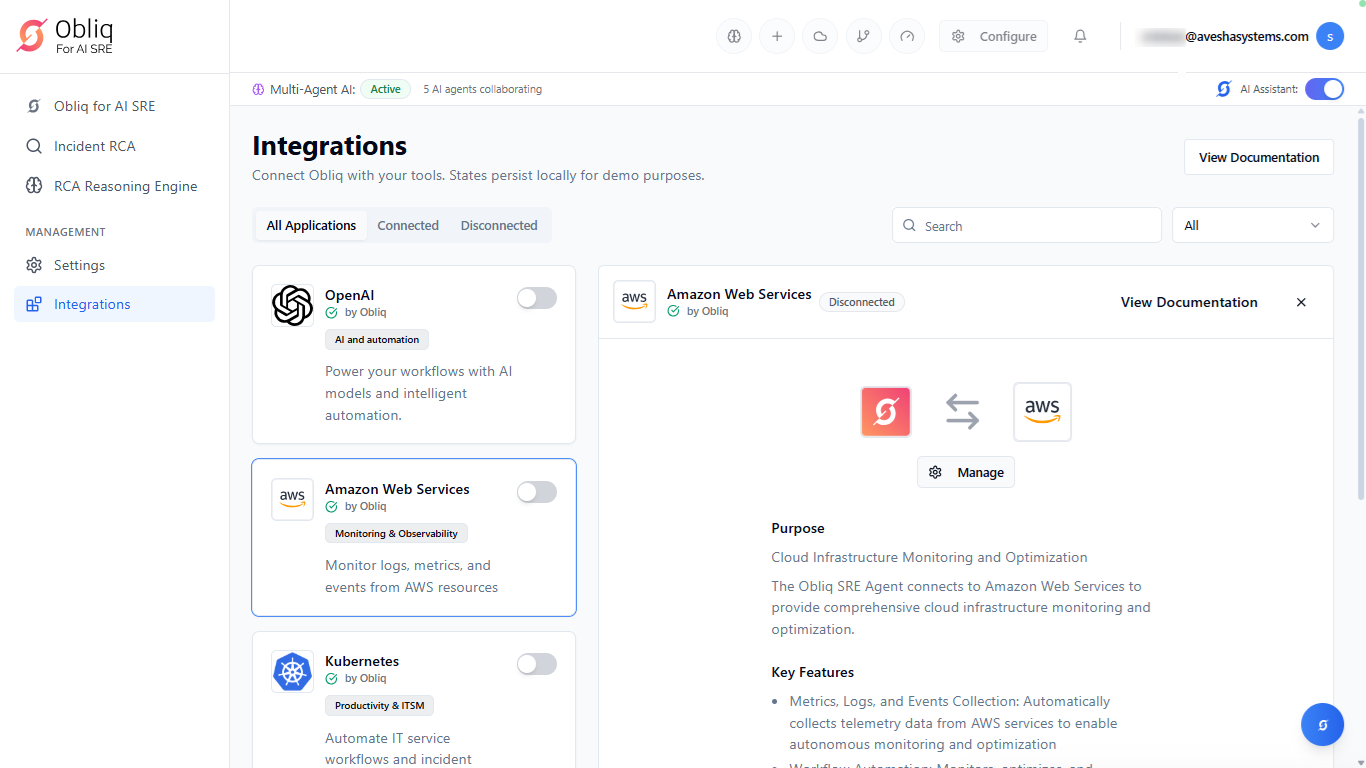
On the Integrations page, click Amazon Web Services.
Configure AWS Cloud Formation
-
Go to Integrations on the left sidebar.
-
On the Integrations page, click Amazon Web Services.
-
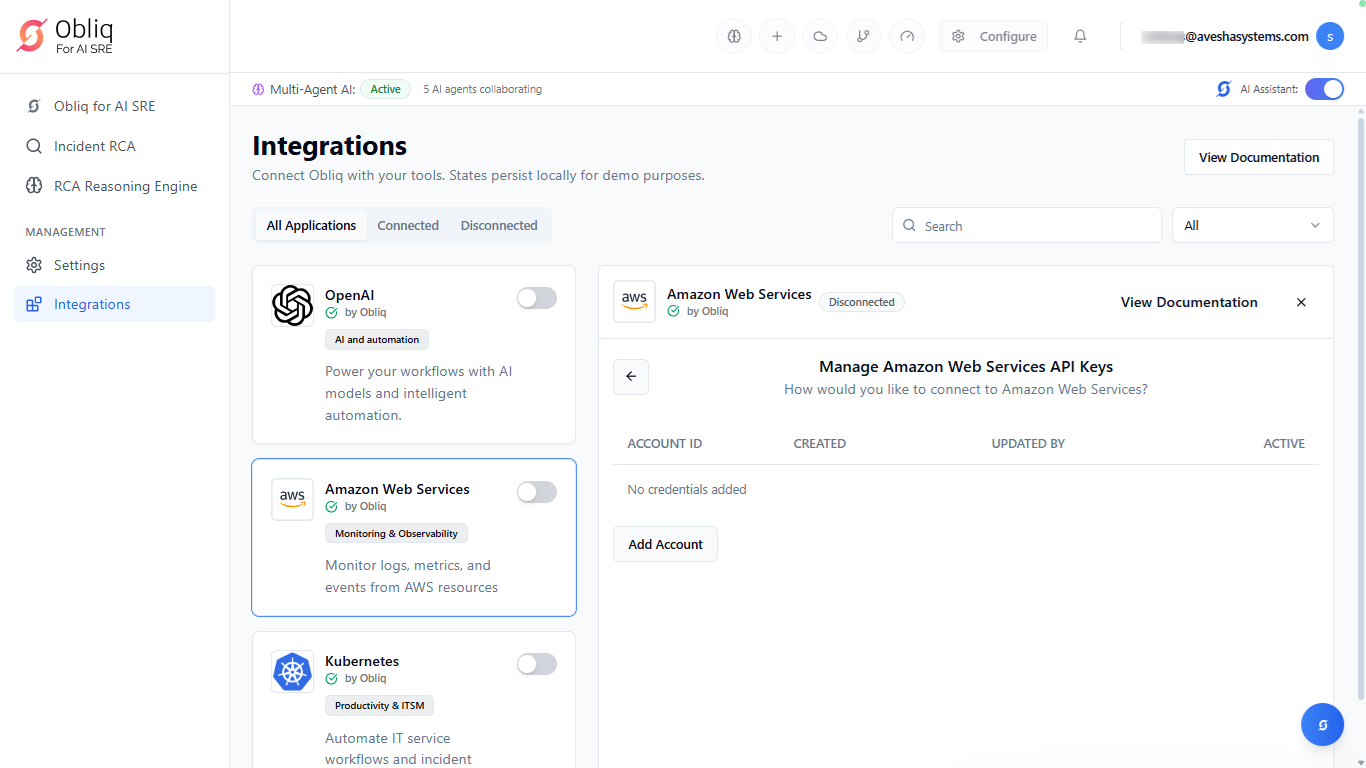
On the Amazon Web Services page, click Manage.
-
On the Manage Amazon Web Services API Keys page, click Add Account.
-
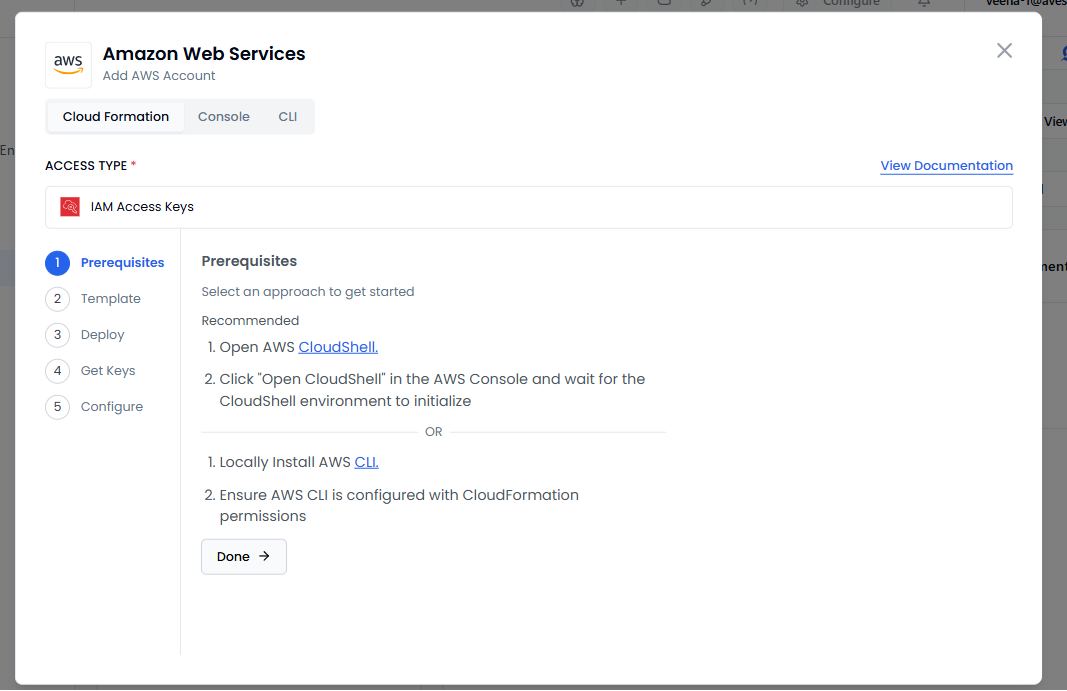
On the Amazon Web Services pane, the Access Type is set to IAM Keys. To know more, see Manage Access Keys.
-
On the left sidebar you find the steps required for you to do before configuration. By default, you are in the first step, Prerequisites.
-
Under Prerequisites, view the requirements and set them.
To know more, see:
-
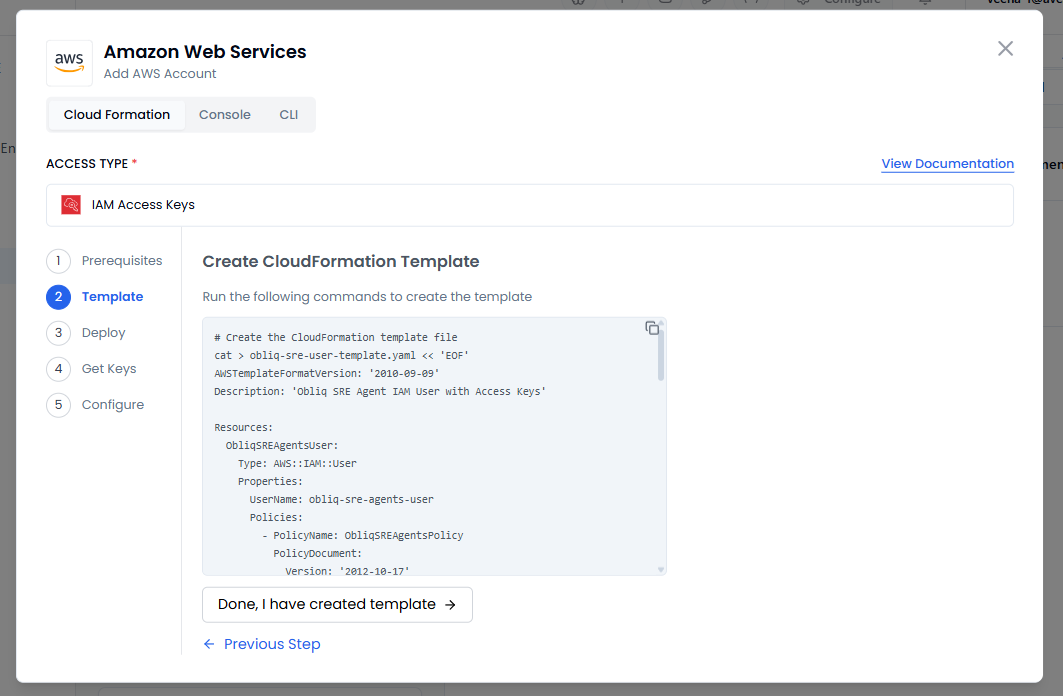
Click Done to proceed to Template.
-
Under Create CloudFormation Template, copy the command and run it to create a template.
To know more, see AWS CloudFormation Template.
-
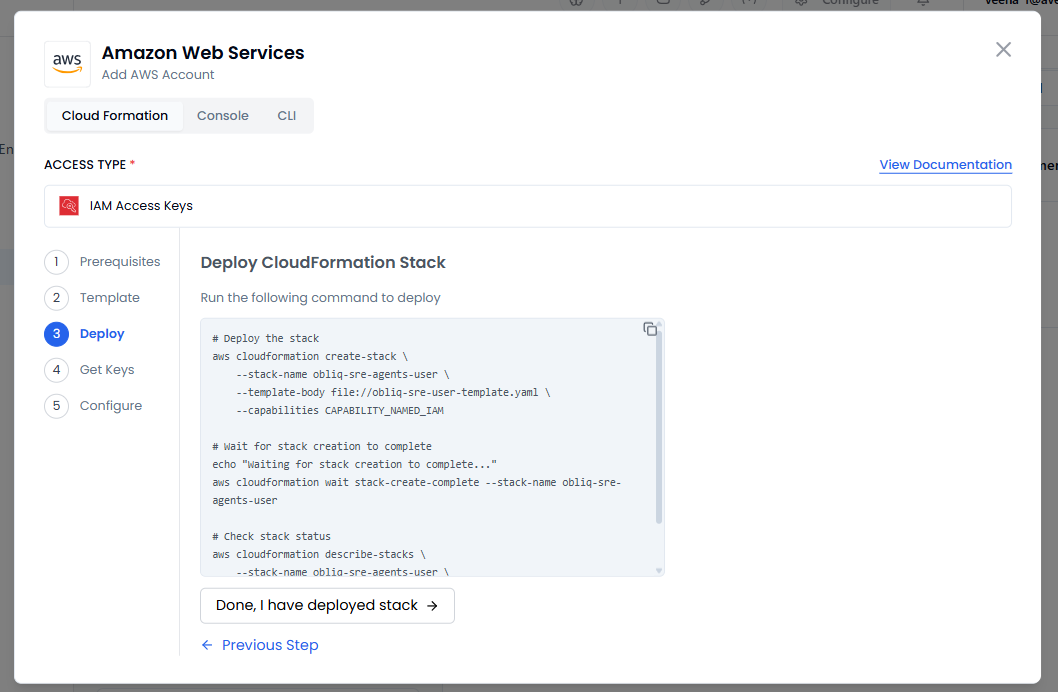
Click Done, I have created template to proceed to Deploy.
-
Under Deploy CloudFormation Stack, copy the command and run it to deploy the CloudFormation stack.
To know more, see AWS CloudFormation Stack.
-
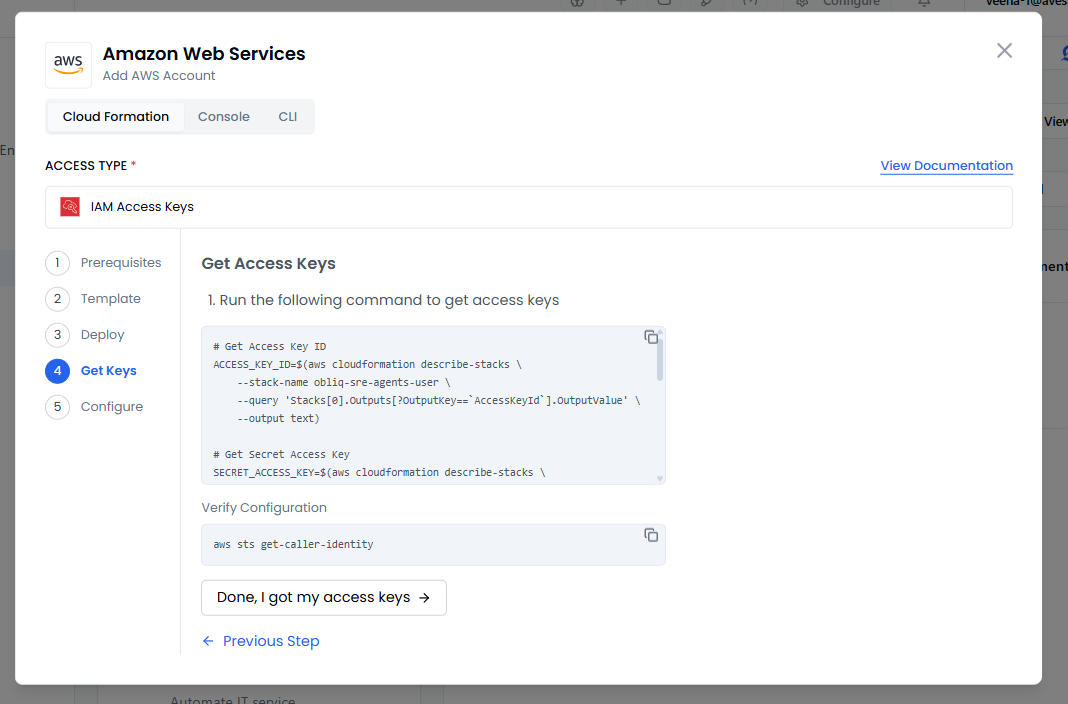
Click Done, I have deployed stack to proceed to Get Keys.
-
Under Get Access Keys:
-
Copy the first command and run it to get access keys. Copy the access and secret keys to use them in the configuration.
-
Copy the second command and run it to verify the configuration.
To know more, see Manage Access Keys.
-
-
Click Done, I got my access keys to proceed to Configure.
-
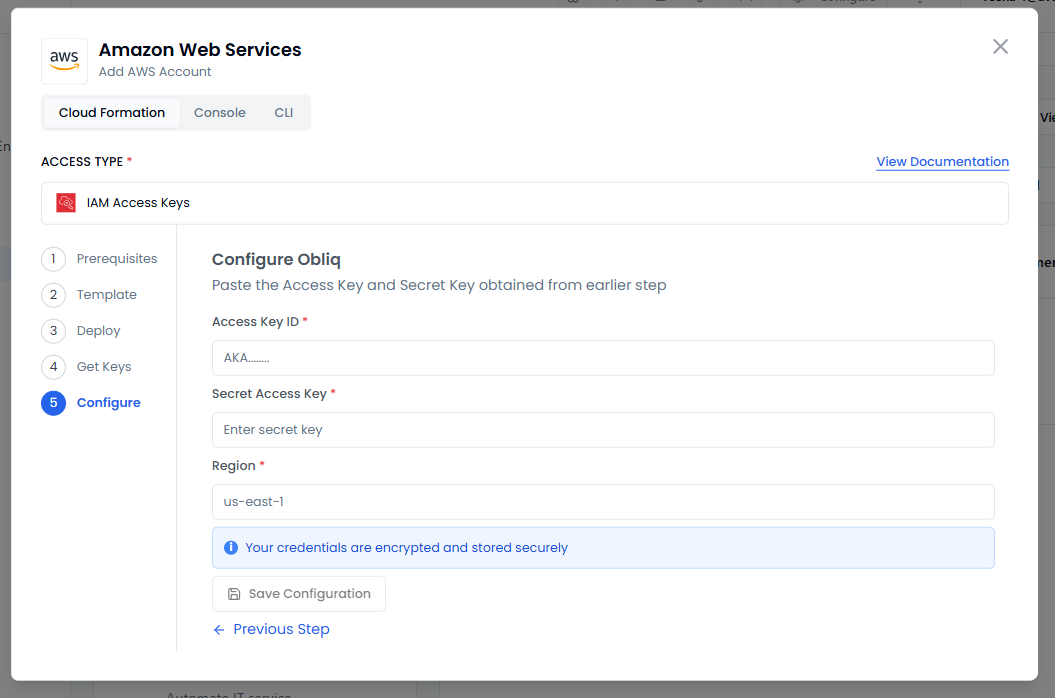
Under Configure Obliq:
- Enter your access key in the Access Key ID text box.
- Enter your secret key in the Secret Access Key text box.
- Select the AWS region of your IAM account in the Region text box. To know more, see AWS Regions.
-
Click Save Credentials to save the AWS CloudFormation configuration.
Configure AWS Console
-
Go to Integrations on the left sidebar.
-
On the Integrations page, click Amazon Web Services.
-
On the Amazon Web Services page, click Manage.
-
On the Manage Amazon Web Services API Keys page, click Add Account.
-
On the Amazon Web Services pane, go to Console.
-
Under Console, the Access Type is set to IAM Keys. To know more, see Manage Access Keys.
-
On the left sidebar you find the steps required for you to do before configuration. By default, you are on the first step, IAM Policy.
-
Under IAM Policy, perform the steps to create an IAM policy.
To know more, see Create IAM Policies.

-
Click Done, I have created IAM Policy to proceed to IAM User.
-
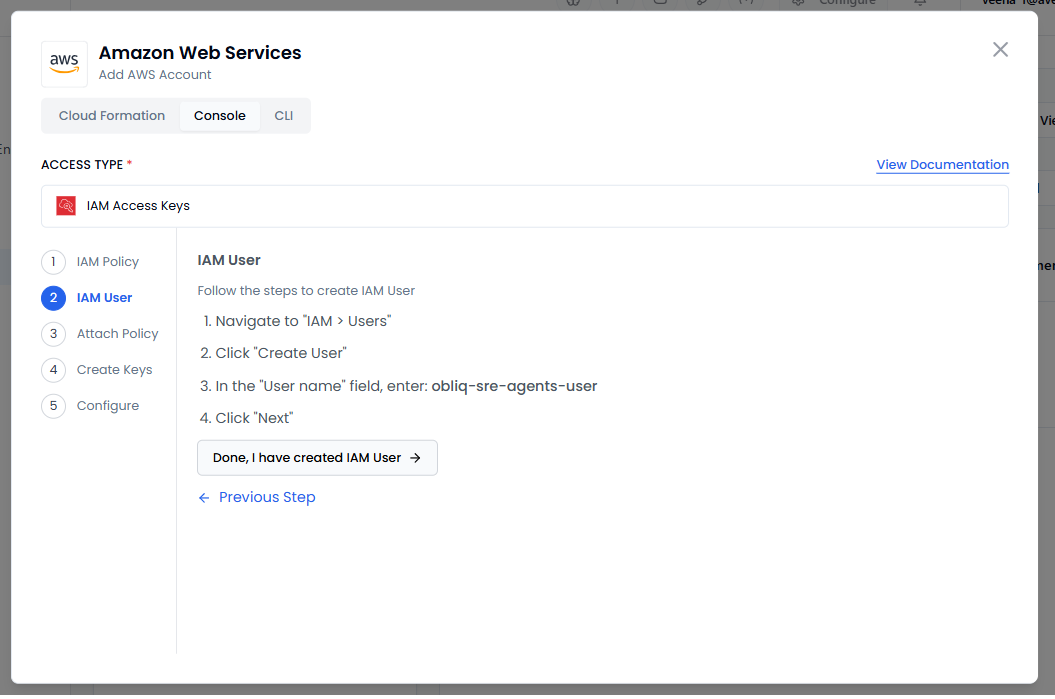
Under IAM User, perform the steps to create an IAM User.
To know more, see IAM User.
-
Click Done, I have created IAM User to proceed to Attach Policy.
-
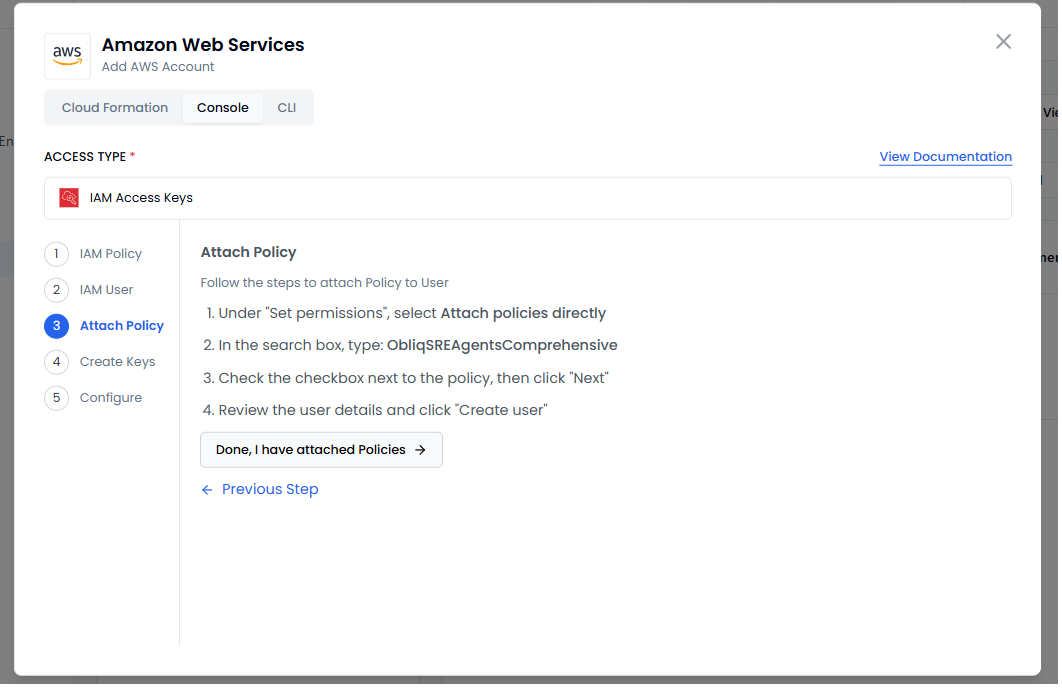
Under Attach Policy, perform the steps to attach policy to the IAM User that you created.
To know more, see Add or removed identity permissions.
-
Click Done, I have attached policies to proceed to Create Keys.
-
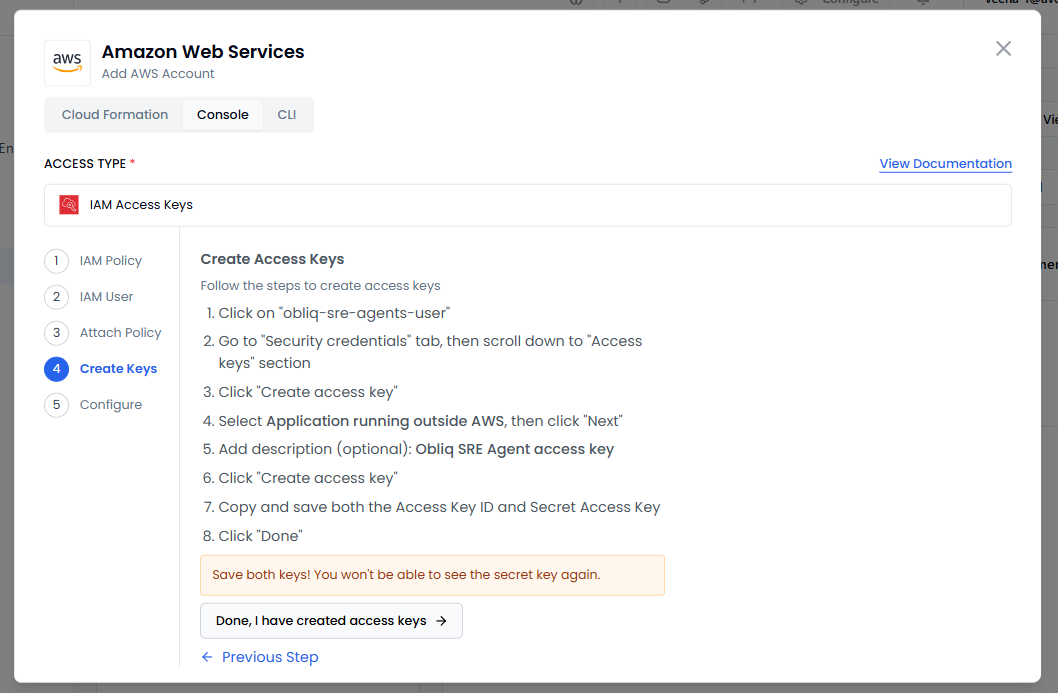
Under Create Access Keys, perform the steps to create them. Copy the access key and secret key to use them in configuration.
To know more, see Manage Access Keys.
-
Click Done, I have created access keys to proceed to Configure.
-
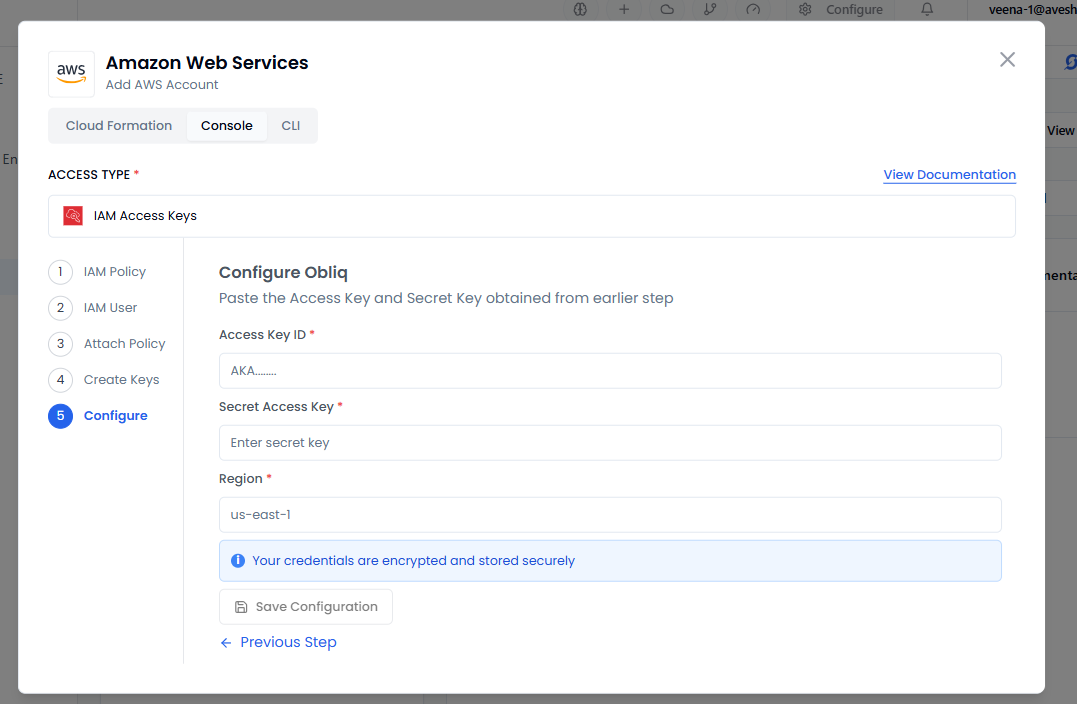
Under Configure Obliq:
- Enter your access key in the Access Key ID text box.
- Enter your secret key in the Secret Access Key text box.
- Select the AWS region of your IAM account in the Region text box. To know more, see AWS Regions.
-
Click Save Credentials to save the AWS Console configuration.
Configure AWS CLI
-
Go to Integrations on the left sidebar.
-
On the Integrations page, click Amazon Web Services.
-
On the Amazon Web Services page, click Manage.
-
On the Manage Amazon Web Services API Keys page, click Add Account.
-
On the Amazon Web Services pane, go to CLI.
-
Under CLI, the Access Type is set to IAM Keys. To know more, see Manage Access Keys.
-
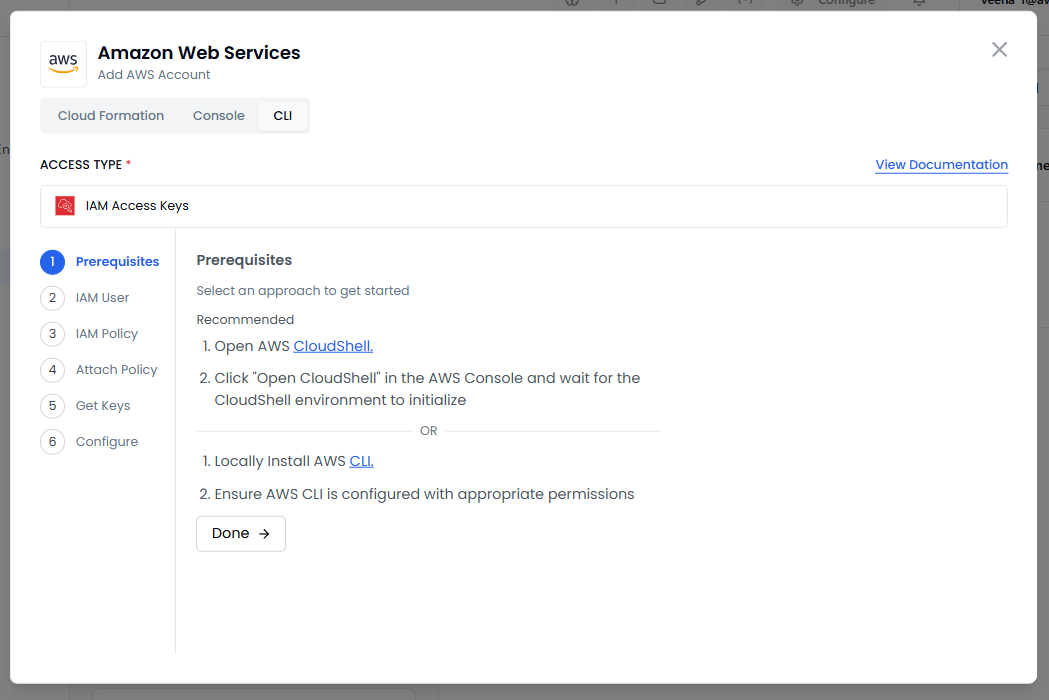
On the left sidebar you find the steps required for you to do before configuration. By default, you are on the first step, Prerequisites.
-
Under Prerequisites, two options each with 2 steps are provided. Pick an option and set the prerequisites.
To know more, see:
-
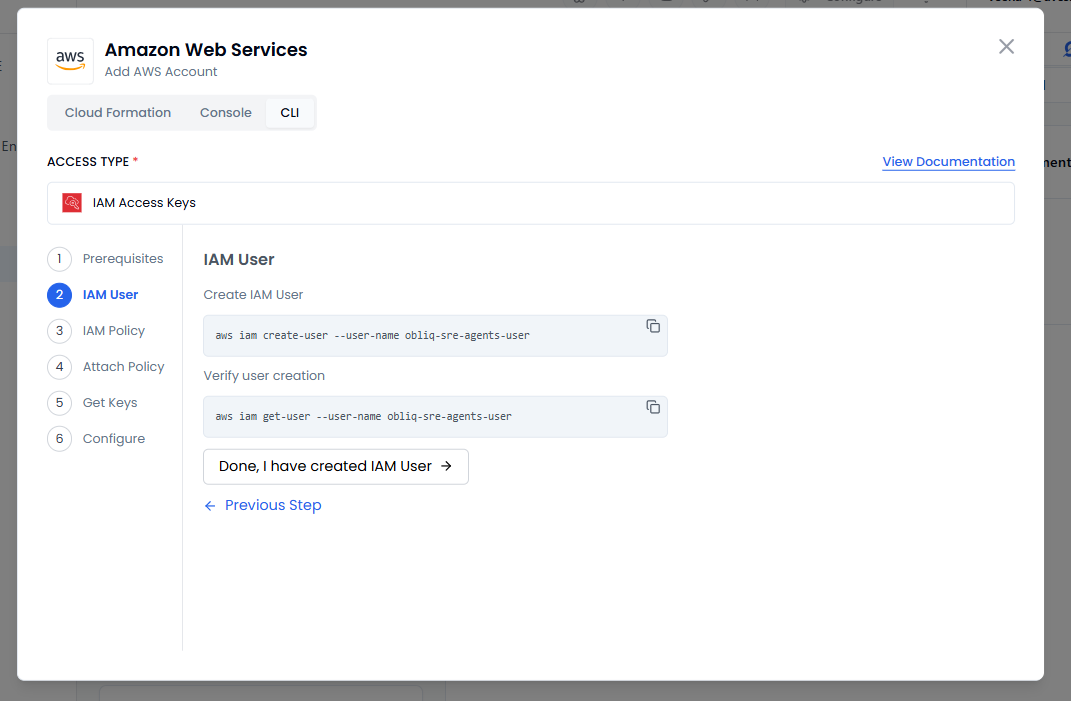
Click Done to proceed to IAM User.
-
Under IAM User:
-
Copy the first command and run it to create an IAM user.
-
Copy the second command and run it to verify the newly created IAM user.
To know more, see IAM User.
-
-
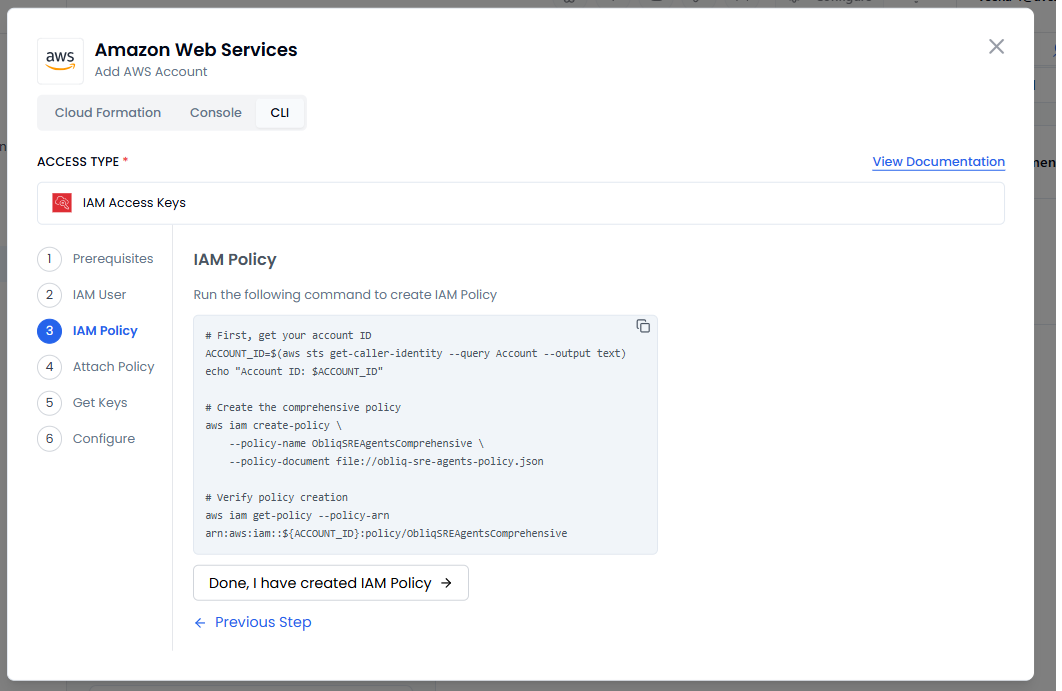
Click Done, I have created IAM User to proceed to IAM Policy.
-
Under IAM Policy, copy the command and run it to create an IAM Policy.
To know more, see Create IAM Policies.
-
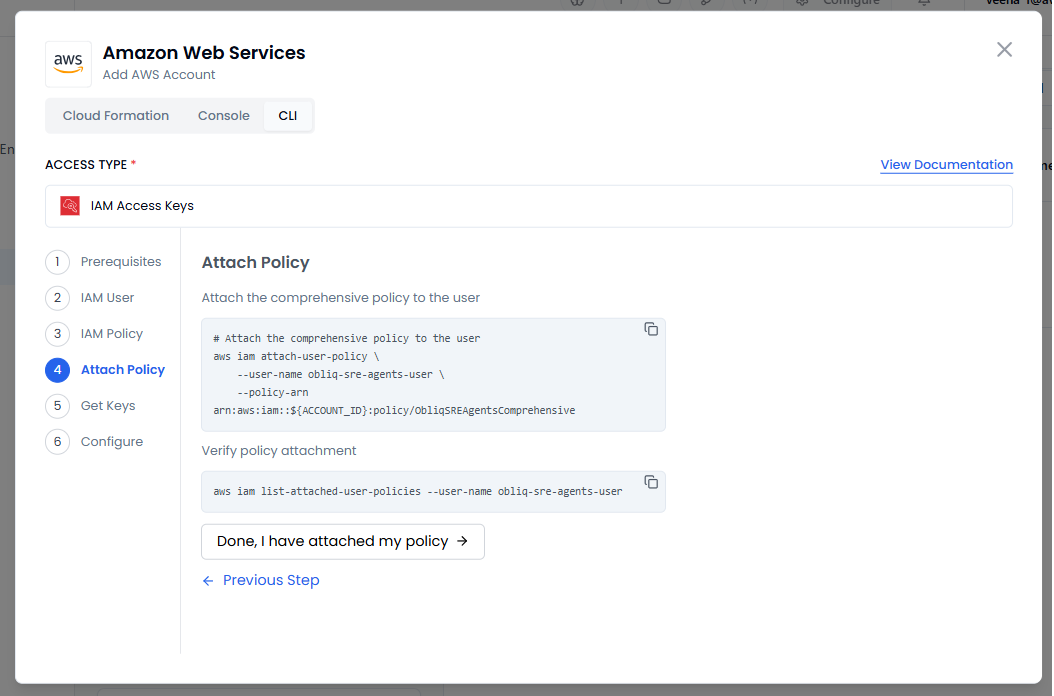
Click Done, I have created IAM Policy to proceed to Attach Policy.
-
Under Attach Policy:
- Copy the first command and run it to attach the comprehensive policy to the user.
- Copy the second command and run it to verify the policy attachment.
To know more, see Add or removed identity permissions.
-
Click Done, I have attached my policy to proceed to Get Keys.
-
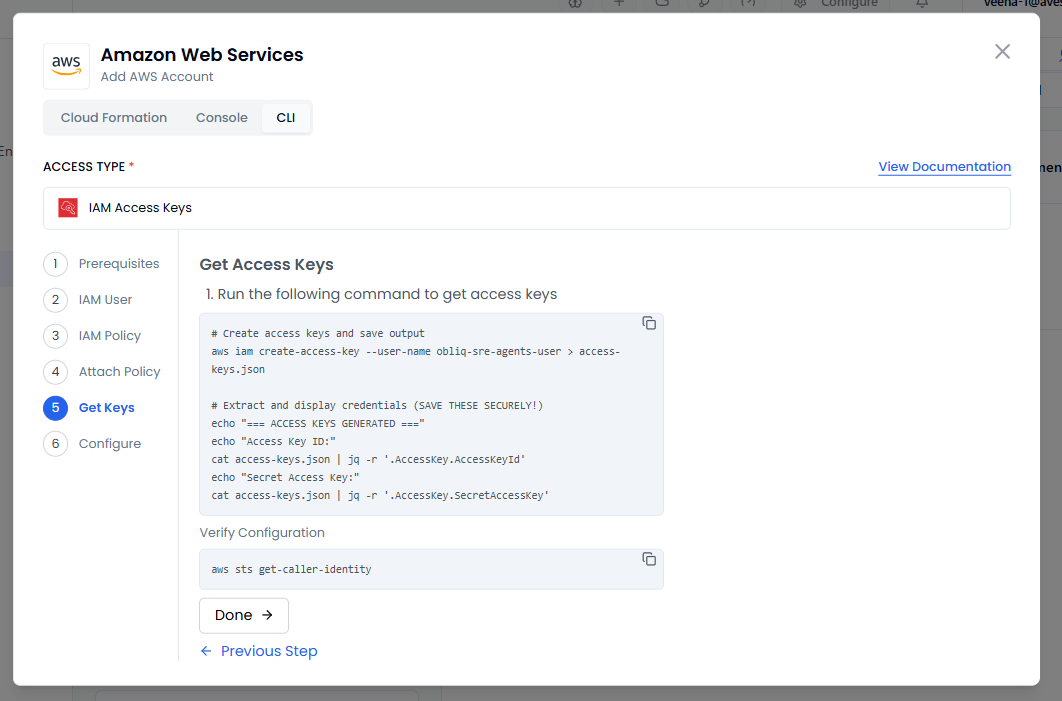
Under Get Access Keys:
- Copy the first command and run it to get access keys. Copy the keys to use them in the configuration.
- Copy the second command and run it to verify the configuration.
To know more, see Manage Access Keys.
-
Click Done to proceed to Configure.
-
Under Configure Obliq:
- Enter your access key in the Access Key ID text box.
- Enter your secret key in the Secret Access Key text box.
- Select the AWS region of your IAM account in the Region text box. To know more, see AWS Regions.
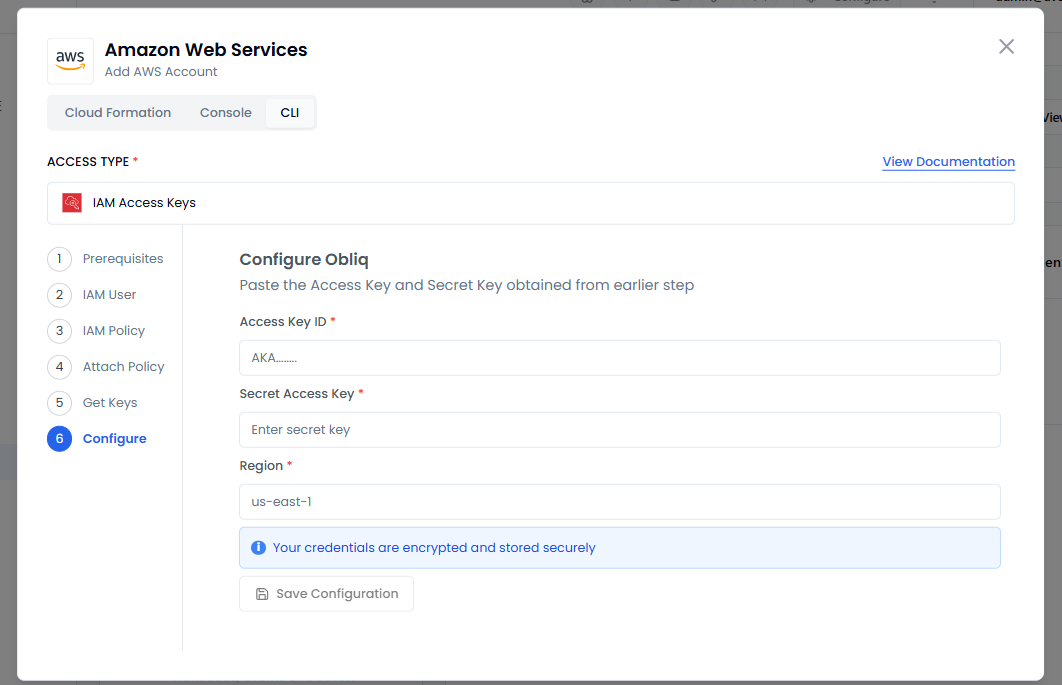
- Click Save Credentials to save the AWS CLI configuration.