Manage Workload Templates
This topic describes the steps to create and manage workload templates in a workspace.
Overview
Workload Templates are predefined configurations that define how workloads should be deployed and managed across clusters in a workspace. They help to standardize deployment practices, ensure consistency, and simplify the management of workloads.
Create a Workload Template
To create a Workload Template in a workspace:
-
Go to Workspace on the left sidebar.
-
Under All Workspaces, select the workspace you want to manage.
-
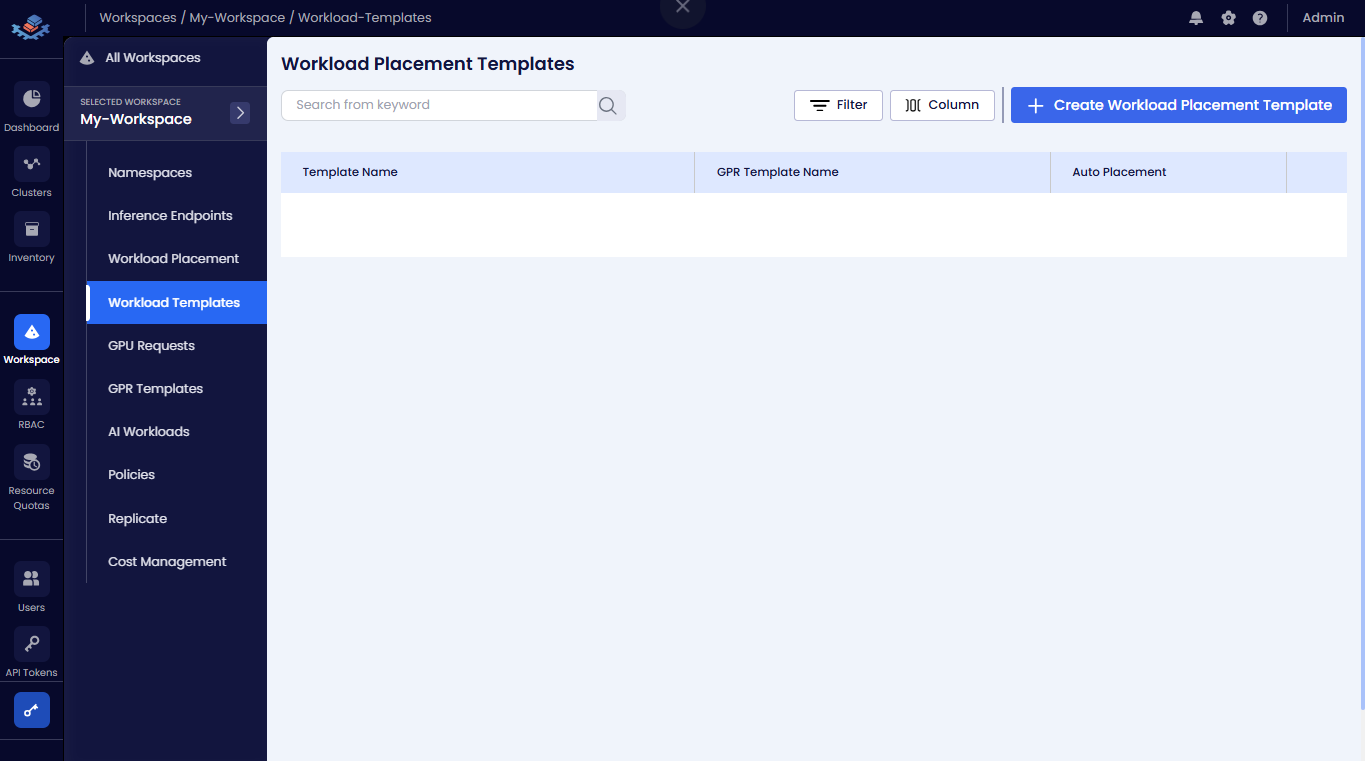
In the menu of the selected workspace, click the Workload Template submenu.
-
On the Workload Placement Templates page, click the +Create Workload Placement Template button.
-
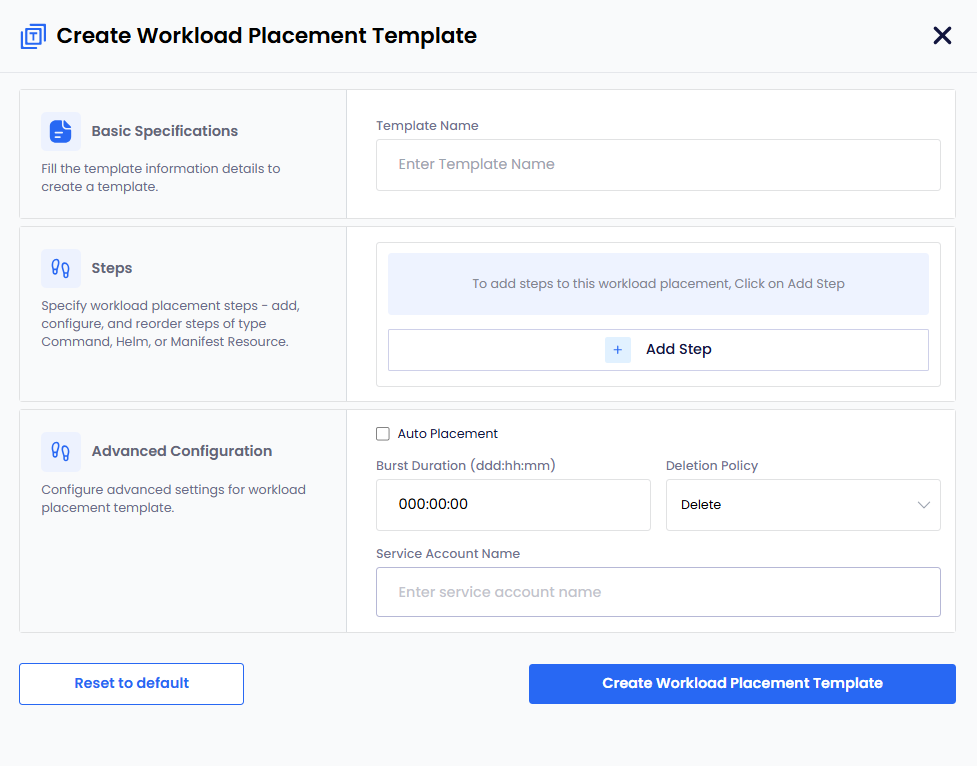
On the Create Workload Placement Template configuration wizard, enter the following details:
-
In the Basic Specifications section, enter a name for your template in the Template Name text box.
-
In the Steps section, click the + Add Step button to add steps. This will allow you to add and configure the specific workload steps (Command, Helm, or Manifest Resource) for this template.
Workload steps for command, Helm, and manifest resource types can be added in any order. To add multiple steps, repeat the following sub-steps for each step you want to add.
-
To add the kubectl command, perform the following:
- Select the step type
Commandin the Type drop-down menu. - Under Command Details:
- Enter the descriptive name for this step in the Name text box.
- Enter the command in the Command text box. For example
kubectl create namespace vllm-demo.
- Click the Save Step button to save the command step.
- Select the step type
-
To add the Helm configuration, perform the following:
- Select the step type
Helmin the Type drop-down menu. - Under Helm Details:
- Enter the name of the application in the Name text box. For example,
vllm-app. - Enter the chart name in the Chart Name text box. For example,
vllm/vllm-stack. - Enter the application name in the Release Name text box. For example,
vllm - Enter the release namespace in the Release Namespace text box. For example
- Enter the repo in the Repo Name text box. For example,
vllm. - Enter the repo URL in the Repo URL text box. For example,
https://vllm-project.github.io/production-stack/. - (Optional) Enter the repo version in the Version text box.
- Enter the name of the application in the Name text box. For example,
- Under Helm Flags, use the toggle switches to enable or disable specific deployment behaviors.
You can perform the following:
- Enable the Atomic toggle to delete the installation if it fails, rolling back changes.
- Enable the Cleanup On Fail toggle to delete new resources created in this release when it fails.
- Enable the Create Namespace toggle to automatically create the Kubernetes Namespace if it does not already exist.
- Disable the Skip CRDs toggle to ensure Custom Resource Definitions are installed.
- Enable the Wait toggle to force the operation to wait until all Pods, PVCs, Services, and minimum number of Pods of a Deployment are in a ready state before marking the release as successful.
- Enter the duration (hh:mm:ss) in the Timeout textbox. For example, 0h10m0s(10 minutes) is the duration to wait for Kubernetes operation.
- (Optional) Enter the name of the Kubernetes secret to be used for this deployment in the Secret Ref text box.
- You can also enter your Helm values in YAML format in text editor window at the bottom to override defaults in the chart.
For example, you can modify the
replicaCountparameter. This instructs Helm to deploy the specified number of replicas of the application. - Click the Save Step button to save this step.
- Select the step type
-
To add the Manifest Resource configuration, perform the following:
- Select the step type
Manifest Resourcein the Type drop-down menu. - Under Manifest Resource Details:
- Enter the descriptive name for the manifest in the Name Text box.
- Enter the YAML manifest in the text editor window at the bottom.
- Click the Save Step button to save this step.
- Select the step type
-
-
In the Advanced Configuration section:
- (Optional) Select the Auto Placement box to enable automatic placement. The value is enabled by default. You can unselect this box to manually select clusters during workload deployment.
- Enter a burst duration in the Burst Duration text box in the format
ddd:hh:mm. - Select a deletion policy from the Deletion Policy dropdown menu (for example,
DeleteorRetain). - (Optional) Enter the name of a Service Account in the Service Account Name text box.
-
-
Click the Create Workload Placement Template button to save the template. Alternatively, you can click the Reset to default button to clear all the parameters and start over.
Examples
Example YAML Manifest for CUDA Sample Deployment
The following is an example of a Manifest Resource step YAML manifest that deploys a CUDA sample application using a Deployment resource in a specific namespace with GPU resource limits:
apiVersion: apps/v1
kind: Deployment
metadata:
  labels:
    app: cuda-test
  name: cuda-test
  namespace: complex-namespace
spec:
  replicas: 1
  selector:
    matchLabels:
      app: cuda-test
  template:
    metadata:
      labels:
        app: cuda-test
    spec:
      containers:
        - args:
            - while true; do /cuda-samples/vectorAdd; done
          command:
            - /bin/bash
            - '-c'
            - '--'
          image: nvcr.io/nvidia/k8s/cuda-sample:vectoradd-cuda11.7.1-ubuntu20.04
          name: cuda-sample-vector-add
          resources:
            limits:
              nvidia.com/gpu: 1
      hostPID: true
Example Helm Values for VLLM Deployment
The following is an example of Helm values in YAML format for deploying the VLLM application with specific configurations:
'- name': VLLM_FLASHINFER_DISABLED
cpu: '2'
hf_token: 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
maxModelLen: 4096
memory: 8G
modelURL: meta-llama/Llama-3.2-1B-Instruct
name: llama3
pvcStorage: 100Gi
replicaCount: 1
repository: vllm/vllm-openai
requestCPU: 4
requestGPU: 1
requestMemory: 8Gi
storageClass: compute-csi-default-sc
tag: v0.10.1
value: '1'
View a Workload Placement Template
To view a Workload Placement Template in a workspace:
-
Go to Workspace on the left sidebar.
-
Under All Workspaces, select the workspace you want to manage.
-
In the menu of the selected workspace, click the Workload Templates submenu.
-
On the Workload Templates page, you can see the list of existing workload templates in the workspace.
-
Click on a workload template name to view its details, including basic specifications, cluster specifications, steps, GPU configuration, and status.
Edit a Workload Placement Template
To edit the Workload Template details:
-
Go to Workspace on the left sidebar.
-
Under All Workspaces, select the workspace that the contains the Workload Template you want to edit.
-
In the menu of the selected workspace, click the Workload Template submenu.
-
On the Workload Placement Templates page, under Template Name, select the template to view its details.
-
On the Modify Workload Placement Template pane, edit the required fields.
-
Click the Update Workload Placement Template button to save the changes.
Delete a Workload Placement Template
To delete a Workload Placement Template:
-
Go to Workspace on the left sidebar.
-
Under All Workspaces, select the workspace that contains the Workload Template you want to delete.
-
In the menu of the selected workspace, click the Workload Template submenu.
-
On the Workload Placement Templates page, under Template Name, select the template you want to delete.
-
Click the delete icon on the right. On the delete confirmation dialog, type the name of the workload placement template.
-
Click the Delete button to confirm the deletion.