Manage an Inference Endpoint
This topic describes the steps to view, deploy, and delete Inference Endpoints for your workspaces.
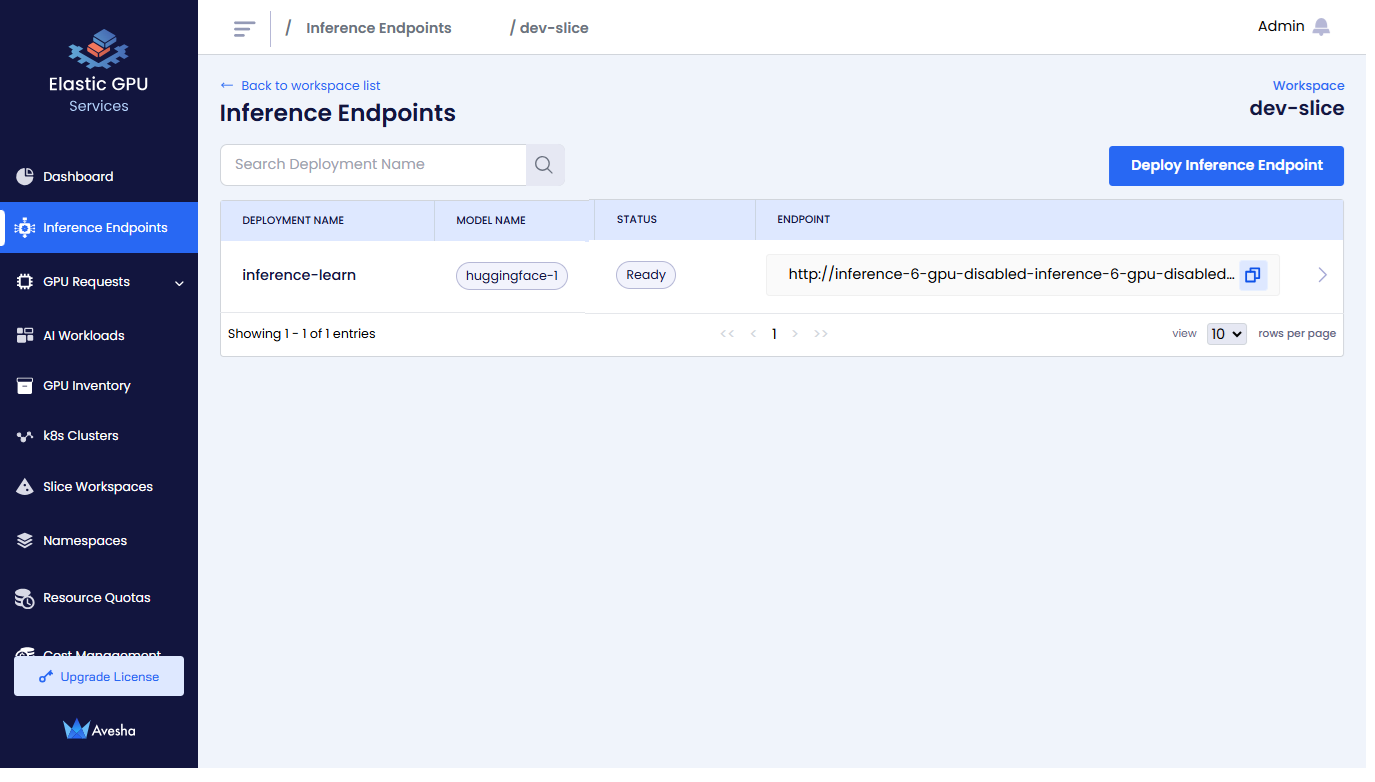
View the Inference Endpoint
To view the Inference Endpoint:
-
Go to Inference Endpoints on the left sidebar.
-
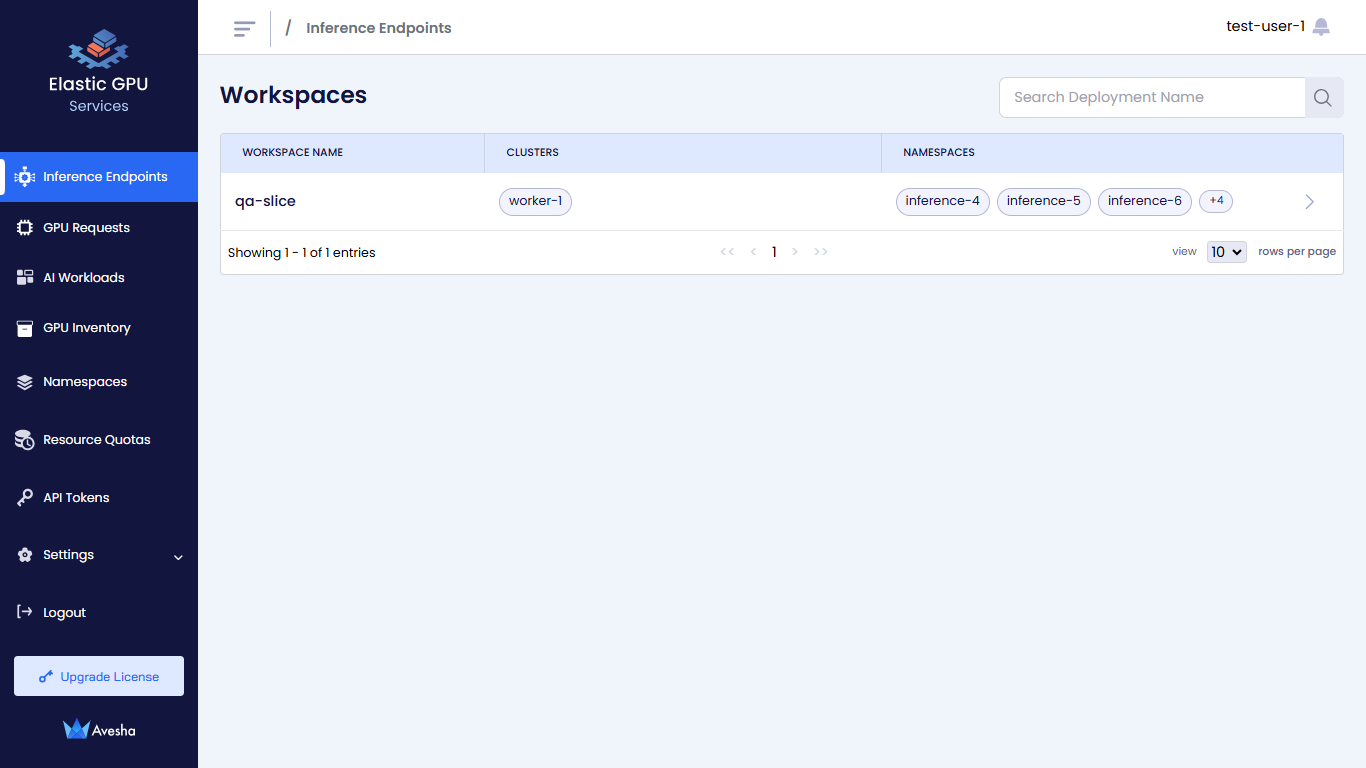
On the Workspaces page, select the workspace whose Inference Endpoints you want to view.
-
On the Inference Endpoints page, you see a list of Inference Endpoints for that workspace.

The following figure illustrates the deployment for the workspace.
Deploy an Inference Endpoint
Only the admin has the privilege to add namespaces to a workspace. The user (non-admin) with access to a workspace must create the inference endpoint with the namespace name added to a workspace by the admin.
For example, if the admin adds the inference-1-gpu and inference-1-cpu namespaces to a workspace. The non-admin user must create an
inference endpoints with name inference-1-gpu or inference-1-cpu only.
To deploy an Inference Endpoint on your workspace:
-
Go to Inference Endpoint on the left sidebar.
-
On the Workspaces page, go to the workspace on which you want to deploy an Inference Endpoint.
-
On the Inferences Endpoint page, click Deploy Inference Endpoint.
-
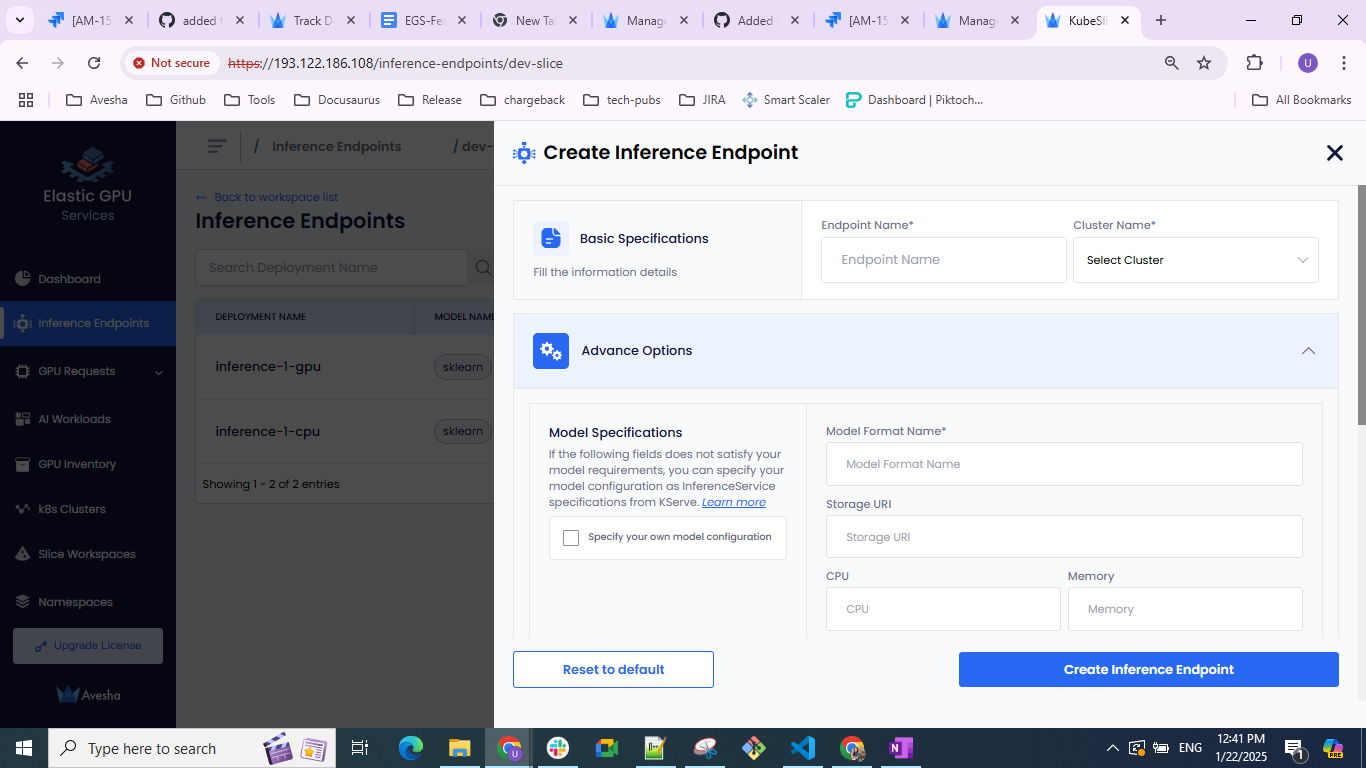
On the Create Inference Endpoint pane, under Basic Specifications:
-
Enter a name for the Inference Endpoint in the Endpoint Name text box. Ensure that the namespace with the same name as the Inference Endpoint already exists on the worker cluster. If it does not exist, then ask your cluster admin to create it for you.
warningIf you try creating an Inference Endpoint with a name without ensuring that a namespace with the same name exists, then you get an error that says
Failed to create namespace. -
Select the cluster from the Cluster Name drop-down list, on which you want to deploy the Inference Endpoint.
-
-
Under Advanced Options, enter the specifications for model deployment. Under Model Specifications, enter the following:
noteThe following are standard parameters for most of model deployments. However, if these parameters do not meet your model requirements, then select the Specify your own model configuration checkbox and enter your own model configuration.
- Enter a name in the Model Format Name text box.
- Add the storage URI in the Storage URI text box.
- Add the CPU value in the CPU text box.
- Add the Memory value in the Memory text box.
- Add the arguments in the Args text box.
- To add secret key-value pair, click the plus sign against Secret and add them.
Own Model Configuration
To add your own model configuration:
-
Select the Specify your own model configuration checkbox.
-
On the terminal screen, enter your model configuration yaml file from KServe. For more information, see KServe.
-
Under GPU Specifications, enter the following:
infoSelect the Create CPU-only Inference checkbox for CPU only specification for a model.
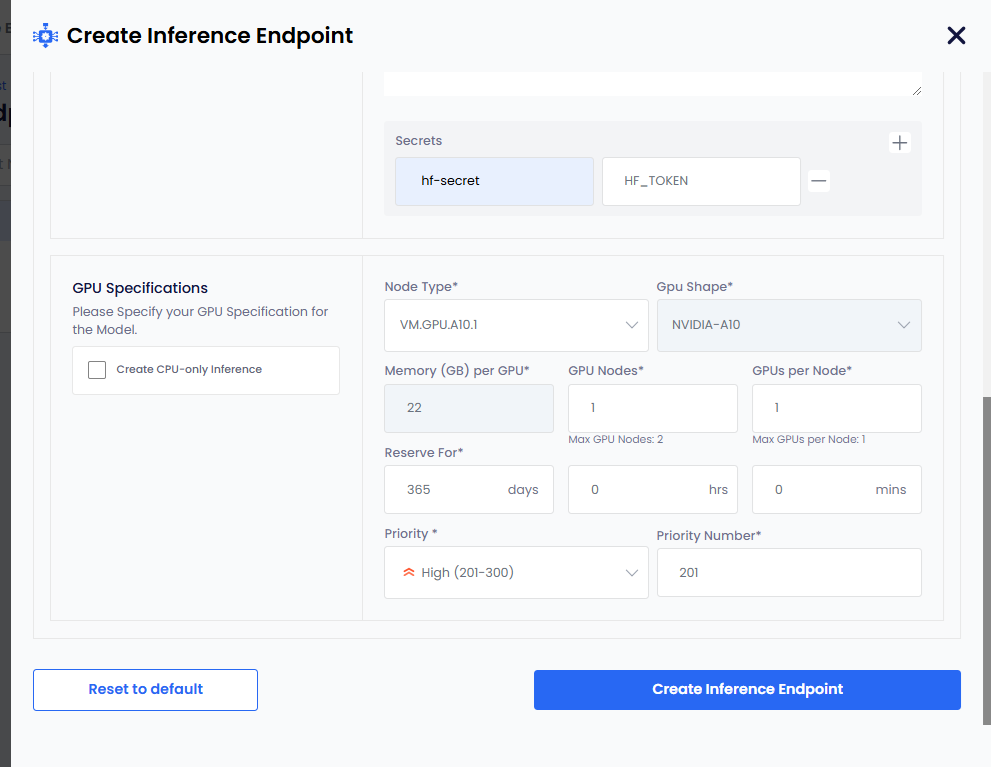
-
Select node type from the Node Type drop-down list. After you select node type:
- The GPU Shape and Memory per GPU values are auto populated. These values are immutable.
- The GPU Nodes, GPUs Per Node have the default values. Edit these values as per your requirements.
- The Reserve For have
365days by default. The duration is indays\hours\minsformat. Edit the days as per your requirements. The number of days must be less that 365. - The Priority and Priority Number have default values. Edit the values as per your requirements.
-
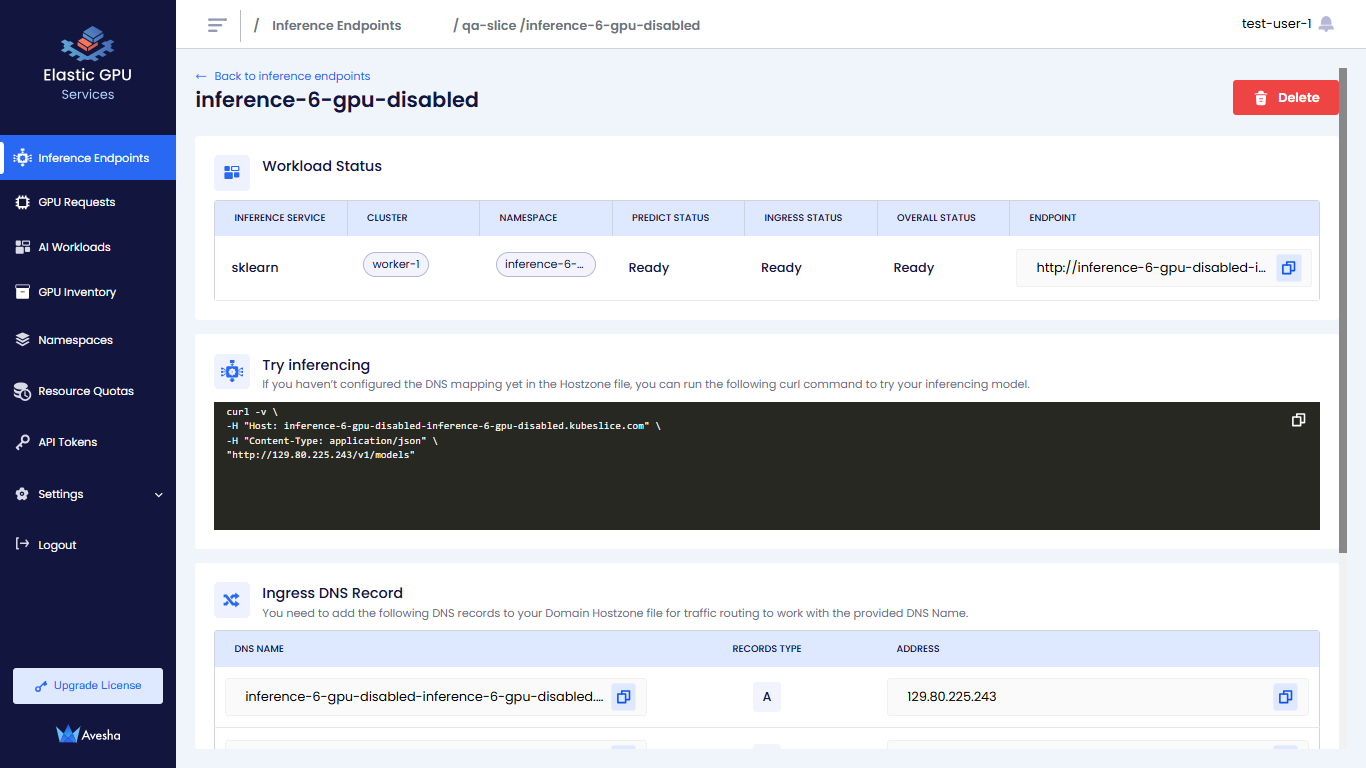
Click the Create Inference Endpoint button. The status goes to Pending before it changes to Ready.
-
Delete an Inference Endpoint
To delete an Inference Endpoint:
-
On the Workspaces page, click a workspace.
-
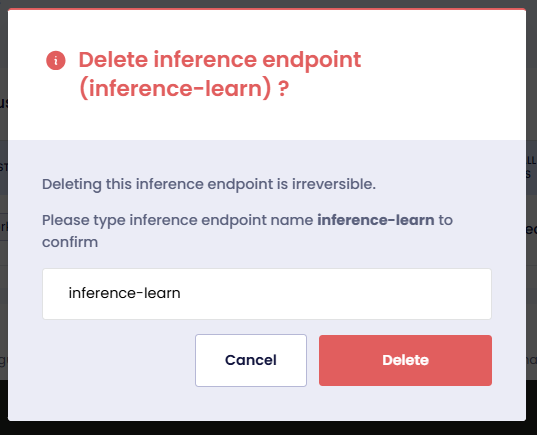
On that Inference Endpoint page, click the Delete button.
-
Enter the name of the Inference Endpoint in the text box and click Delete.