Manage GPU Requests
This topic describes the steps to create a GPU request, manage a GPR, and early-release the GPU nodes.
GPUs will not be assigned to a slice workspace by default. Use the portal to create a GPU provision requests and to run AI workloads (in the namespaces that are associated with the slice workspace) that require one or more GPUs.
The following are the GPU Provision Request (GPR) features:
- The user can create one or more GPU provision requests
- Only one GPR will be provisioned onto the slice workspace at a given time
- GPR has strict entry and exit times for GPU nodes from a slice workspace
- Isolation of GPU nodes per slice workspace
- Other slice workspaces (or users) cannot use the GPUs allocated to the user's slice workspace inadvertently
- It has a self-service mechanism for GPU provision requests
- It has visibility into wait time for GPUs
- The user can delete or edit GPRs before provisioned
- The user can early-release GPR if they no longer need the GPUs in their slice workspace
Create a GPU Request
-
Go to GPU Requests on the left sidebar.
-
On the GPU Requests page, go to the GPU Requests Per Slice tab and select the slice workspace for which you want to create a GPU request.
-
On the top-right corner, click the Create GPU Request button.
-
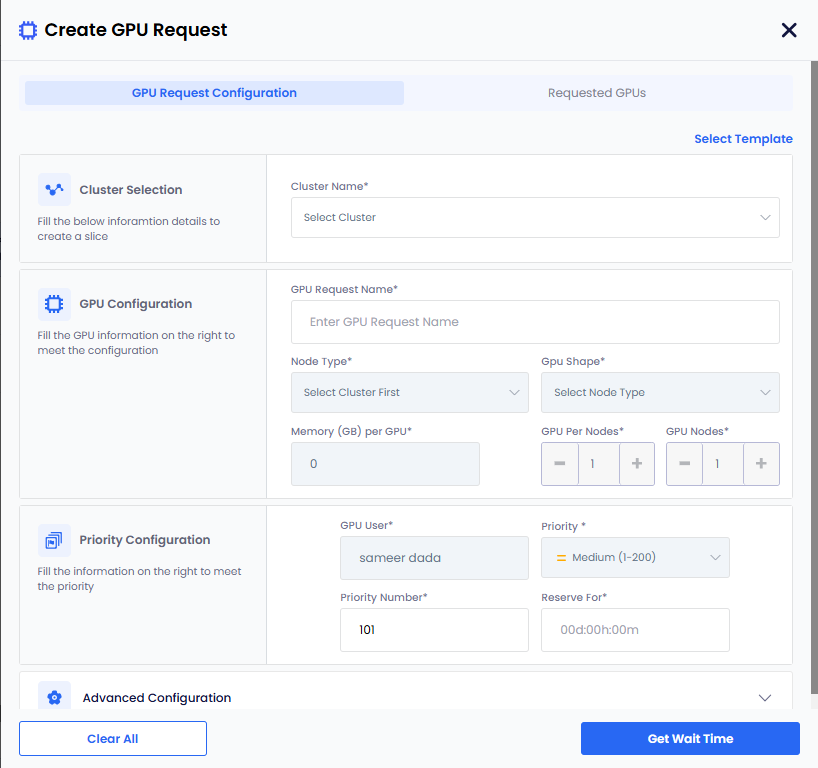
On the Create GPU Request page, enter the following information to configure GPU request:
-
For cluster selection, select the cluster from the Cluster drop-down list.
-
For GPU configuration, enter the following information:
-
Enter the GPR request name in the Request Name text box.
-
Select the node type from the Node Type drop-down list.
-
The GPU shape, Memory (GB) per GPU , the GPU Per Node, and the GPU Nodes values are populated automatically after selecting the node type. The values are immutable.
-
-
For priority configuration of the requesting GPU, enter the following information:
-
The default value for User is the user name. The user name is the name of the slice workspace user.
-
The Priority and the Priority Number are automatically assigned and cannot be modified by the user.
-
Enter the amount of time you wish to reserve the GPU resource (in days/hours/mins) in the Reserve for text boxes. The values must be greater then zero for days/hours/mins.
noteThe admin chooses the priority for each slice workspace. As the user, you are not allowed to modify the priority for a request. If you are seeing a long wait time and would like your request to be processed earlier, you may request your admin to promote the current GPU request priority to a higher priority.
-
-
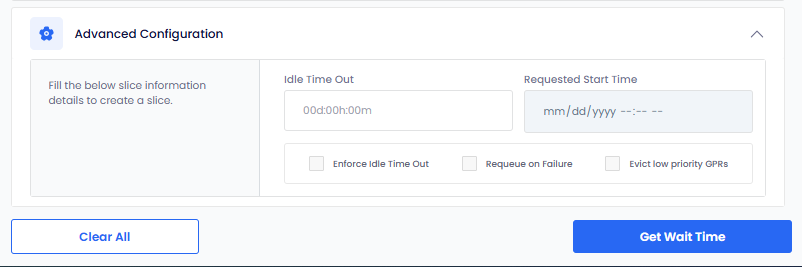
For advanced configuration, enter the following information:
-
Enter the idle timeout duration (in days/hours/mins) in the Idle Timeout text boxes for the reserved resource. The values must be greater then zero for days/hours/mins. The idle timeout duration is always lesser than the duration of the reservation.
-
(Optional) Enforce Idle Timeout : After the idle timeout is set, the Enforce Idle Timeout checkbox will be enabled. Ensure this box is checked to enforce the idle timeout setting.
-
(Optional) Select the Requeue on Failure check box if you want to queue this GPR in case it fails.
-
Only the admin can select Evict low priority GPRs to configure auto eviction of a low-priority GPR.
-
-
-
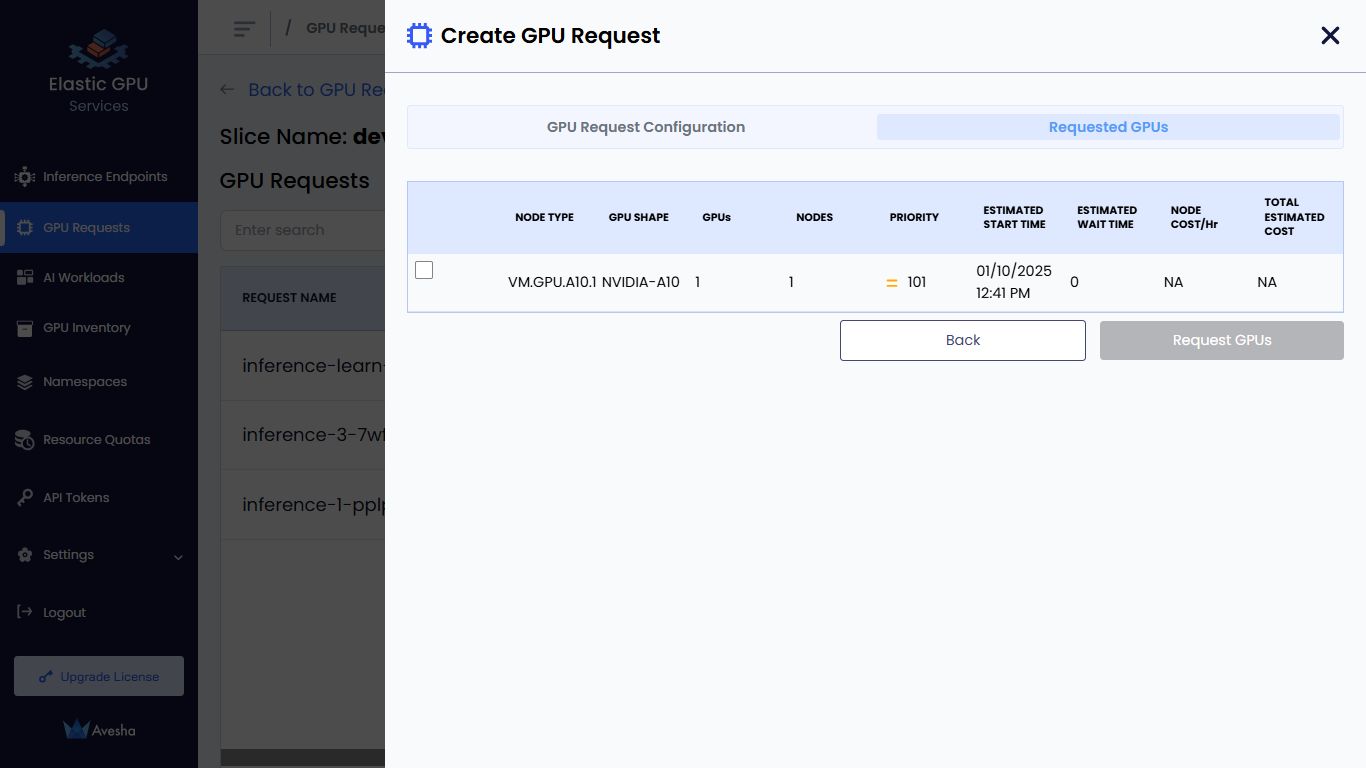
Click the Get Wait Time button. EGS shows the estimated wait time for the GPU nodes provisioning.
-
Under Requested GPUs, select the GPU that is acceptable with estimated wait time.
-
Click the Request GPUs button.
- The status of the GPR request changes to Queued if the GPU node allocation is in queue.
- The status of the GPR request changes to Provisioned if the GPU in queue is provisioned successfully.
- The status of the GPR request changes to Released Early if the GPR is released early then the scheduled time.
- The status of the GPR request changes to Completed if the GPR Request completes is scheduled time.
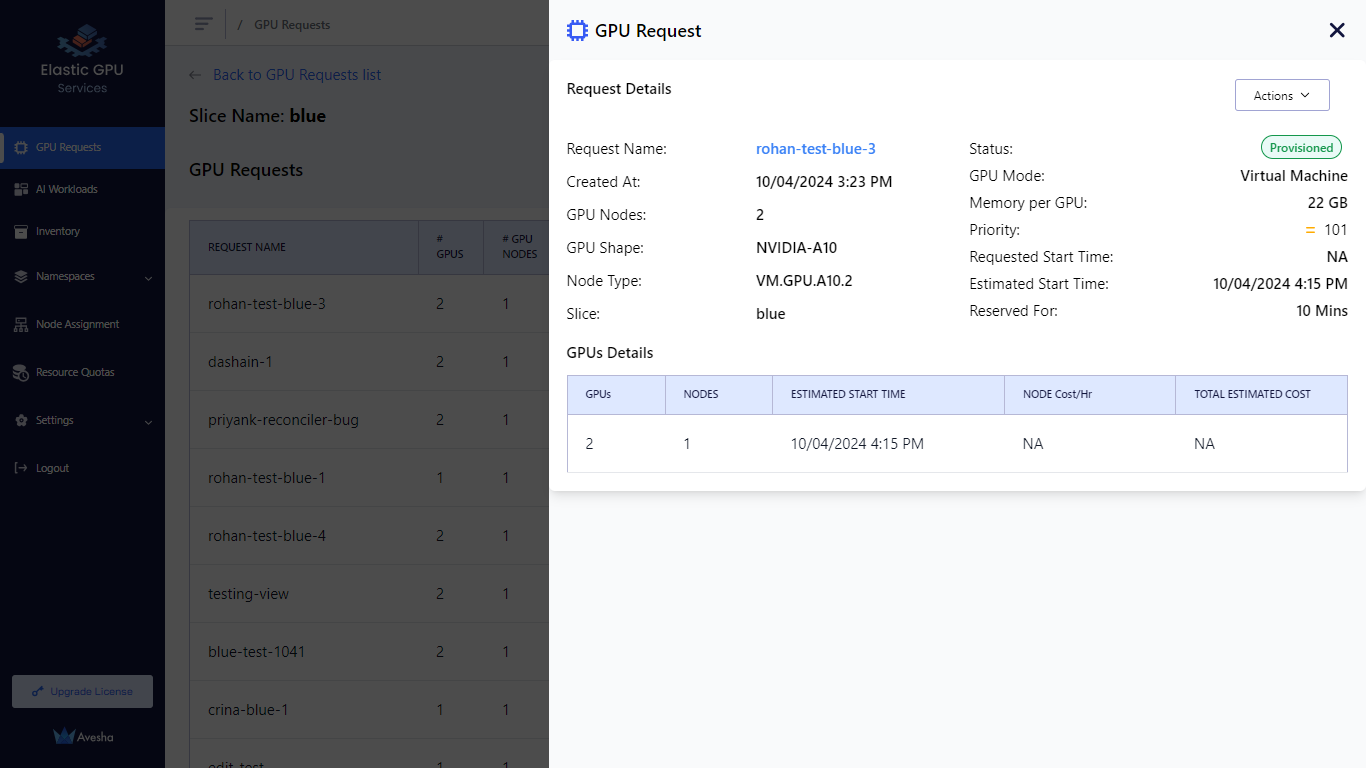
View GPU Requests
The user can manage the GPRs in their slice workspaces.
To view the GPU Request:
-
Go to GPU Requests on the left sidebar.
-
On the GPU Requests page, go to the All GPR Requests tab and select the GPU request to view the details.
Manage GPR Queues
The user can manage the GPRs that are on their slice workspace GPR queue.
The following operations can be performed:
- The user can delete a pending GPR. This will remove the GPR from the queue.
- The user can early-release a provisioned GPR. This will end the GPR early (early exit of GPU nodes).
- The user can edit a pending GPR.
- The user can extend a GPR with a small grace period.
Edit GPU Requests
To edit the GPU request:
-
On the GPU Requests page, select the GPU request you want to edit.
-
On the top-right, click the Actions button and select Edit. You can edit only the GPU request name.
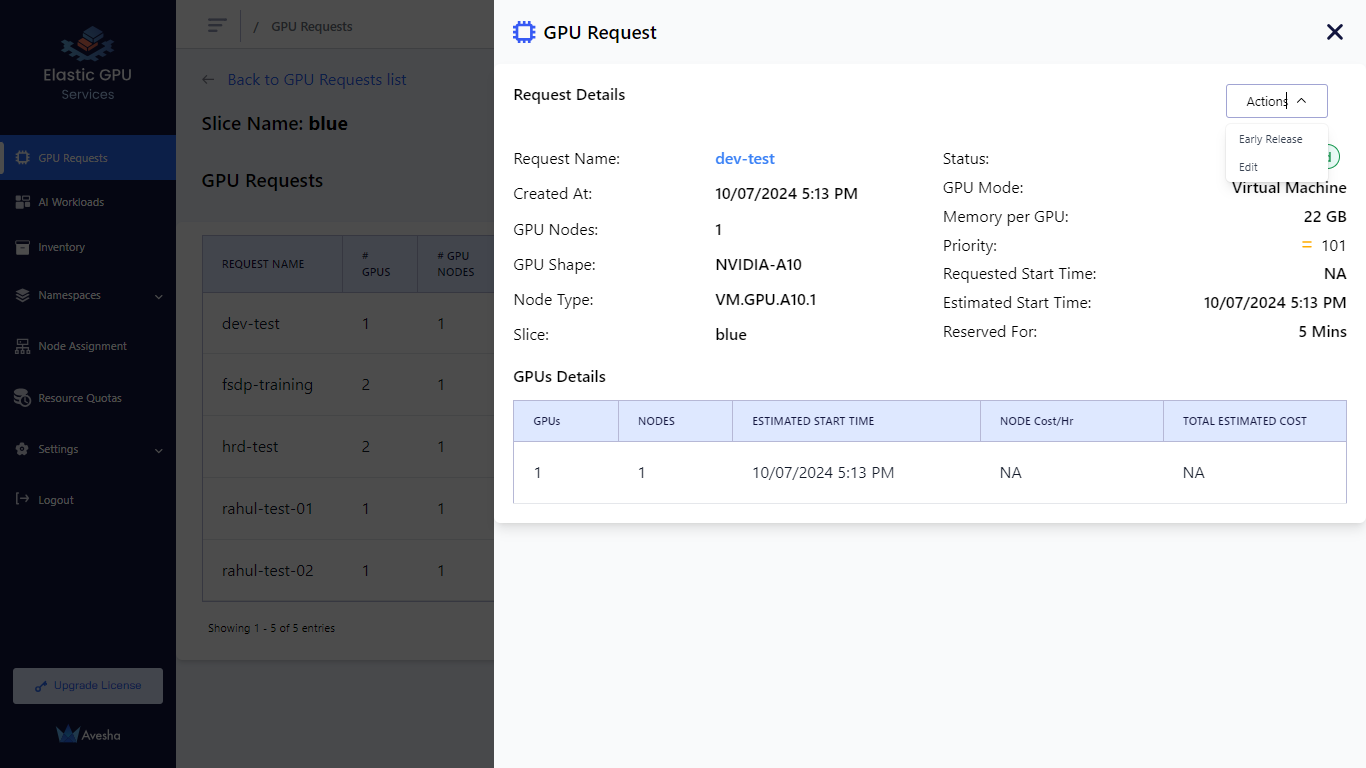
- Edit the request name and click the Update button.
Early Release the GPU Nodes
For any reason, if you want to release the GPU nodes associated with
the slice workspace, you can early-release the GPR. From the portal you can perform early-release to release a provisioned GPR.
To early release the provisioned GPU nodes:
-
On the GPU Requests page, select the request you want to edit.
-
On the top-right, click the Actions button and select Early Release.
-
Enter RELEASE to confirm to early release the nodes.
After the GPR is early-released, the GPU nodes will no longer be available for any AI workloads running on the slice workspace . Any running workloads (pods/and so on) using GPUs and running on the node will go into a pending state.